Want to grow fresh herbs or flowers but short on garden space? A DIY planter box is an easy and affordable solution.
With just a few simple tools and some basic lumber, you can build your own raised garden bed in a weekend.
Planter boxes make gardening easier by keeping soil contained and plants neatly organized. They also improve drainage and let you work at a comfortable height.
This beginner-friendly manual will walk you through materials, construction steps, and decorative finishing touches for creating beautiful, functional growing spaces.
What is a Planter Box?
A planter box is a raised container filled with soil where you grow vegetables, herbs, flowers, or ornamental plants above ground level.
These structures typically feature rectangular wooden frames with open bottoms or drainage holes allowing excess water to escape freely.
The better design reduces physical strain by bringing plants to comfortable working heights for planting, watering, and harvesting.
DIY planter box designs range from simple single-level boxes to tiered arrangements, creating vertical gardens in small spaces.
These versatile growing containers work beautifully on patios, decks, balconies, or directly on lawn areas throughout residential properties.
Tools and Materials Required to Build a DIY Planter Box
| Item | Quantity | Details | Estimated Cost |
|---|---|---|---|
| Cedar or pine boards | 4-8 pieces | 1×6 or 2×6 lumber cut to the desired length | $30-$60 |
| Wood screws | 1 box | 2.5 to 3-inch exterior-grade screws | $8-$12 |
| Drill with bits | 1 | Cordless drill with Phillips head and pilot bits | $50-$100 (if needed) |
| Saw | 1 | Circular saw, miter saw, or hand saw | $30-$150 (if needed) |
| Measuring tape | 1 | 25-foot tape measure for accurate cuts | $10-$15 |
| Landscape fabric | 1 roll | Weed barrier for the bottom of the planter | $12-$20 |
| Wood stain or sealant | 1 container | Exterior wood protectant (optional) | $15-$30 |
How to Build a Budget-Friendly Planter Box
Creating beautiful planters doesn’t require expensive materials or tools when you know smart, budget-friendly building strategies and alternatives.
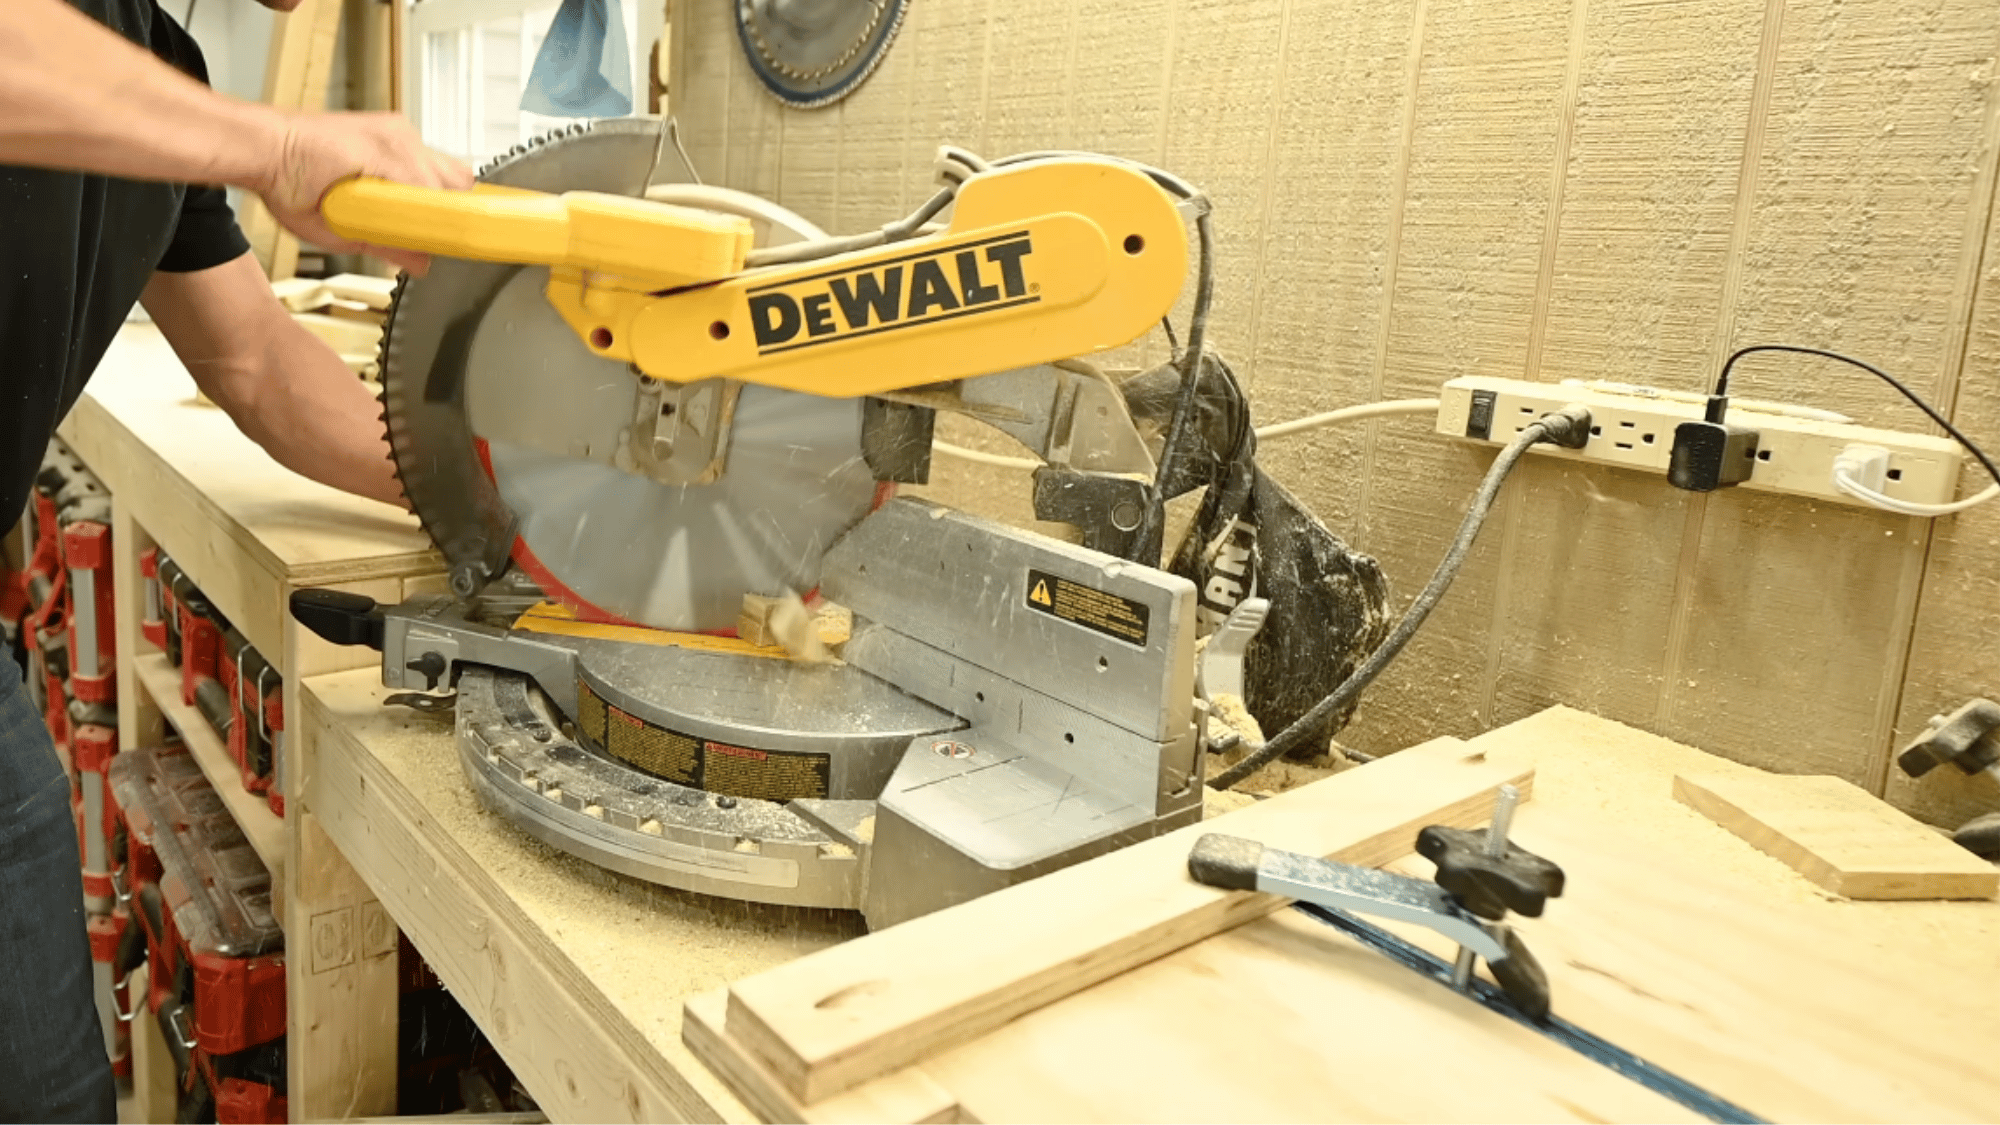
Step 1: Measure and Cut the Fence Pickets
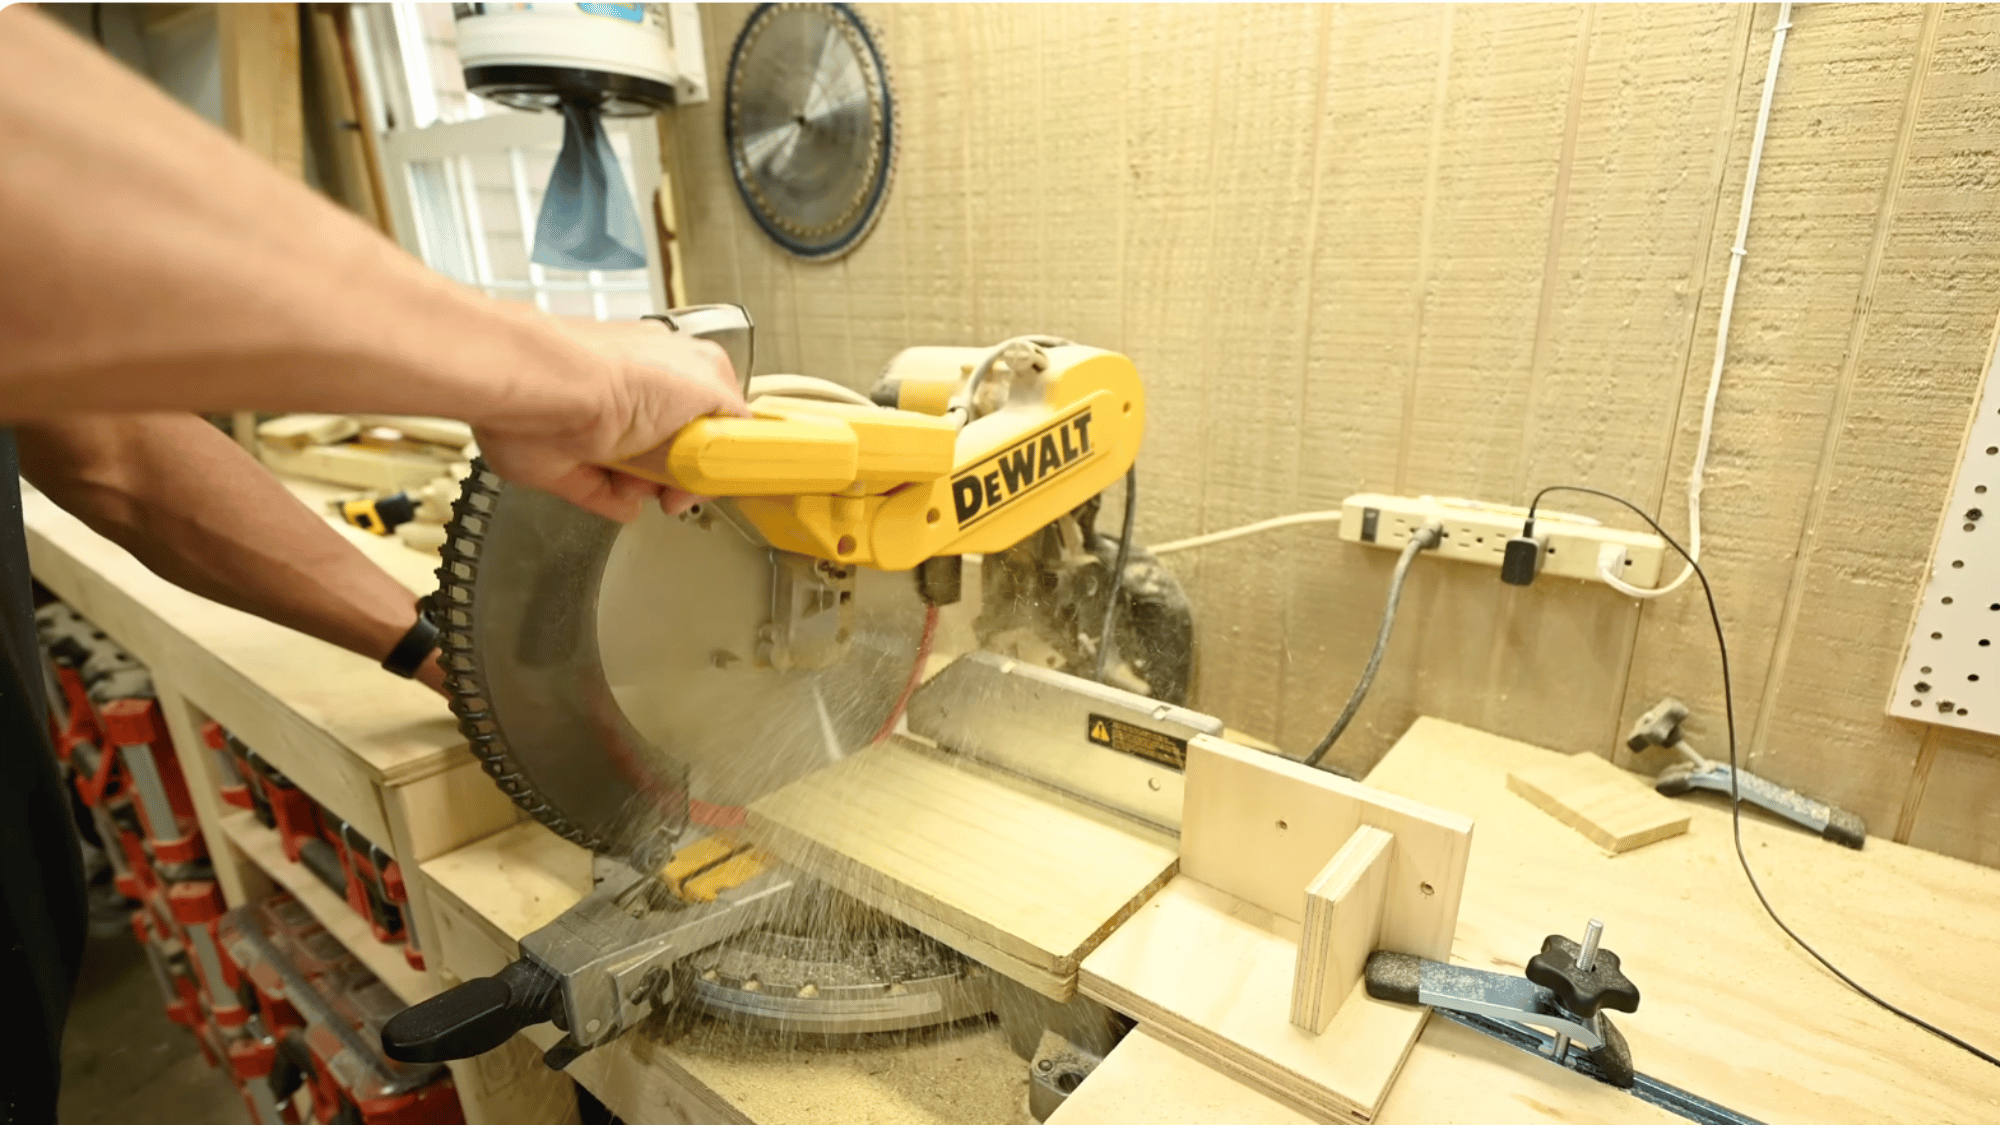
Start by stacking two 6-foot pressure-treated fence pickets together on your miter saw. Cut four pieces at 11 inches, four pieces at 9¾ inches, and four pieces at 13 inches.
These pieces will form the planter’s sides, ends, and legs. The 11-inch and 9¾-inch boards create your wall panels, while the 13-inch pieces will serve as both legs and trim boards.
Double-check your measurements before cutting for consistency. Once done, label your pieces to avoid confusion later during assembly and organization.
Step 2: Rip Narrow Strips for Supports and Legs
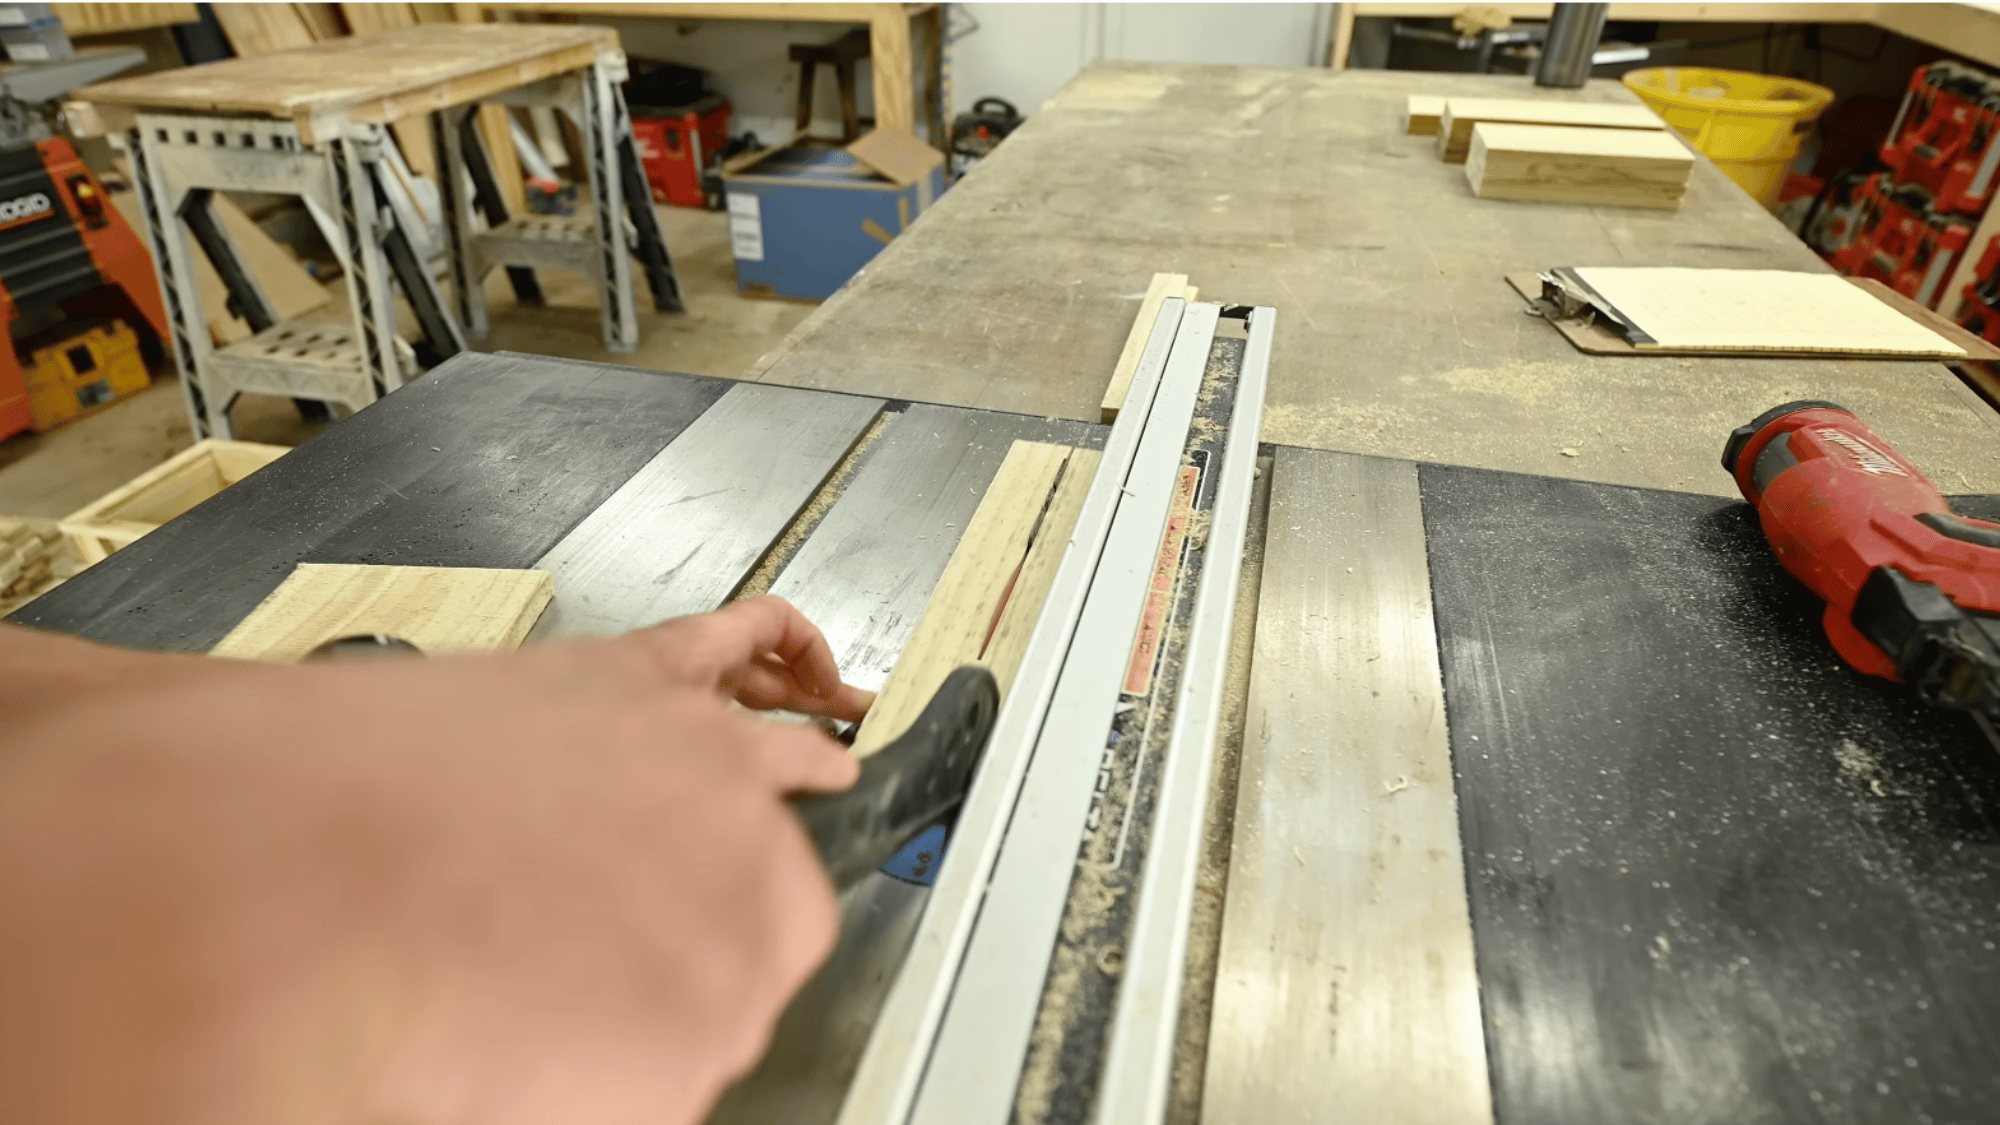
Take two of the 13-inch boards and rip them lengthwise into 1¼-inch-wide strips using a table saw. These will act as the corner supports for your planter box.
Then, take the other two 13-inch boards and rip them into four 2-inch-wide pieces, which will be your legs.
They will come in handy when adding the base later. When ripping boards, ensure consistent width and use a push stick for safety to keep your hands away from the blade.
Step 3: Assemble the Side Panels
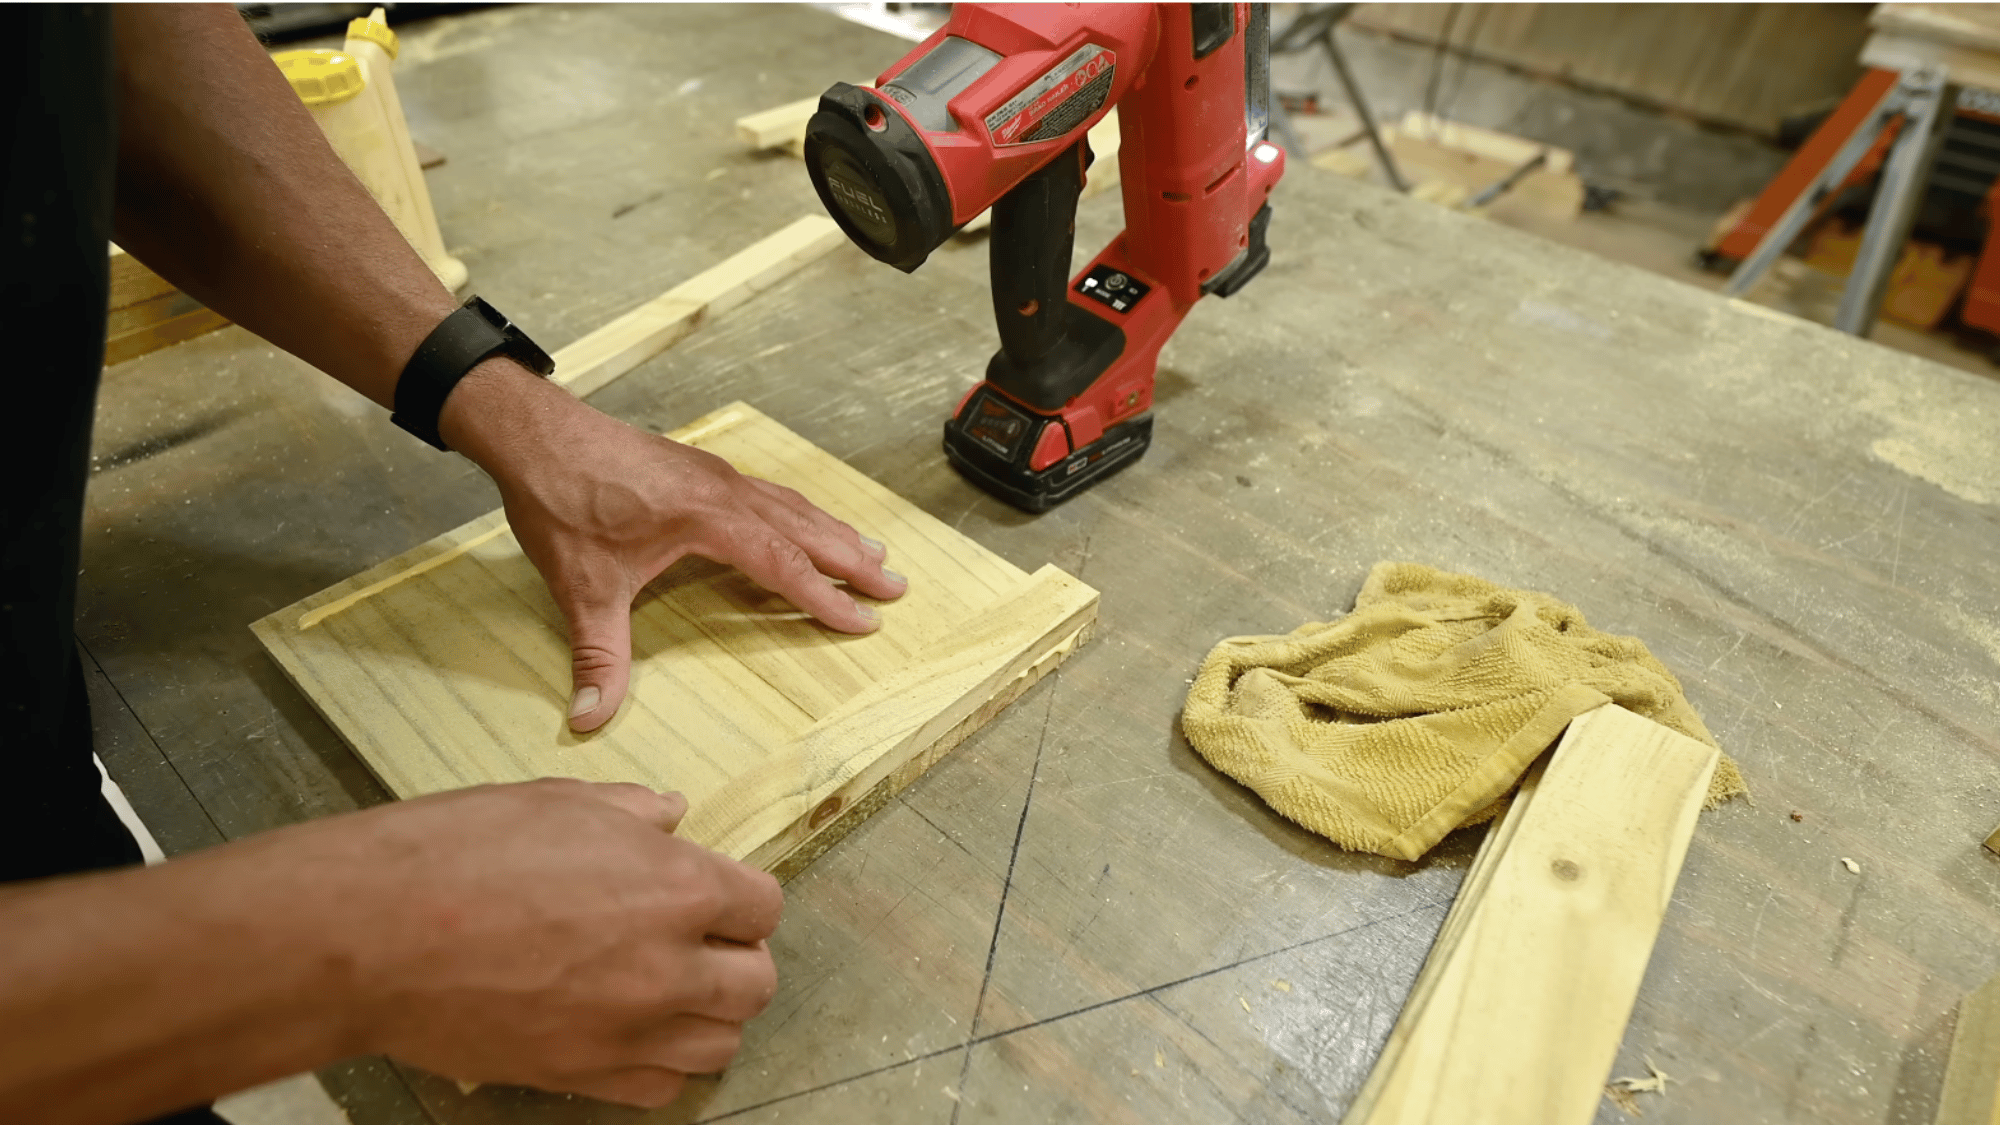
Lay two 11-inch boards side by side to form one panel. Apply a thin, even bead of exterior wood glue down each edge where the 1¼-inch support strips will be attached.
Secure these strips along both sides using 1-inch brad nails, spacing them evenly for stability. This creates one strong panel; repeat the process for the second.
Wipe off any glue that squeezes out immediately with a damp cloth to maintain clean, professional-looking edges before assembly.
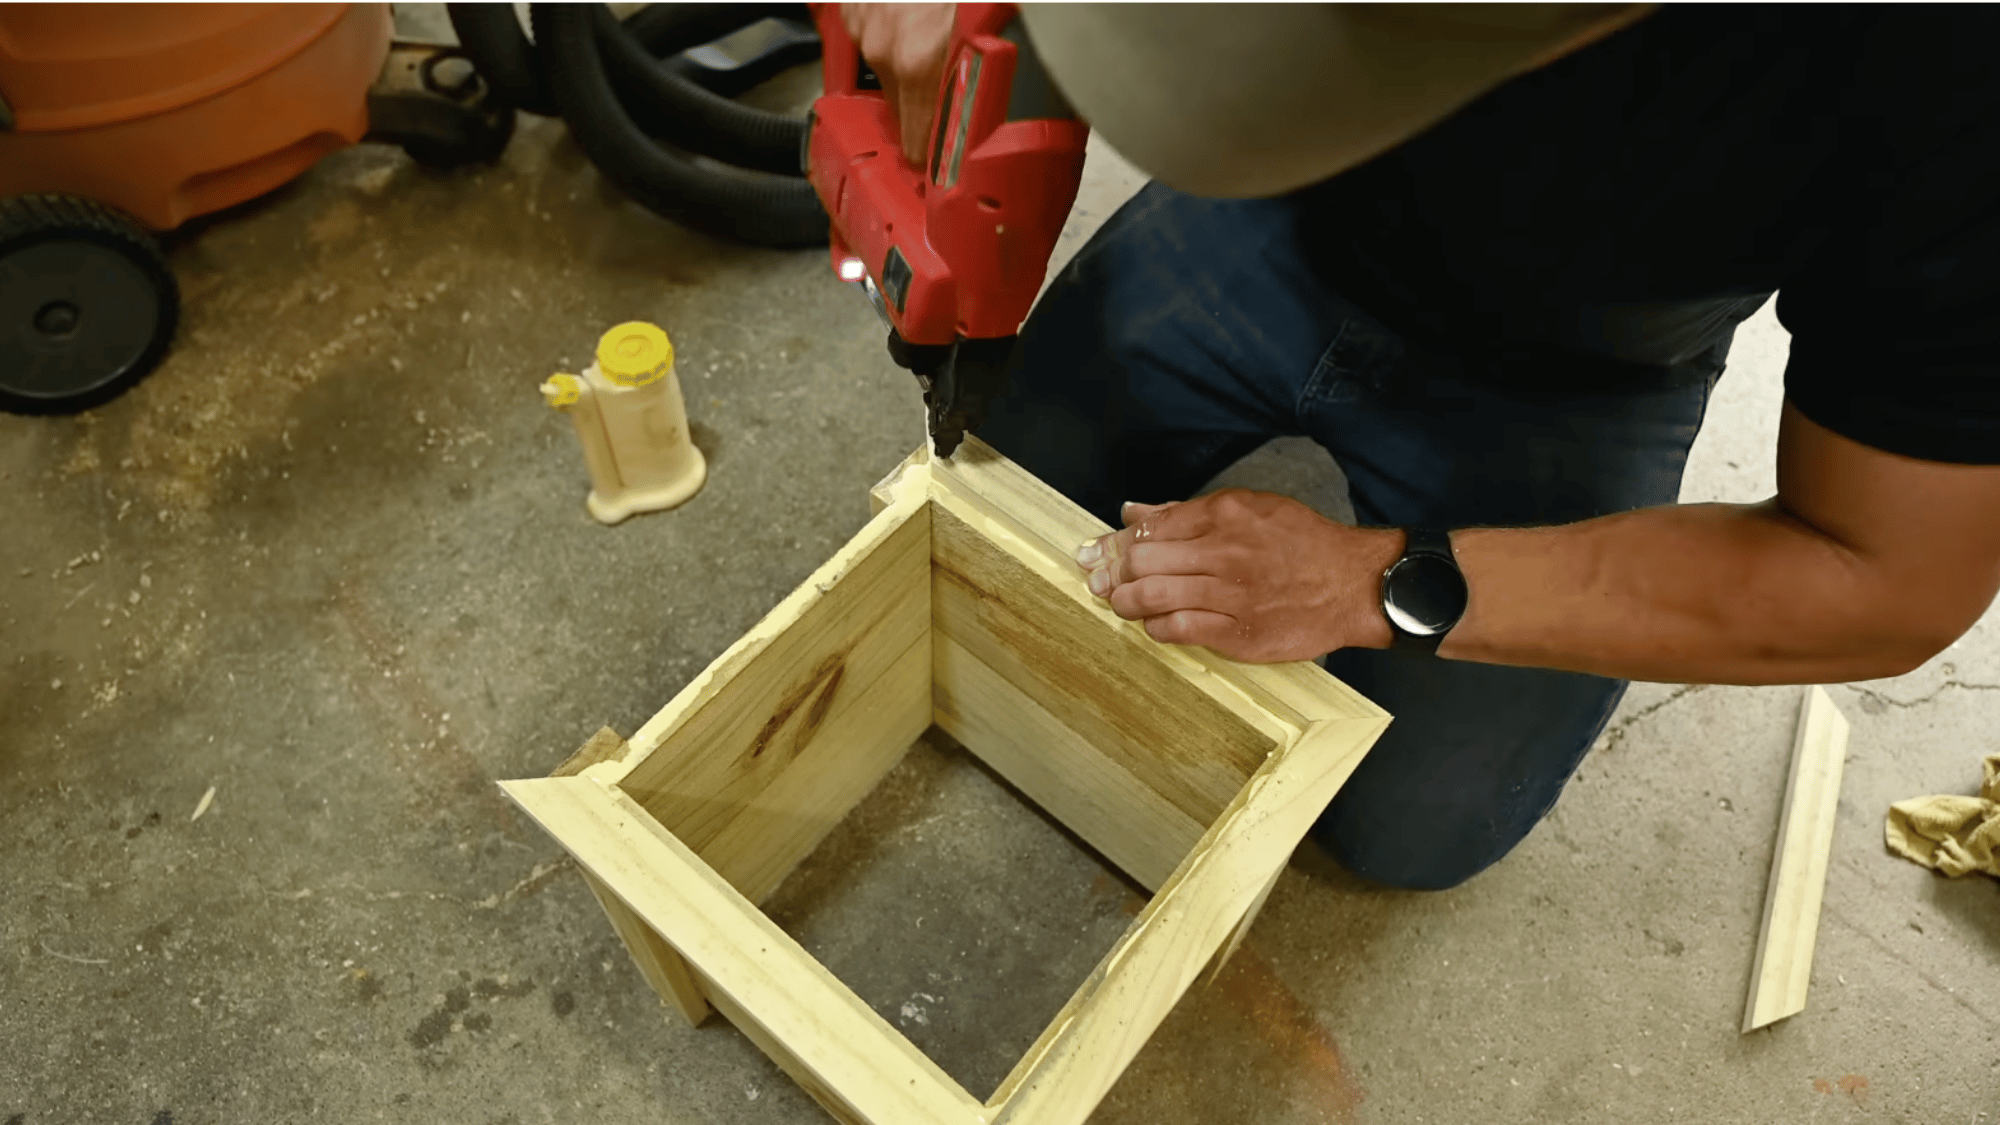
Step 4: Attach Legs and Build the Box Frame

Now attach the 2-inch-wide leg pieces to the side panels. Place one leg at each corner, marking a line with a pencil to ensure alignment.
Apply glue to the inside of each line, then attach the 9¾-inch boards between the panels to create the box shape. Use brad nails to secure everything tightly while the glue dries.
Make sure your box sits square by using a carpenter’s square. The legs should extend slightly below the box, allowing airflow and stability when placed outdoors.
Step 5: Add Trim and Optional Bottom
With the box assembled, it’s time to add trim for a clean finish. Use your remaining 1¼-inch strips and cut them at 45° angles on both ends using the miter saw.
Attach these along the top edge using glue and brad nails so they form a neat frame around the box. You can add a bottom panel by nailing leftover slats or scrap pieces inside.
Leave small gaps between the bottom slats to allow water drainage and prevent pooling that could damage plants.
Step 6: Finishing Touches and Final Look
After assembling your planter box, make it stand out with a quick finish. You can leave the wood natural or apply a stain like weathered gray, cedar, or whitewash for a fresh look.
Add trim or molding along the top for a clean, finished edge.
Try painting patterns or stencils to show your style and protect the wood. Metal brackets or rope handles add charm and strength.
For extra beauty, plant trailing flowers like petunias or vines to soften the edges and add color. Line the box with plastic or fabric before adding soil, or drop in potted plants for easy setup.
This simple design works great for herbs or flowers and can cost as little as $5 with scrap wood.
For more Detailed steps, you can check out this DIY planter box video:
How to Layer a Raised Planter Box?
Proper layering inside your planter box creates optimal growing conditions by improving drainage, adding nutrients, and supporting healthy root development.
Start with a 2- to 3-inch layer of small rocks, gravel, or broken pottery pieces at the bottom to promote water drainage away from plant roots.
Add a layer of landscape fabric or cardboard to prevent soil from washing into the drainage layer and to block weeds from below.
Fill with a mixture of fifty percent topsoil and fifty percent compost to create a nutrient-rich growing medium for vegetables and flowers.
Leave about two inches of space between the soil surface and the planter top to prevent soil and water from spilling over the edges during watering.
Common Mistakes to Avoid While Building a Planter Box
Learning from typical planter box building mistakes helps you create sturdy, long-lasting containers that support healthy plants for years to come.
- Using treated lumber: Avoid pressure-treated wood containing chemicals that leach into soil and contaminate edible plants grown for consumption.
- Inadequate drainage: Failing to provide drainage holes or a gravel layer causes waterlogged soil, leading to root rot and plant death.
- Wrong wood thickness: Selecting boards thinner than three-quarters inch results in weak structures that bow outward under soil pressure and weight.
- Skipping pilot holes: Driving screws without pre-drilling causes wood to split and crack, weakening joints throughout the planter box frame.
- Improper dimensions: Building boxes deeper than eighteen inches wastes soil and money since most vegetable roots don’t extend that far down.
- Wrong placement: Placing your DIY planter box in shaded areas limits plant growth since most vegetables require six to eight hours of direct sunlight.
Conclusion
Building your own planter box is a simple way to start gardening and add beauty to your outdoor space.
Once you complete your first one, you’ll see how easy it is to customize more for herbs, vegetables, or colorful flowers.
This small project builds your confidence with basic tools and gives you skills you can use for other home improvements. Try experimenting with different shapes or finishes to match your style and garden layout.
Gather your materials this weekend, follow the steps, and enjoy the satisfaction of growing plants in something you built yourself.