Ready to create something beautiful with your own hands? Making a DIY picture frame at home is easier than you think and lets you showcase your artwork in frames that match your style perfectly.
Even if you want to save money, add personal touches, building your frames offers the best possibilities. You have expert skills to get started.
With basic materials from your local hardware store and a few simple steps, you can create professional-looking frames in an afternoon.
This will walk you through everything you need to make a DIY picture frame you will be proud to display in your home or give as a thoughtful, handmade gift.
Why Make Your Own Picture Frame?
Creating your own DIY picture frame gives you complete control over size, color, and style to match your specific needs and home decor perfectly.
Store-bought frames often cost significantly more than the materials needed to build custom versions yourself.
Making frames at home allows you to use non-standard sizes that fit your artwork exactly, without expensive custom ordering from frame shops.
The process offers a rewarding hands-on experience that builds basic woodworking skills you can use for future projects.
You can customize every detail from wood type to finish color, creating pieces that reflect your personal taste in your interior design better than mass-produced options.
Types of DIY Picture Frames You Can Build
Find out these popular frame styles that work perfectly for beginners and experienced crafters looking to create custom displays for their homes.
- Simple Wood Frame: A basic rectangular frame made from wooden strips cut at 45-degree angles and glued or nailed together. Easy for beginners with minimal tools.
- Mitered Corner Frame: Frames with precise 45-degree angled joints for a polished look, often made using a miter box or saw to ensure clean corners.
- Shadow Box Frame: A deeper frame that allows for displaying items with some dimensional depth, such as memorabilia or layered art.
- Floating Frame: A frame that gives the illusion that the picture is “floating” within the frame by mounting it on spacers or using transparent material.
- Pallet Wood Frame: Made from reclaimed pallet wood for a rustic, textured look, popular in farmhouse or shabby-chic décor.
- Decorative Frame with Embellishments: Frames adorned with materials like beads, fabric, buttons, or paint to personalize and enhance the visual appeal.
- Cardboard Frame: A lightweight and easy option using cardboard and decorative paper or fabric, perfect for kids or crafts.
Tools & Materials you’ll Need for Diy Picture Frame
Successful image frame projects begin with proper preparation, ensuring you have everything ready before starting your creative woodworking path.
| Item | Purpose | Where to Buy |
|---|---|---|
| Wood molding or lumber | Frame structure | Home Depot |
| Miter saw or miter box | Cutting 45-degree corners | Amazon |
| Wood glue | Joining frame corners | Walmart |
| Clamps or corner brackets | Holding pieces while drying | Amazon |
| Sandpaper (120 and 220 grit) | Smoothing wood surfaces | Walmart |
| Image frame glass or acrylic | Protecting artwork | Home Depot |
Step-by-Step Process of Making an Image Frame
Creating custom image frames at home brings personal satisfaction while allowing complete control over size, style, and quality of your display.
Step 1: Measure your Picture and Plan Frame Size
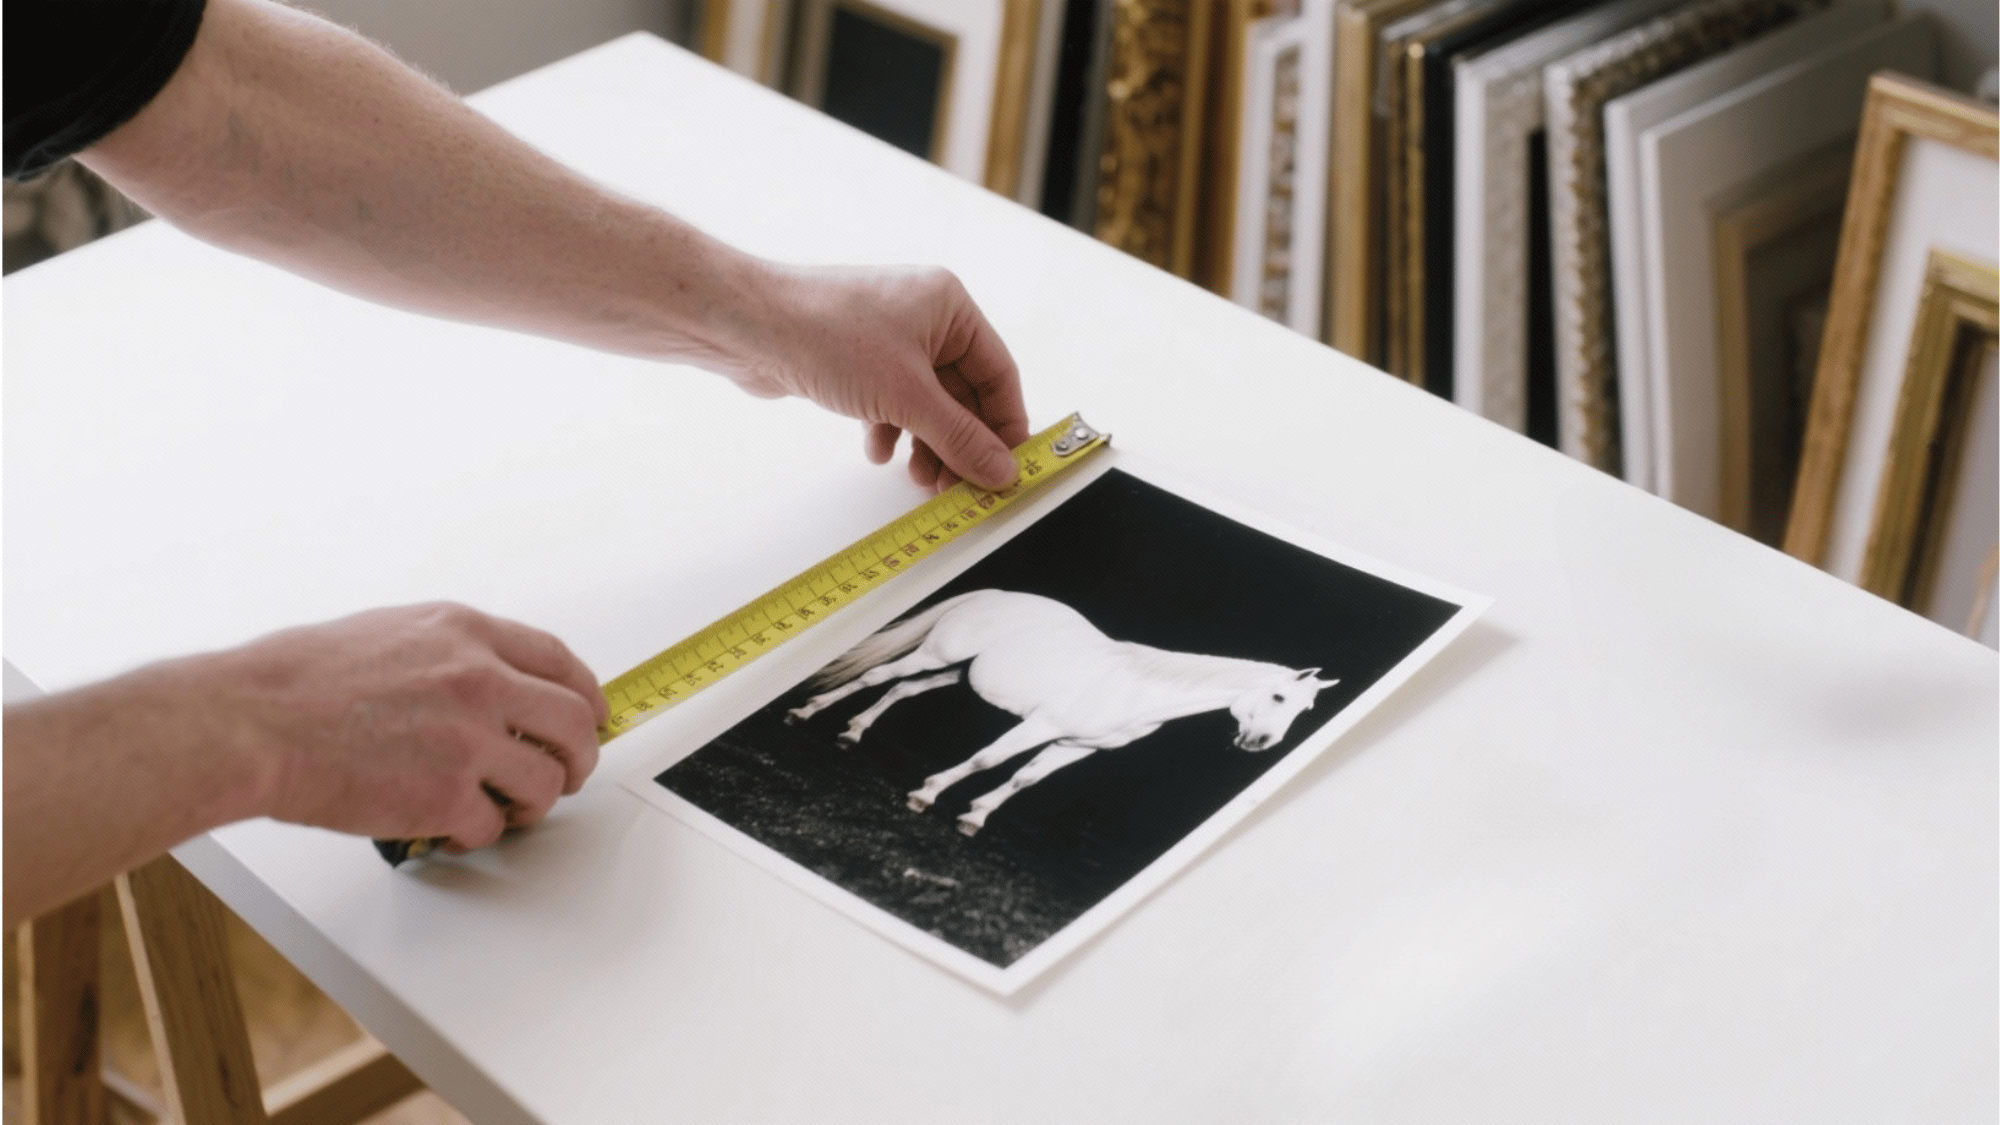
Measure your photo or artwork carefully, noting both height and width dimensions for accurate frame sizing.
Add one-eighth inch to each measurement for the rabbet recess where the glass and picture will sit inside the frame.
Plan your frame border width, typically one to two inches around the artwork, depending on desired proportions and style.
Step 2: Cut Rabbet Groove for Glass and Picture
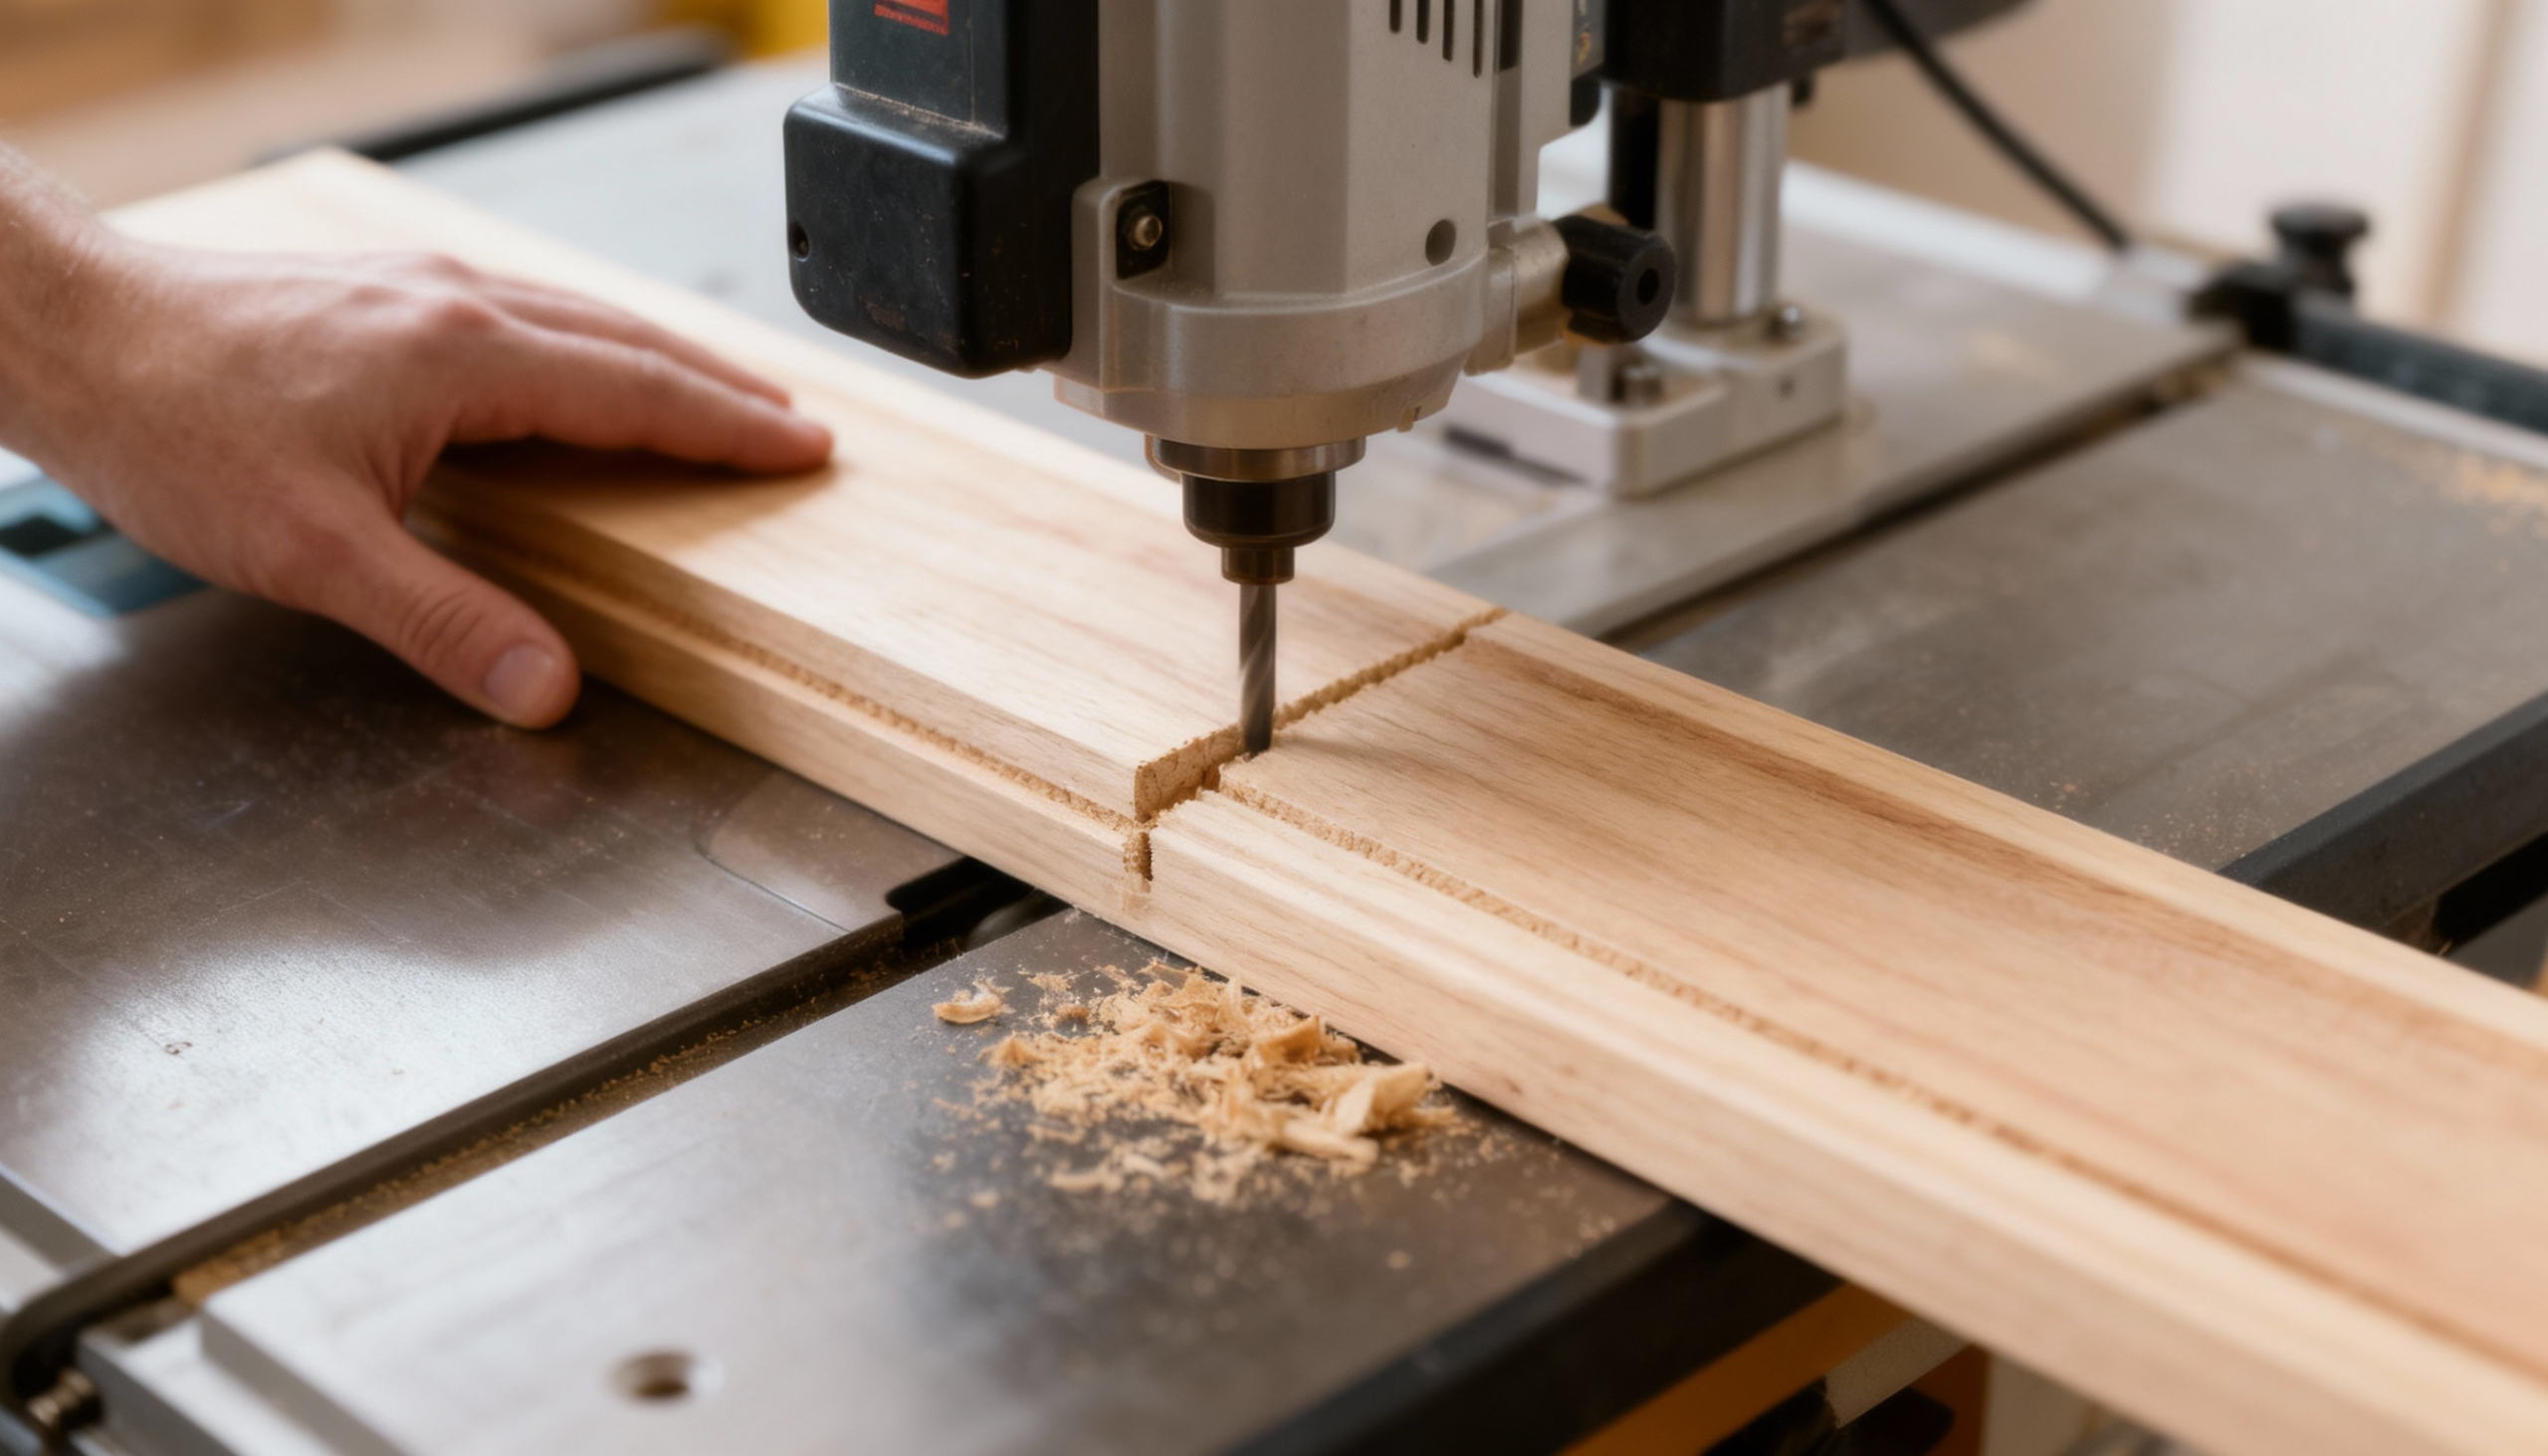
Use a handheld router with a rabbeting bit or table saw to cut a groove along one edge of your frame wood.
Set the bit depth to three-eighths inch, making the groove deep enough to hold glass, artwork, and backing board together.
Make multiple passes if needed, gradually increasing depth rather than forcing one deep cut that might splinter wood.
Step 3: Cut Wood Pieces at 45-Degree Angles
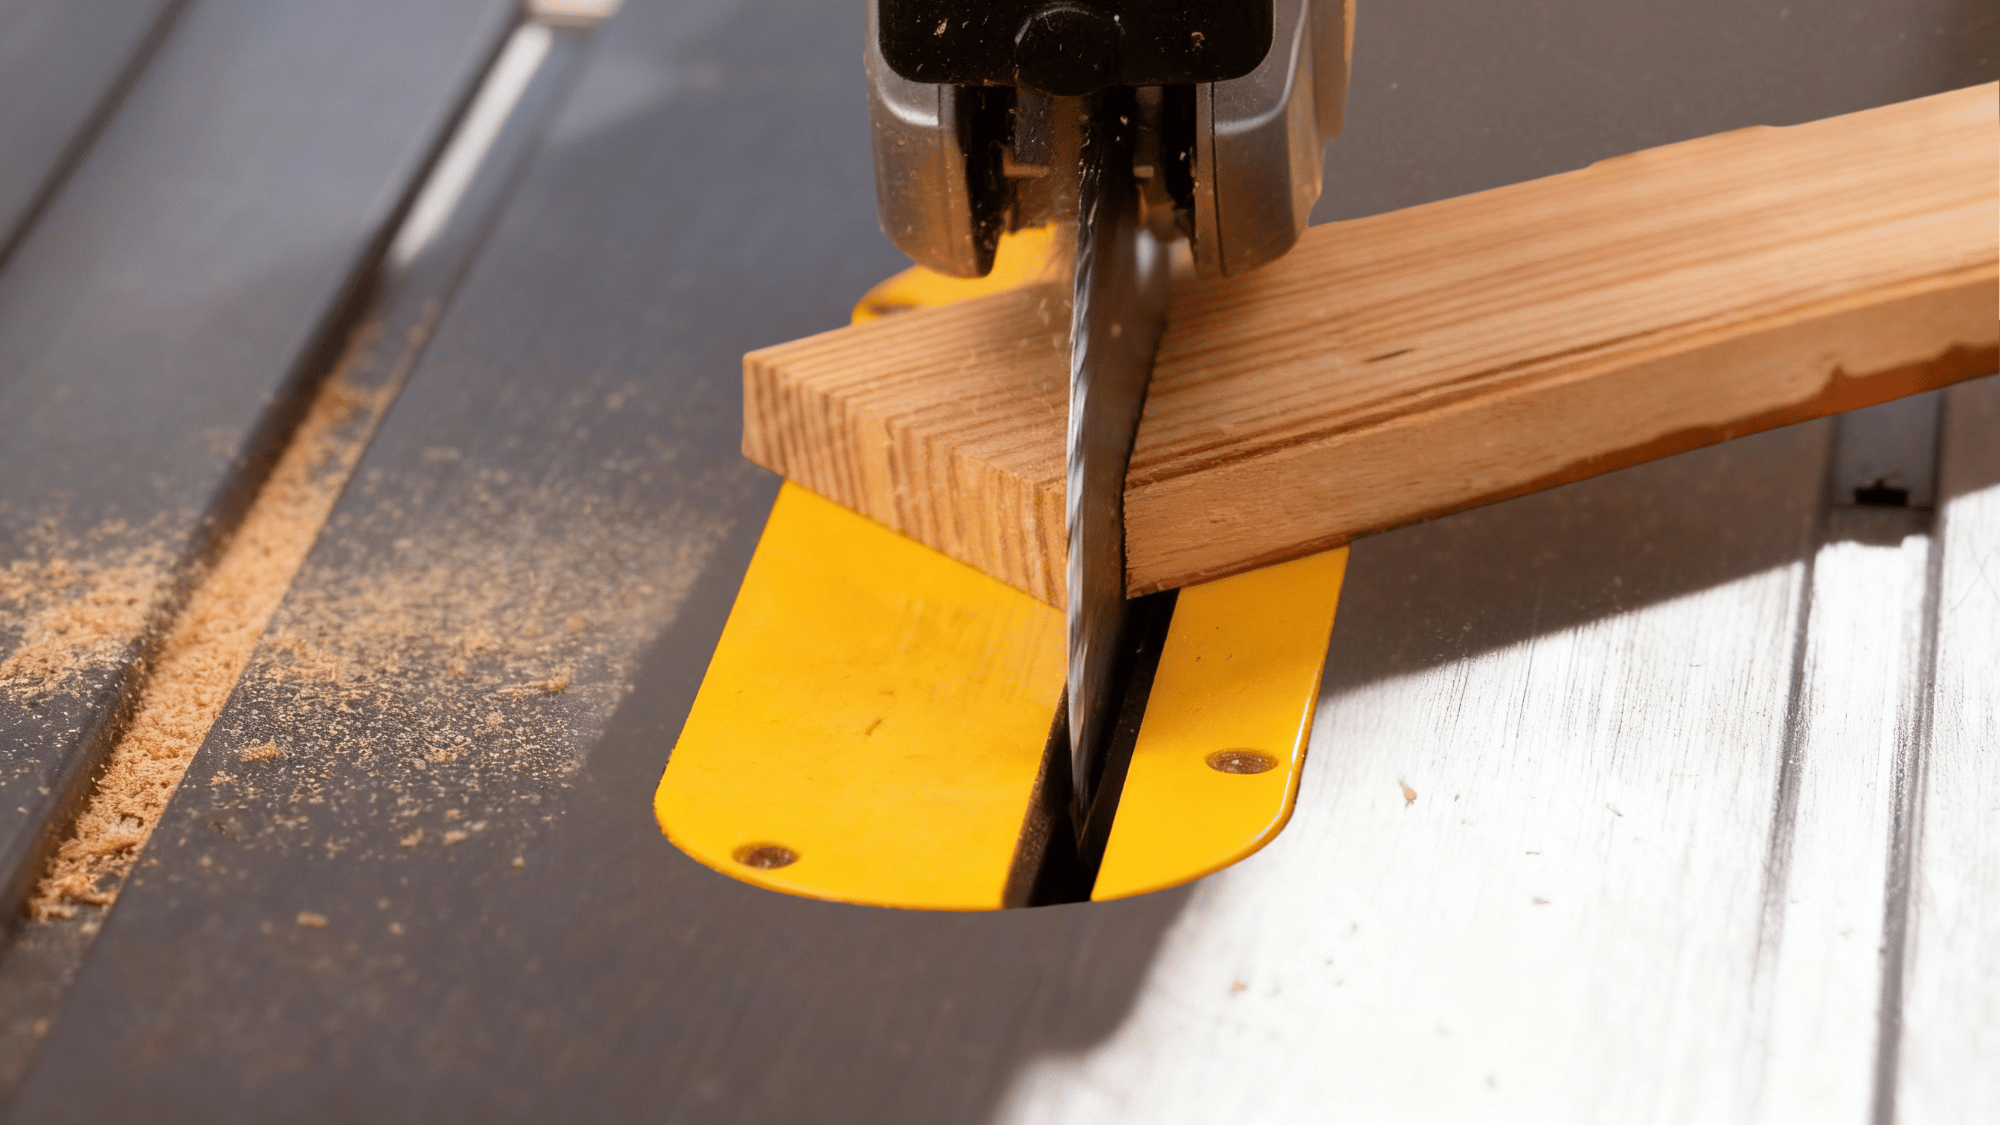
Set your miter saw to 45 degrees and establish one clean, angled cut on your frame wood as a starting point.
Line up the rabbet edge with your measurement marks on the miter saw fence for accurate sizing.
Cut opposite frame sides together by stacking pieces, ensuring they match perfectly in length for a square frame.
Step 4: Sand All Frame Pieces Smooth
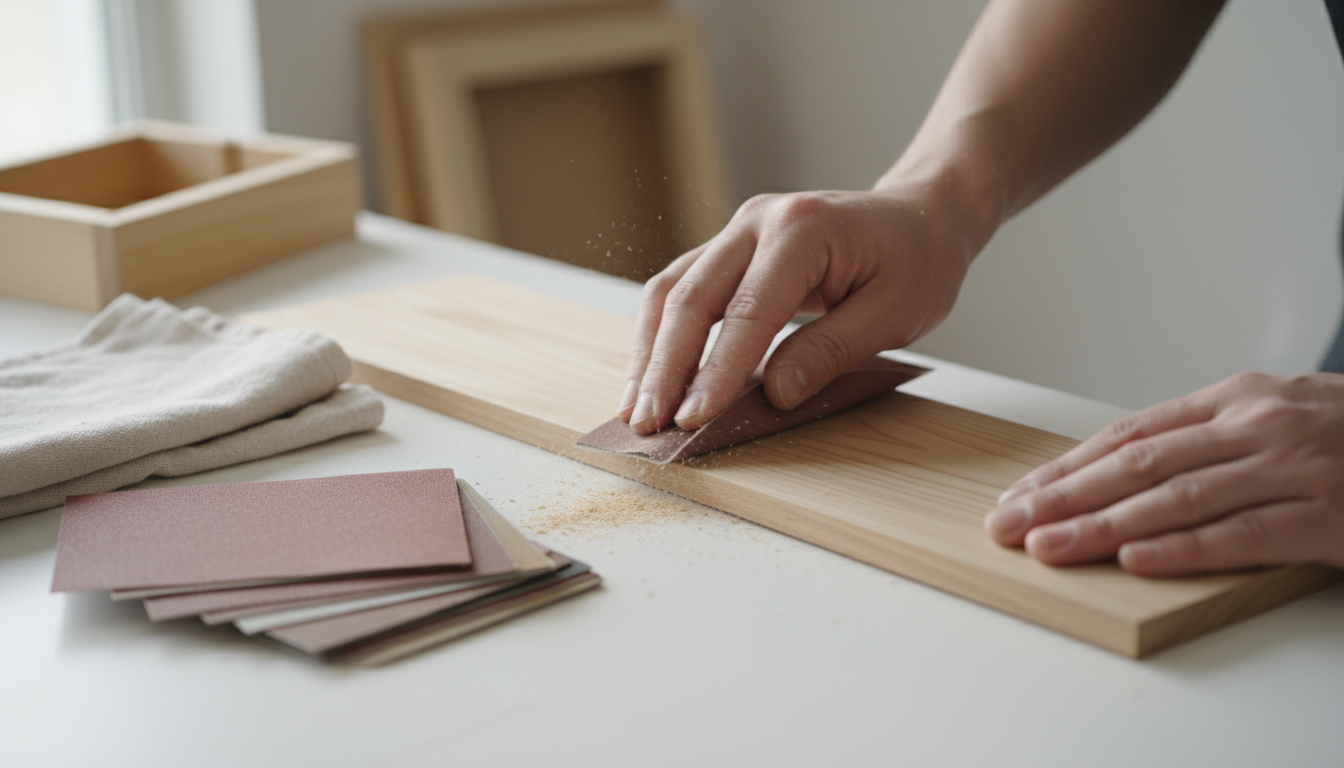
Sand each cut piece thoroughly using medium-grit sandpaper, removing saw marks, rough spots, and splinters from all surfaces and edges.
Wrap sandpaper around a dowel to reach into curved or detailed profile areas if your frame has decorative edges.
Switch to fine-grit sandpaper for final smoothing, creating surfaces ready for stain or paint application.
Step 5: Apply Wood Glue and Tape Corners
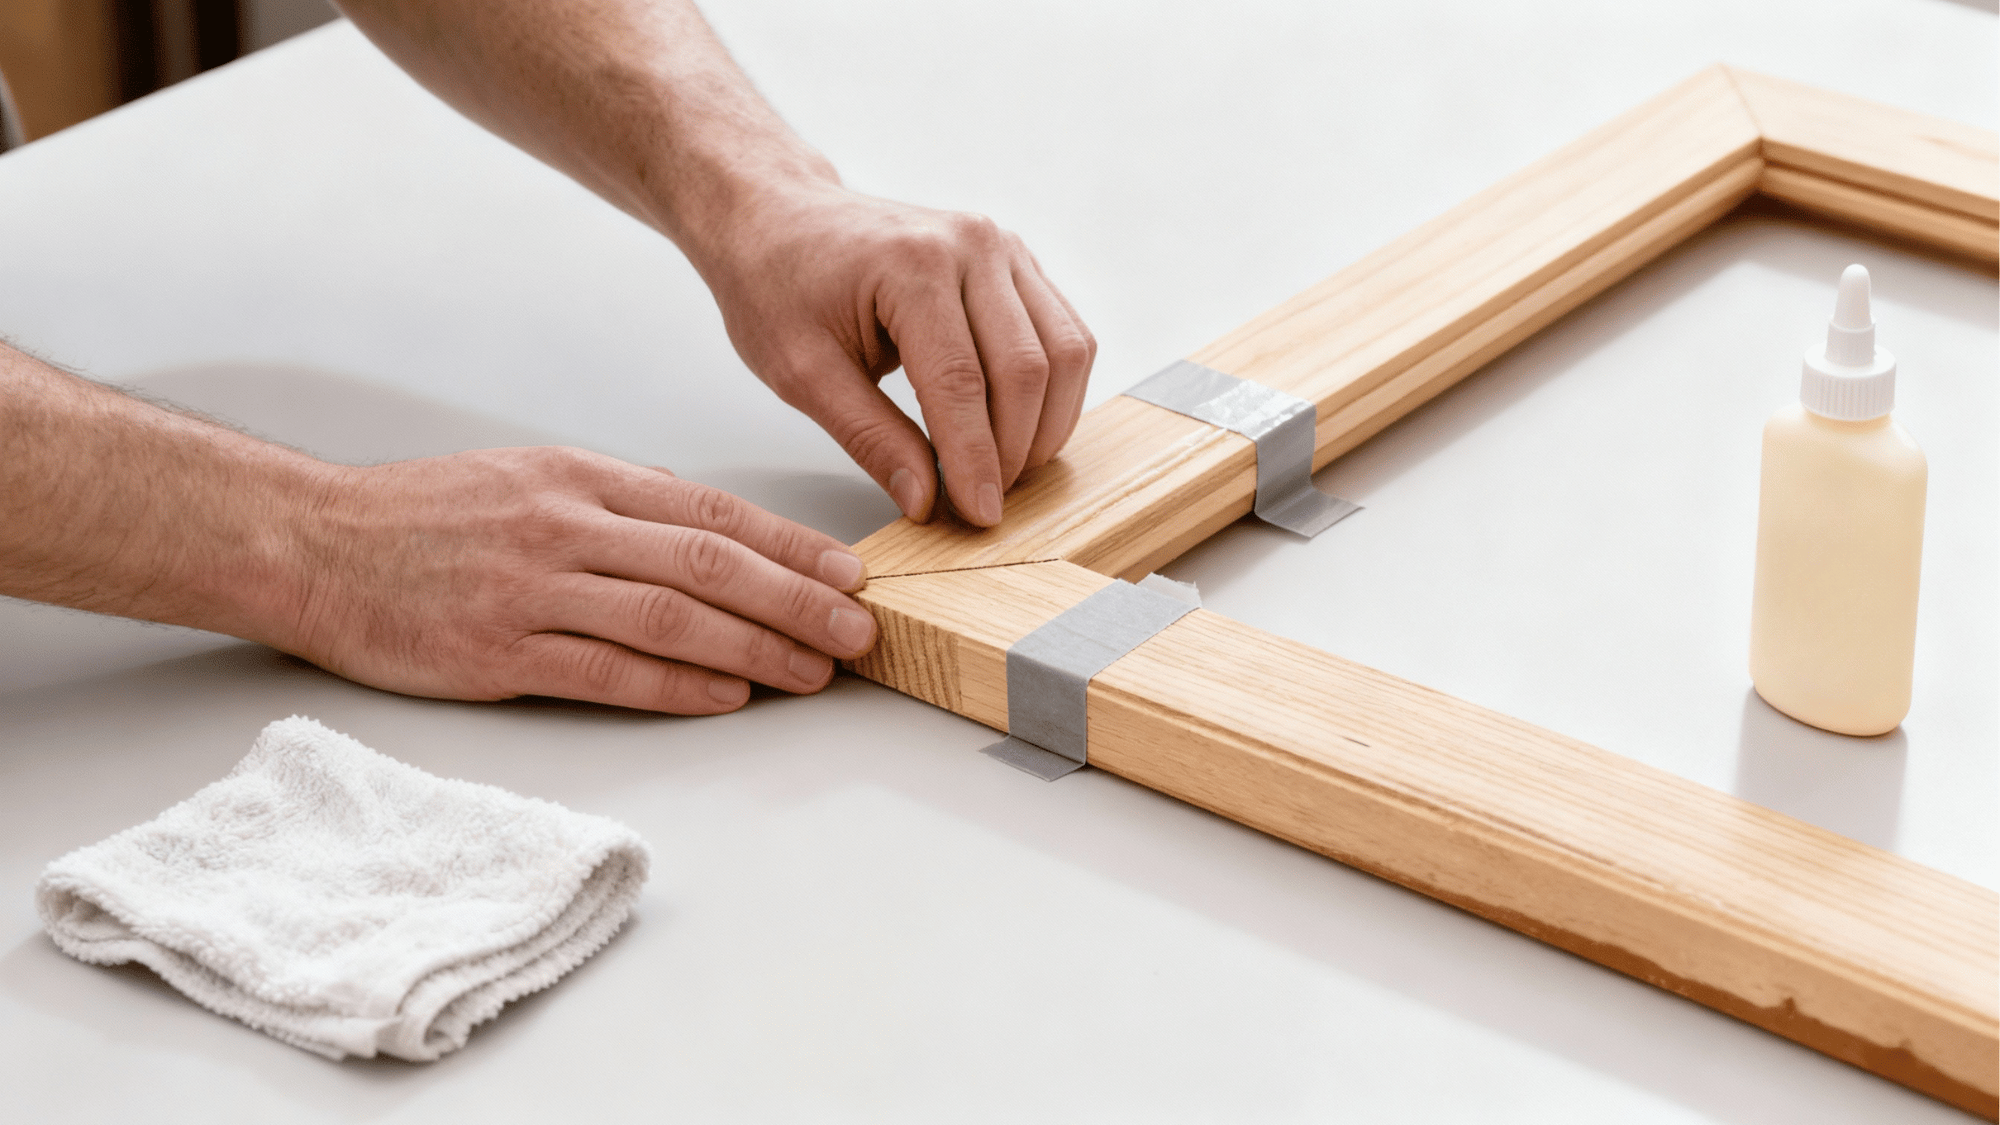
Arrange all four frame pieces face down, forming the frame shape with mitered corners meeting precisely without gaps.
Apply tape across each joint on the outside, holding pieces in alignment before adding glue to prevent shifting.
Spread wood glue evenly on all 45-degree mitered surfaces, then fold the pieces up and tape the final corner closed.
Step 6: Clamp Frame and Reinforce Corners
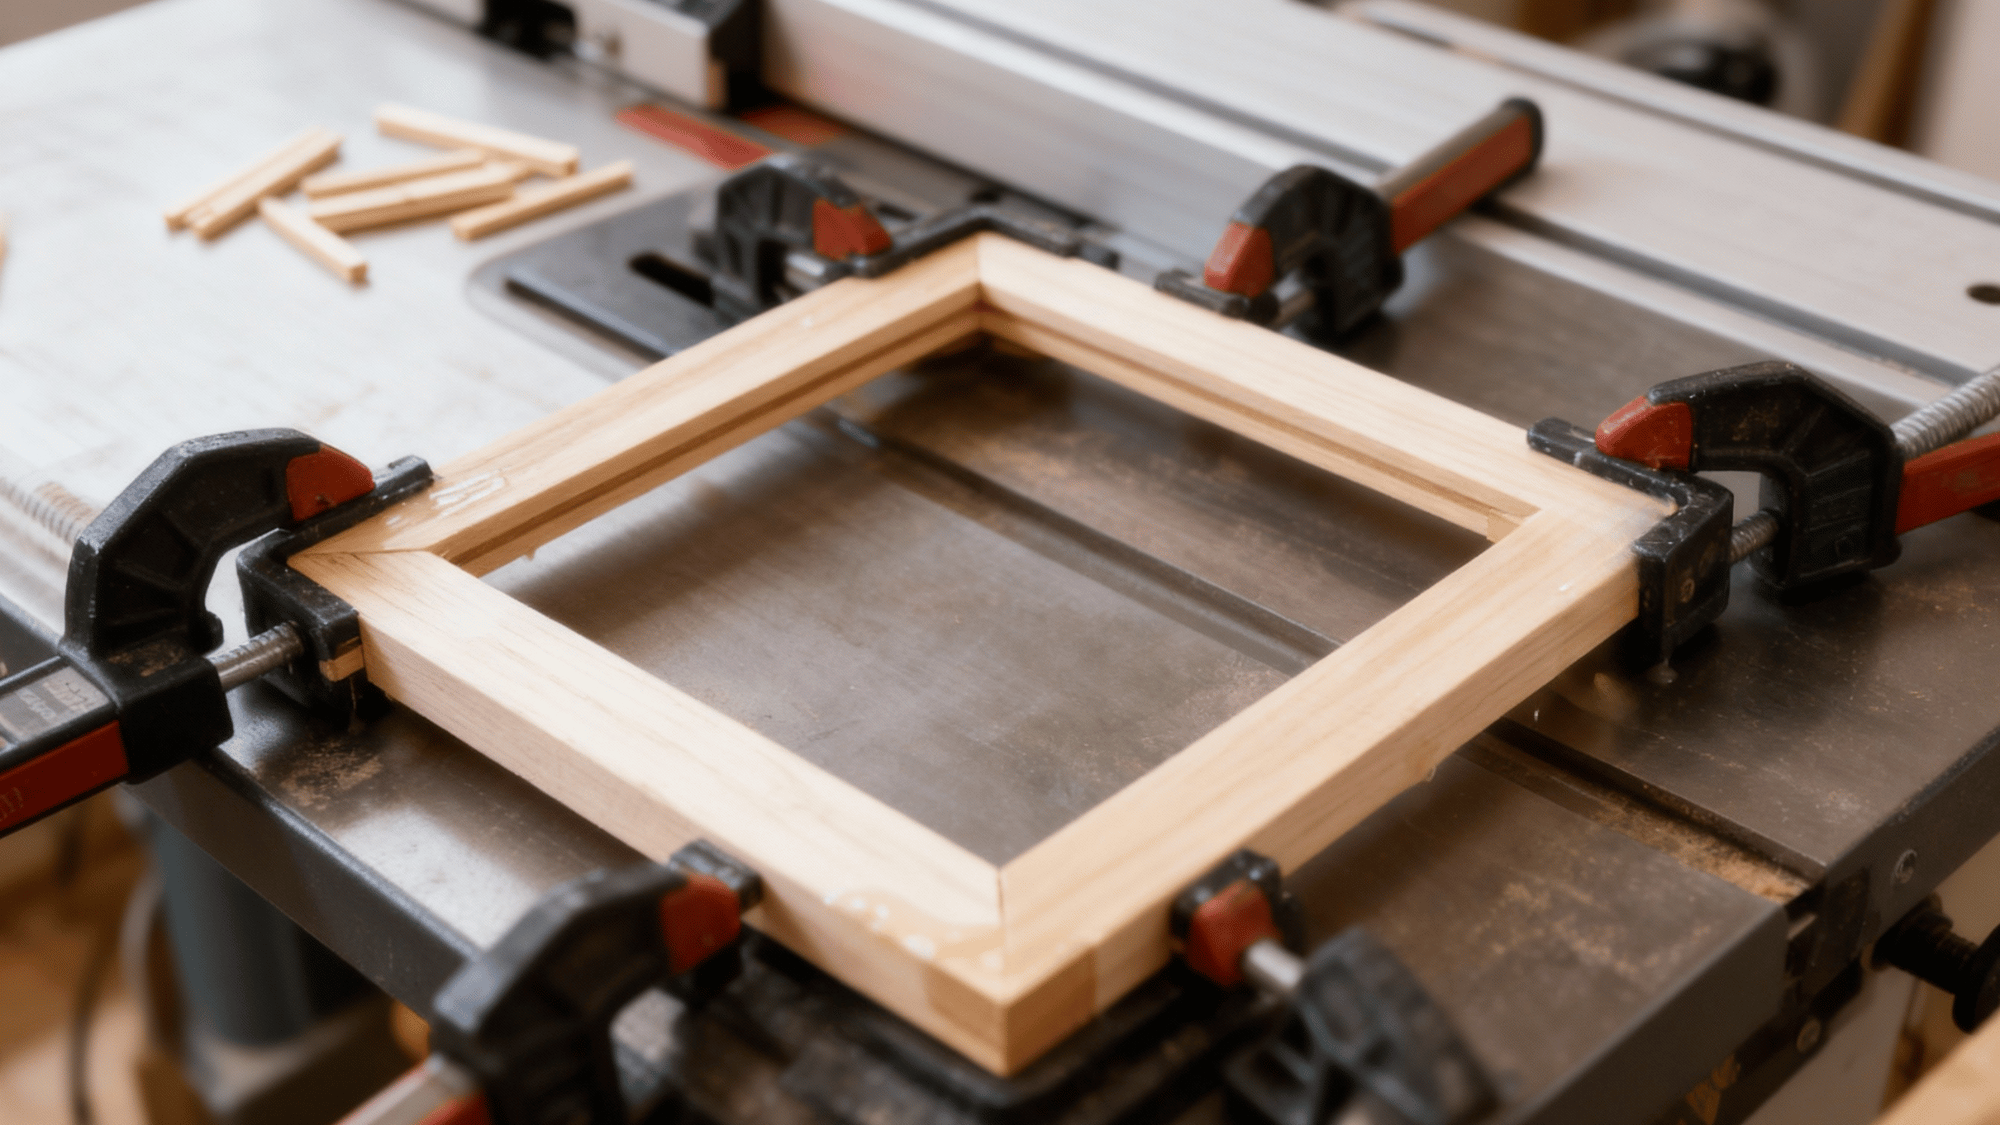
Use a web clamp with corner supports, applying even pressure around the entire frame perimeter while the glue dries completely.
Let the glue cure for the time specified on the bottle, typically one to two hours minimum, before removing the clamps.
Reinforce corners by cutting thin slots with a table saw and gluing wooden spline triangles into each corner for extra strength.
Step 7: Apply Stain or Paint Finish
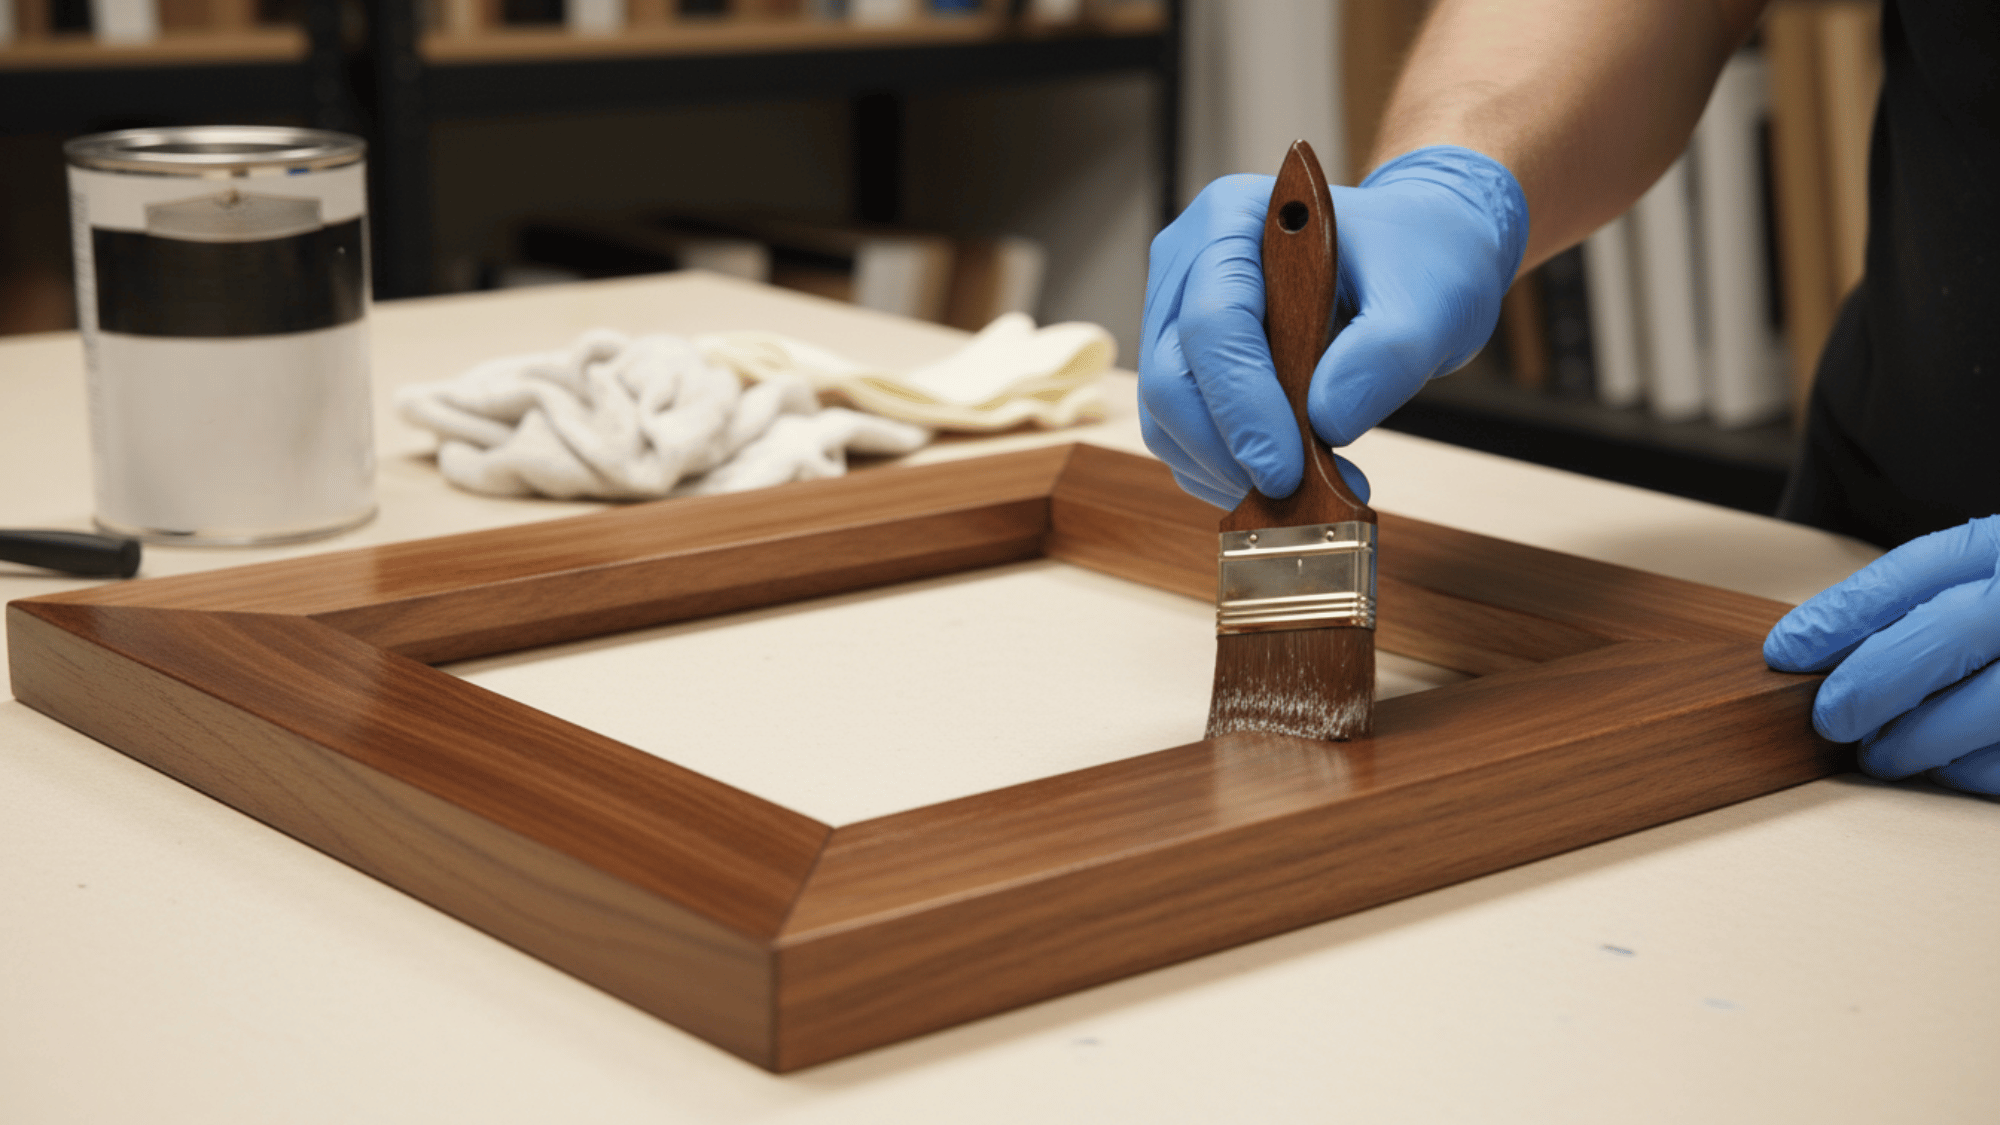
Choose your desired finish, even if stain, paint, or clear coat, matching your decor and the wood type used.
Apply wood conditioner first if using stain on softwoods like pine to prevent blotchy, uneven color absorption.
Brush on stain or paint in thin, even coats, allowing each to dry completely before adding additional layers.
Finish with a clear topcoat, like polyurethane or lacquer, protecting the frame and adding durability for years of display and handling.
Safety Tips You Need to Follow
Following these essential safety guidelines protects you from injuries and ensures a smooth, accident-free experience while building your picture frame.
- Wear protection: Always use safety glasses when cutting wood to prevent sawdust and debris from entering the eyes.
- Secure materials: Clamp wood firmly before cutting to prevent pieces from shifting and causing inaccurate or dangerous cuts.
- Work ventilation: Apply paint, stain, or glue in well-ventilated areas to avoid inhaling harmful chemical fumes.
- Sharp tools: Keep fingers away from saw blades and cutting edges at all times during the building process.
- Proper storage: Store tools safely after each use to prevent accidents when the workspace is not in use.
- Adult supervision: Children should only work on DIY picture frame projects with direct adult guidance and assistance.
Conclusion
Creating a DIY picture frame at home proves more accessible and rewarding than most people imagine when starting their first project.
The skills you develop through frame-making transfer to countless other home improvement and craft projects over time.
Even if framing family photos, children’s artwork, or decorative prints, homemade frames add special meaning that purchased versions cannot provide.
Ready to create your first custom frame? Gather your materials today and start building beautiful displays for your treasured memories.