Repairing basement walls can sound difficult, but with the right approach, it’s something many people can handle.
Cracks or damage in basement walls often raise concern, yet most issues start small and can be fixed with basic steps.
A well-maintained basement keeps the home safe, dry, and strong. Taking care of small problems early prevents bigger ones later.
This blog explains how to repair basement walls yourself in a simple, practical way. It focuses on easy methods anyone can understand and follow.
Why Basement Wall Repair is Essential for Home Safety and Value?
A strong, stable basement wall is the backbone of your home’s foundation. When cracks, leaks, or bowing walls go untreated, they can compromise the entire structural integrity of the house.
Moisture seeping through damaged walls often leads to mold growth, wood rot, and poor indoor air quality, posing serious health risks.
Over time, foundation movement caused by unchecked wall damage can also affect doors, windows, and flooring alignment throughout the home.
Addressing basement wall issues promptly not only prevents costly repairs but also preserves your property’s long-term value.
Investing in proper basement wall repair is one of the most effective ways to protect both your home’s structure and its resale potential.
Signs You Have to Fix Basement Walls

Catching early warning signs of basement wall damage can save you from major structural repairs and costly water issues later. Here’s what to look for:
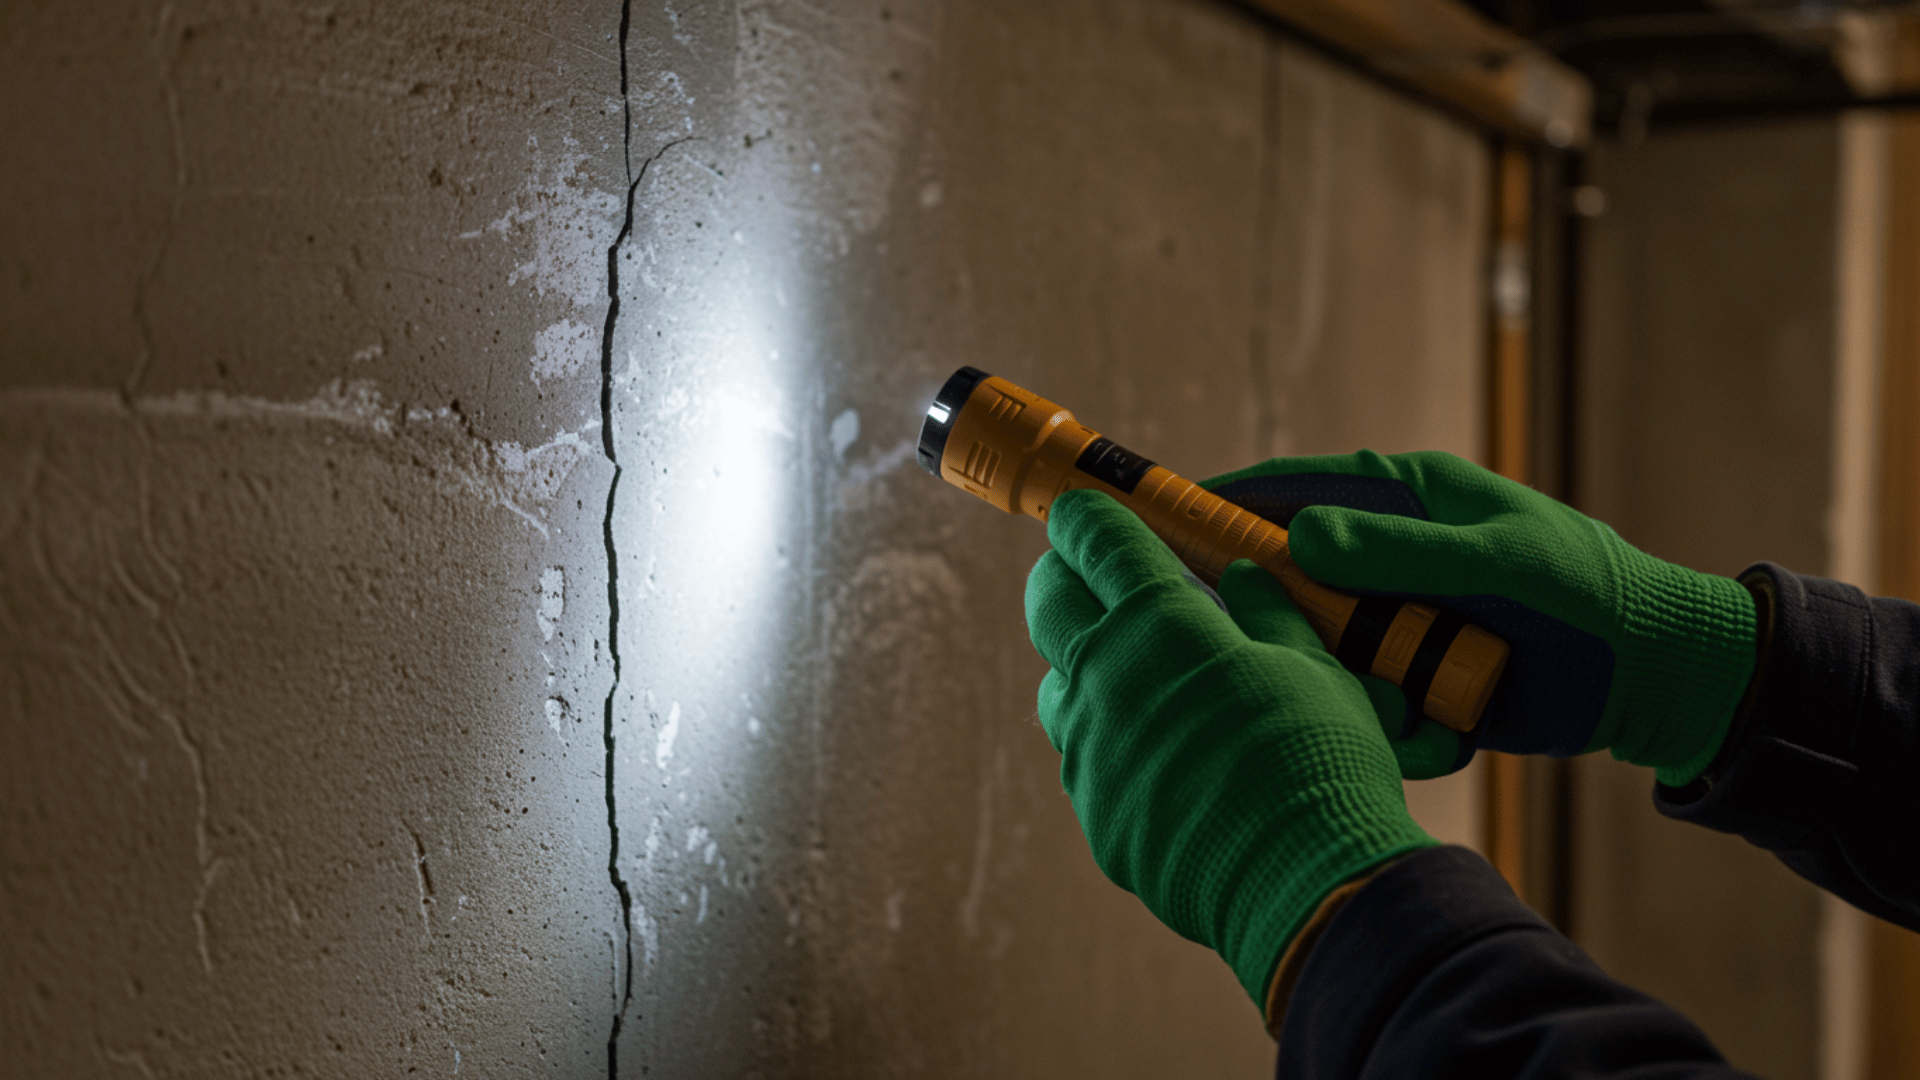
- Visible Cracks: Horizontal, vertical, or stair-step cracks in concrete or block walls indicate stress or shifting foundations. Even small ones can worsen over time.
- Damp Spots or Water Seepage: Moisture on basement walls or floors signals leaks caused by cracks, poor drainage, or hydrostatic pressure.
- Bowing or Leaning Walls: If your basement walls appear to curve inward, it’s often due to external soil or water pressure a serious structural concern.
- Musty Odors and Mold Growth: Persistent dampness encourages mold and mildew, which can harm air quality and damage your belongings.
- Flaking or Crumbling Concrete: Known as spalling, this happens when moisture breaks down the wall surface, weakening its integrity.
- Sticking Doors or Uneven Floors Above: Foundation movement caused by wall damage can affect the alignment of doors, windows, and floors on upper levels.
- Efflorescence (White Powdery Residue): White or chalky deposits on walls indicate water seepage through the concrete, leaving behind mineral salts.
Types of Basement Wall Repair Methods
Repairing basement walls depends on the type and severity of damage. Choosing the right method ensures long-lasting stability and prevents future problems.
1. Epoxy or Polyurethane Injection
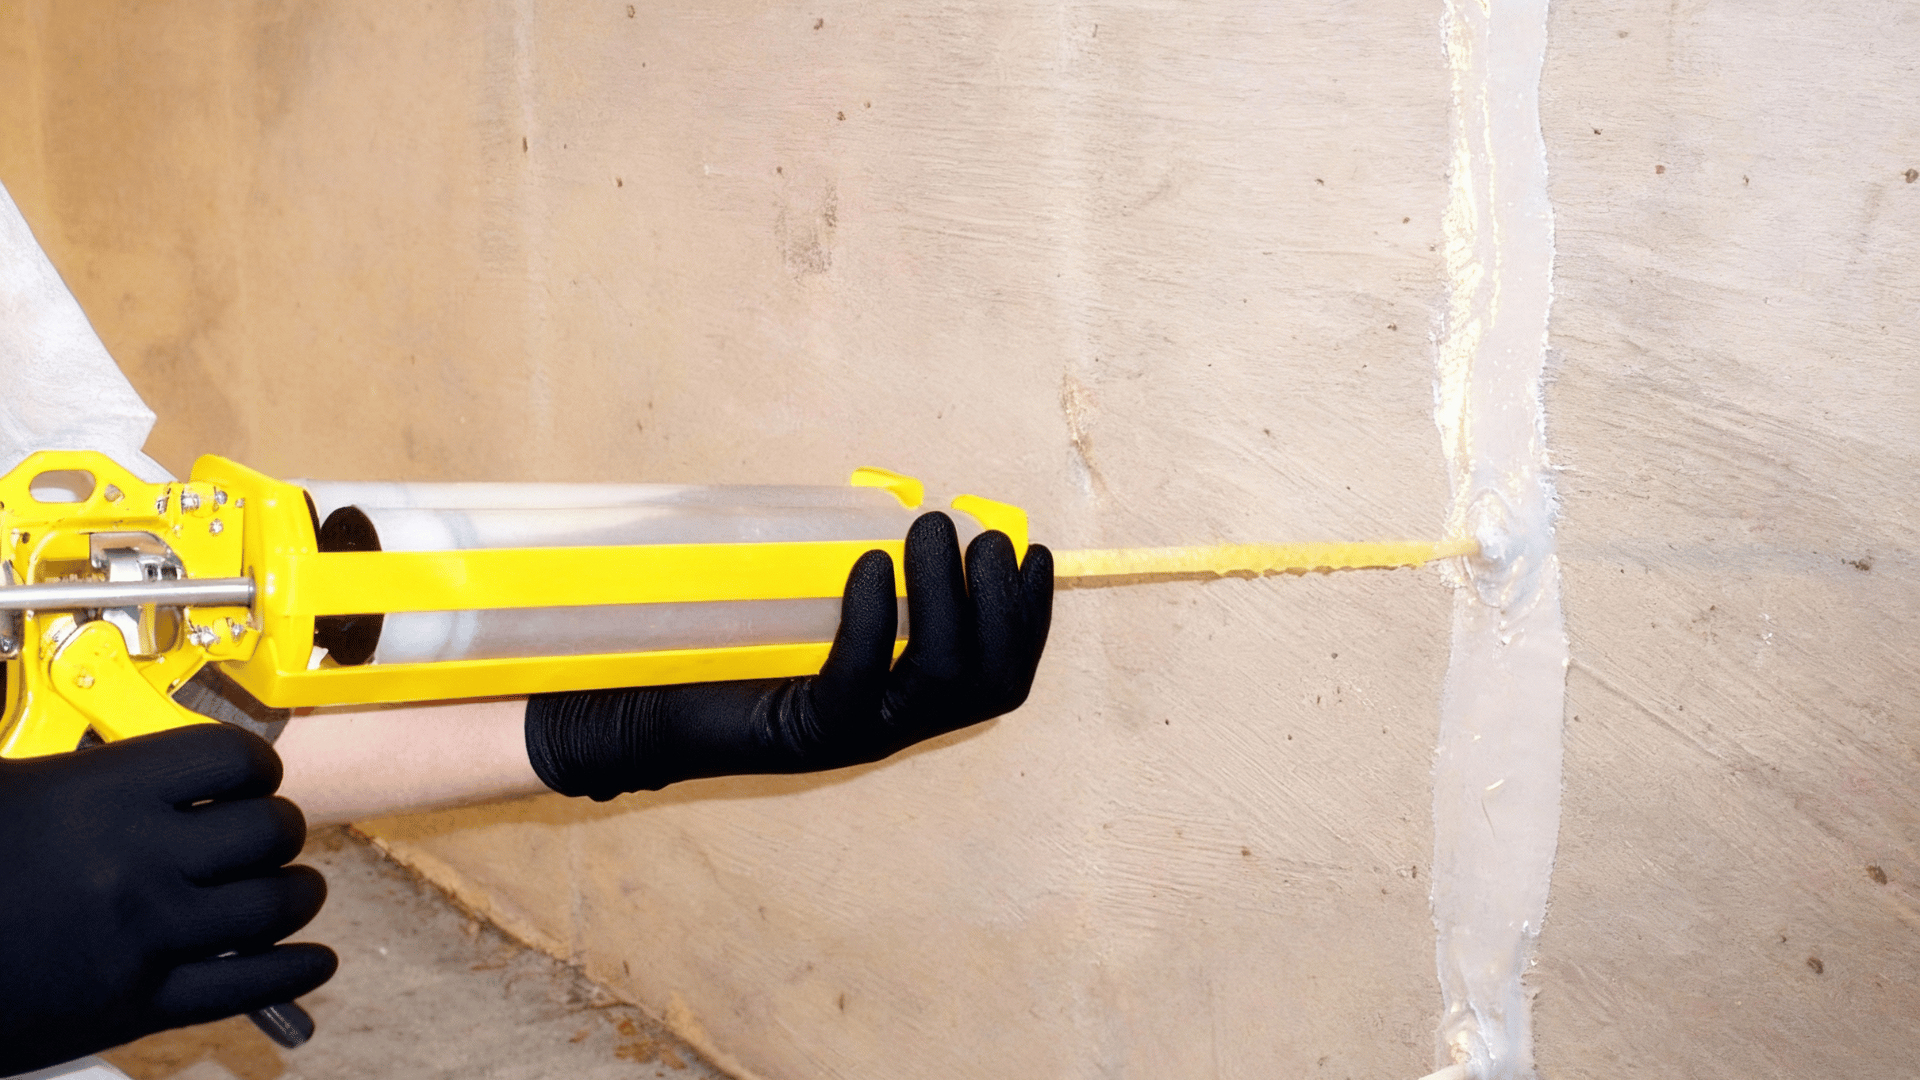
Epoxy and polyurethane injections fill cracks from the inside out, creating permanent seals in concrete basement walls.
Epoxy works best for structural repairs in dry cracks, bonding concrete together rigidly. Polyurethane excels for active leaks, expanding to fill voids and remaining flexible.
How to Use It:
- Clean and prepare cracks by removing debris or loose concrete.
- Inject epoxy or polyurethane resin directly into the cracks under pressure.
- Allow it to cure, sealing the wall from both moisture and structural weakness.
2. Carbon Fiber Straps
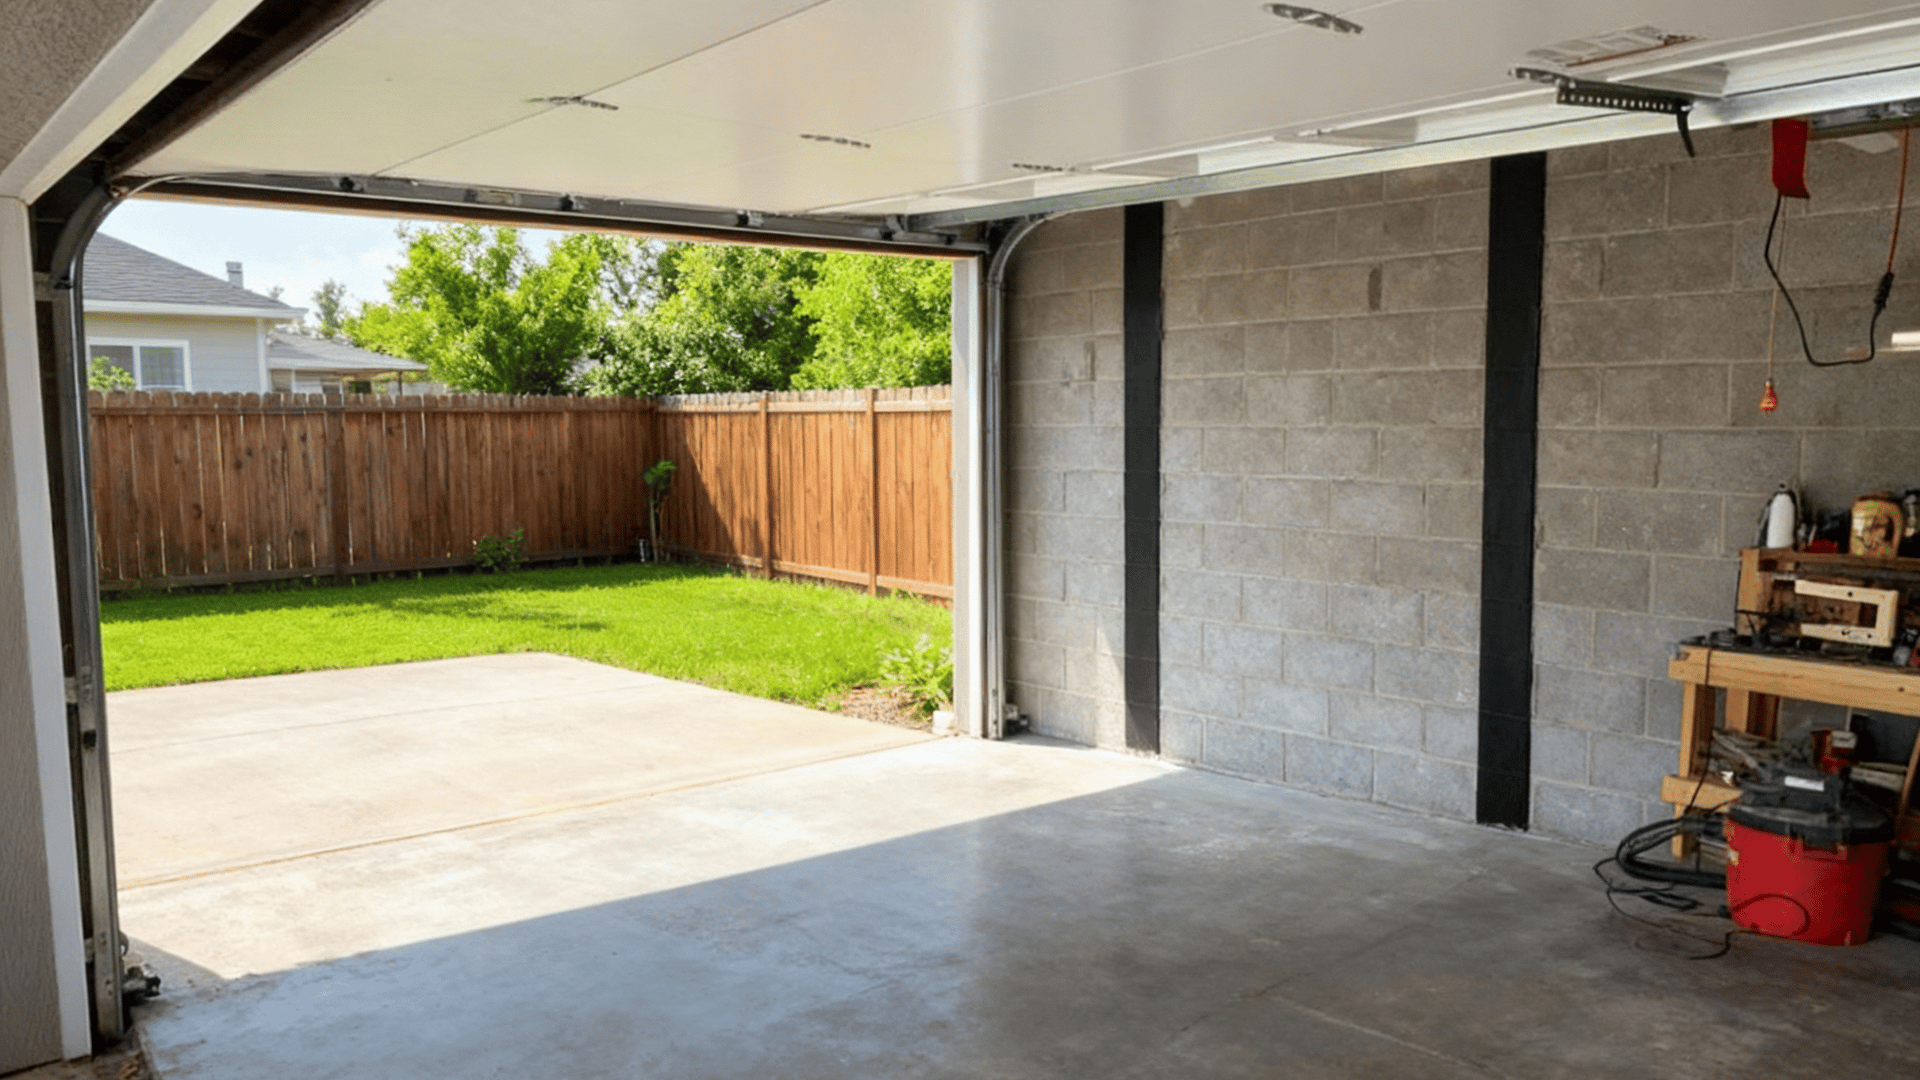
Carbon fiber reinforcement systems stabilize bowing or cracked basement walls without invasive excavation.
These thin, low-profile straps can be painted over and don’t reduce interior space like traditional methods.
How to Use It:
- Clean the wall surface and mark areas with visible bowing or cracks.
- Apply epoxy adhesive and press the carbon fiber straps vertically along the wall.
- Secure the ends and let the adhesive cure to reinforce the wall’s structure.
3. Wall Anchors and Steel Beams
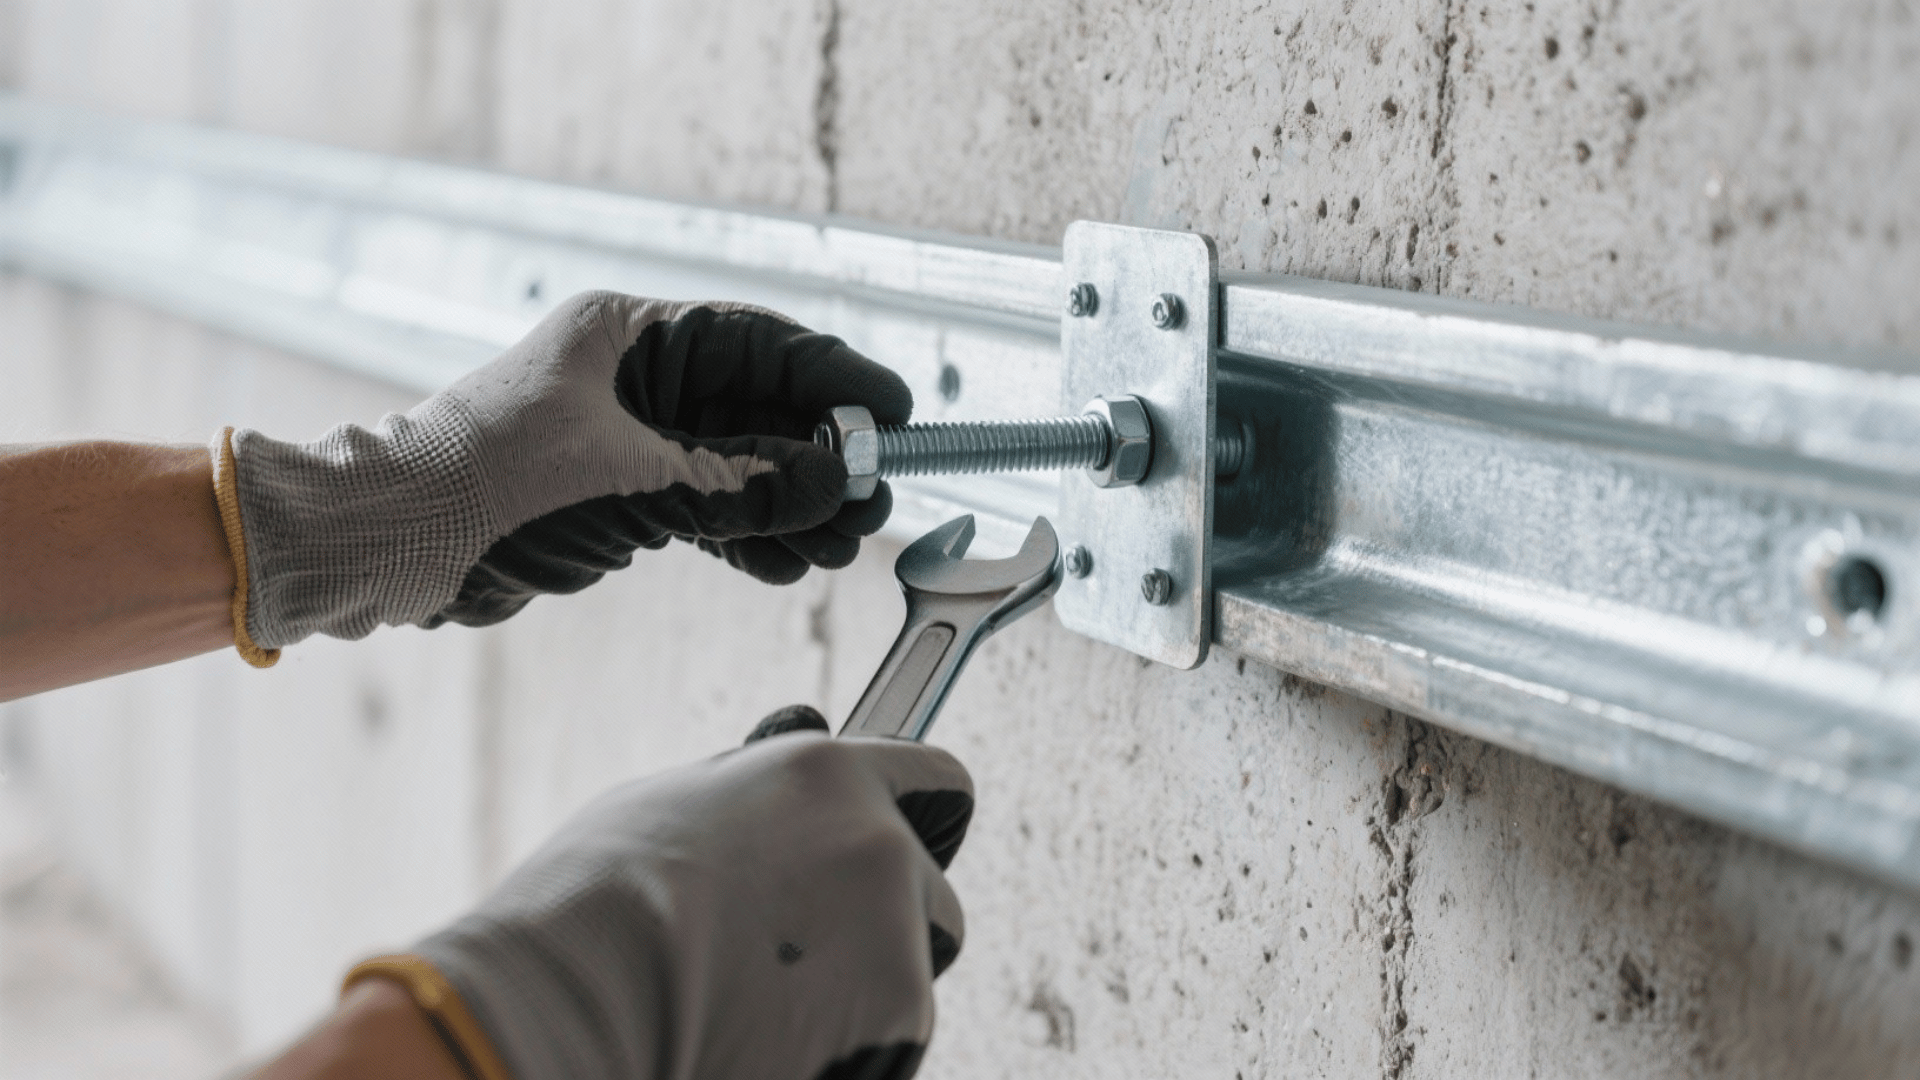
Steel I-beams or wall anchor systems address severely bowing walls through mechanical reinforcement.
I-beams are installed vertically against walls and anchored to floor joists above, preventing further movement.
These heavy-duty solutions handle significant structural damage but require professional installation. Though expensive, they provide permanent solutions for serious problems.
How to Use It:
- Drill holes through the basement wall and into the exterior soil.
- Insert wall anchors or attach steel beams connected to the anchor plates outside.
- Tighten gradually to pull the wall back to its original position and stabilize it.
4. Waterproof Coatings
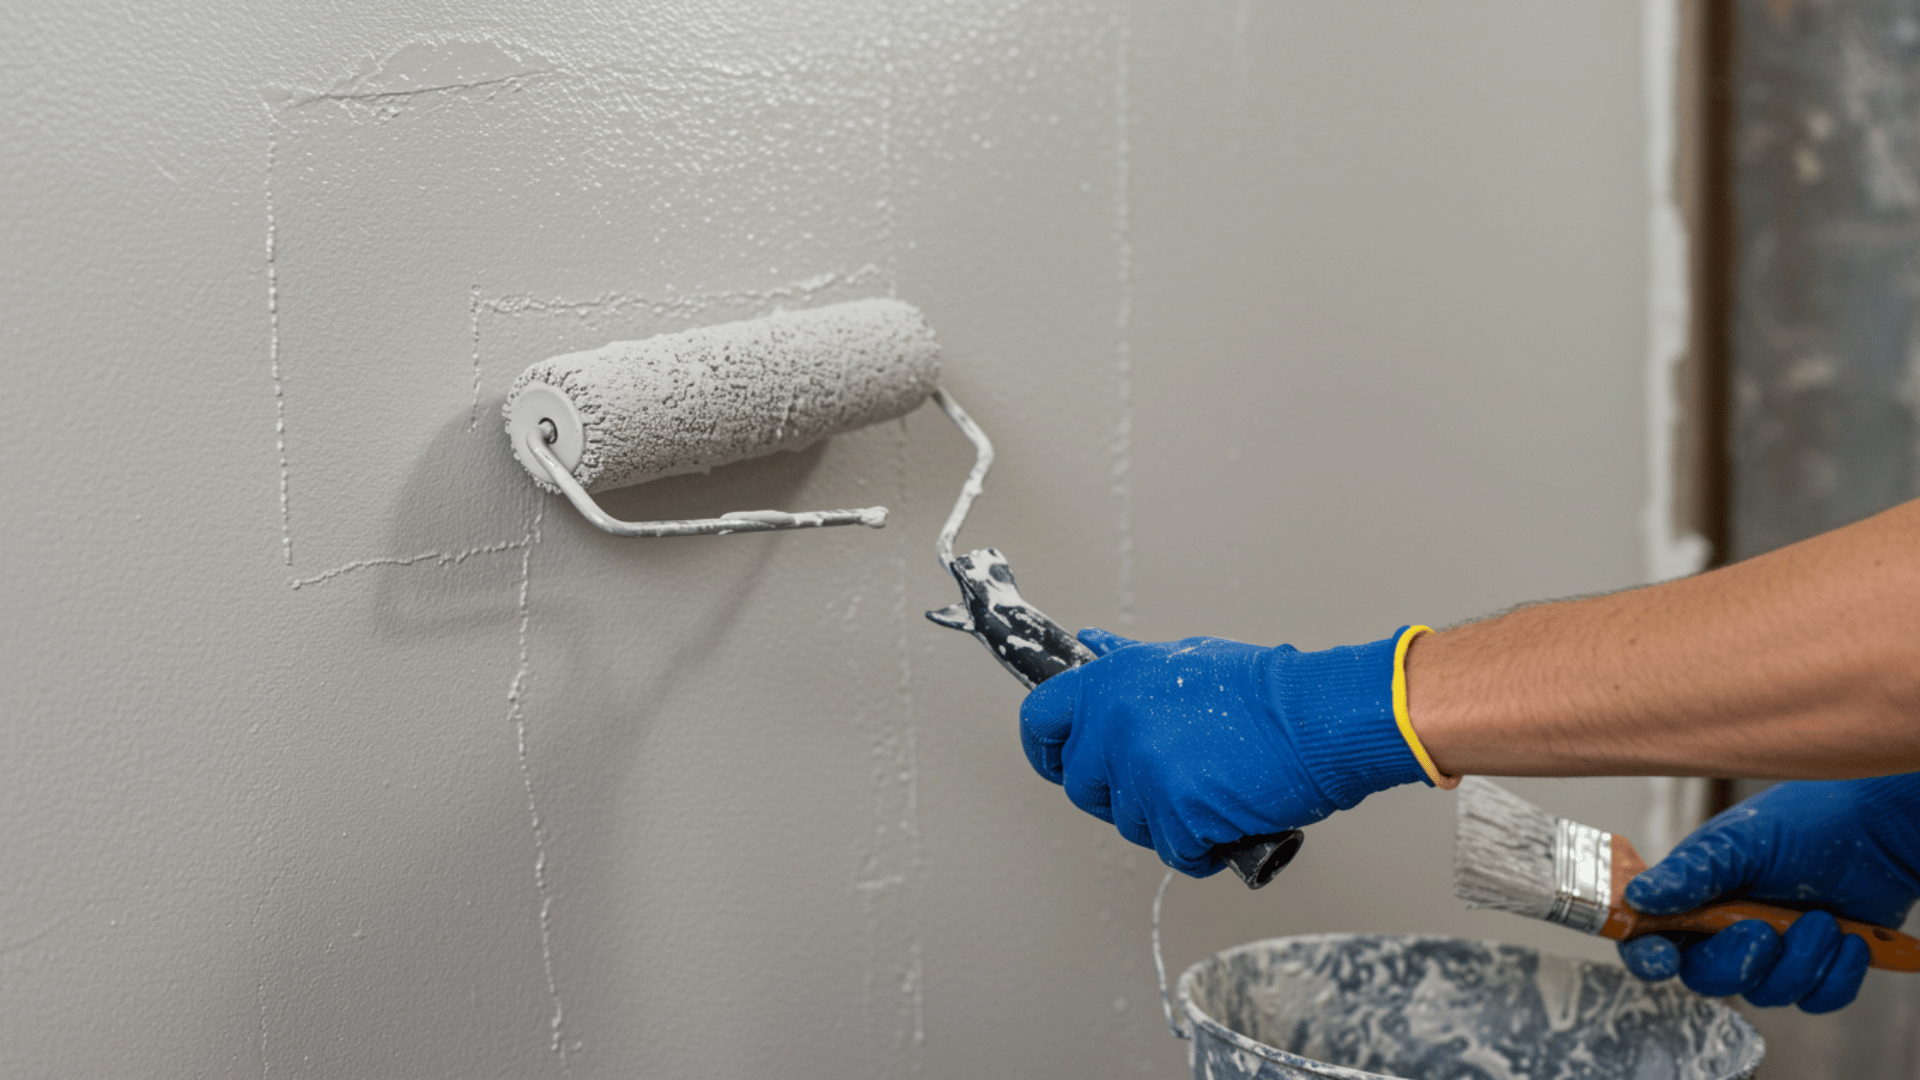
Hydraulic cement, masonry waterproofing paints, and crystalline coatings seal basement walls against moisture penetration. Hydraulic cement expands as it stops active leaks immediately.
These coatings work best for minor moisture issues and should be applied to clean, prepared surfaces. Multiple coats typically provide optimal protection against dampness and seepage.
How to Use It:
- Clean the wall thoroughly and fill any minor cracks.
- Apply waterproof coating or sealant with a brush or roller.
- Let it dry completely to create a moisture barrier against leaks and dampness.
5. Drainage Systems
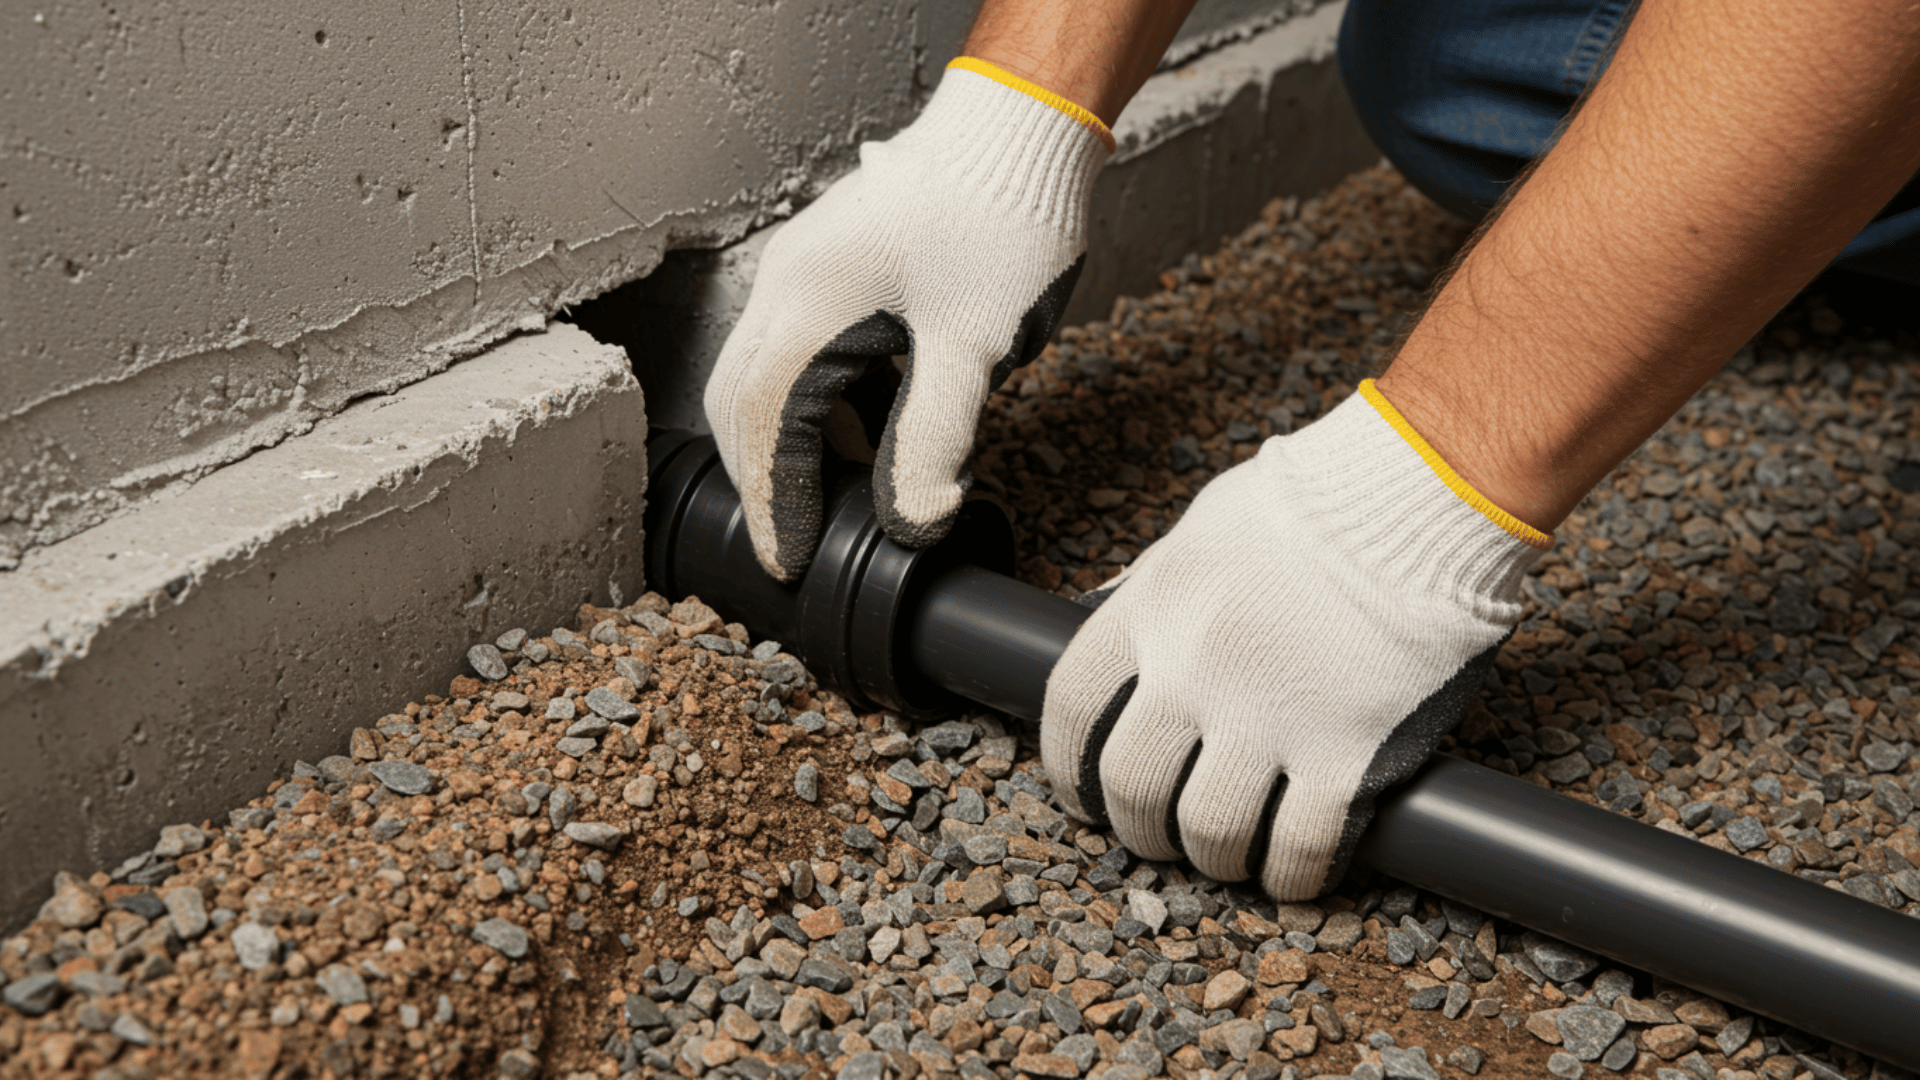
Interior and exterior drainage systems redirect water away from basement walls, preventing hydrostatic pressure buildup.
Proper grading and gutter systems complement drainage solutions. These approaches address water problems at their source, protecting walls from moisture damage long-term.
How to Use It:
- Excavate around the basement foundation or install interior drain tiles.
- Place perforated pipes and connect them to a sump pump system.
- Backfill with gravel and soil to redirect water away from the foundation.
Budget Breakdown for Basement Wall Repairs
Knowing the average cost for fixing basement wall repairs helps you plan your budget and choose the right solution for your home’s needs.
| Repair Type | Estimated Cost Range | When It’s Needed |
|---|---|---|
| Small Crack Sealing | $300 – $800 | Minor hairline or surface cracks |
| Epoxy/Polyurethane Injection | $500 – $1,200 | Sealing active leaks or medium cracks |
| Carbon Fiber Straps | $1,000 – $3,000 | Bowing or slightly shifting walls |
| Wall Anchors/Steel Beams | $4,000 – $10,000 | Severe bowing or structural movement |
| Interior Waterproofing | $2,000 – $6,000 | Persistent moisture or seepage issues |
| Exterior Waterproofing | $5,000 – $15,000 | Heavy leakage or soil pressure issues |
| Foundation Replacement | $20,000+ | Major structural failure |
Preventive Maintenance Tips
Preventive maintenance is the key to protecting your basement walls from costly repairs and long-term structural damage.
- Inspect walls regularly: Check for new cracks, discoloration, dampness, or bulging every few months to catch problems early.
- Extend downspouts away from the home: Use extensions or splash blocks to direct water at least 6–10 feet away from basement walls.
- Control indoor humidity: Use a dehumidifier or ventilation system to keep basement humidity below 50%, preventing condensation and mold.
- Seal small cracks early: Apply epoxy or polyurethane sealant to minor cracks to stop moisture before it becomes a bigger issue.
- Install or maintain a sump pump: A working sump pump helps remove excess water and prevents flooding during heavy rains.
- Avoid overwatering landscaping: Too much watering near the home increases soil pressure and weakens basement walls over time.
- Add waterproof coatings: Applying a high-quality waterproof sealant to interior or exterior basement walls helps block moisture entry.
Conclusion
Don’t compromise your home’s safety by attempting repairs beyond your expertise or ignoring warning signs of serious foundation issues.
Regular inspection and maintenance of your basement walls will help you catch problems early when they’re easier and less expensive to address.
A stable, dry basement protects your entire home’s structural integrity and living environment.
Ready to tackle your basement wall repair project?
Assess your damage today and take the first step toward a safer, more secure foundation for your home.