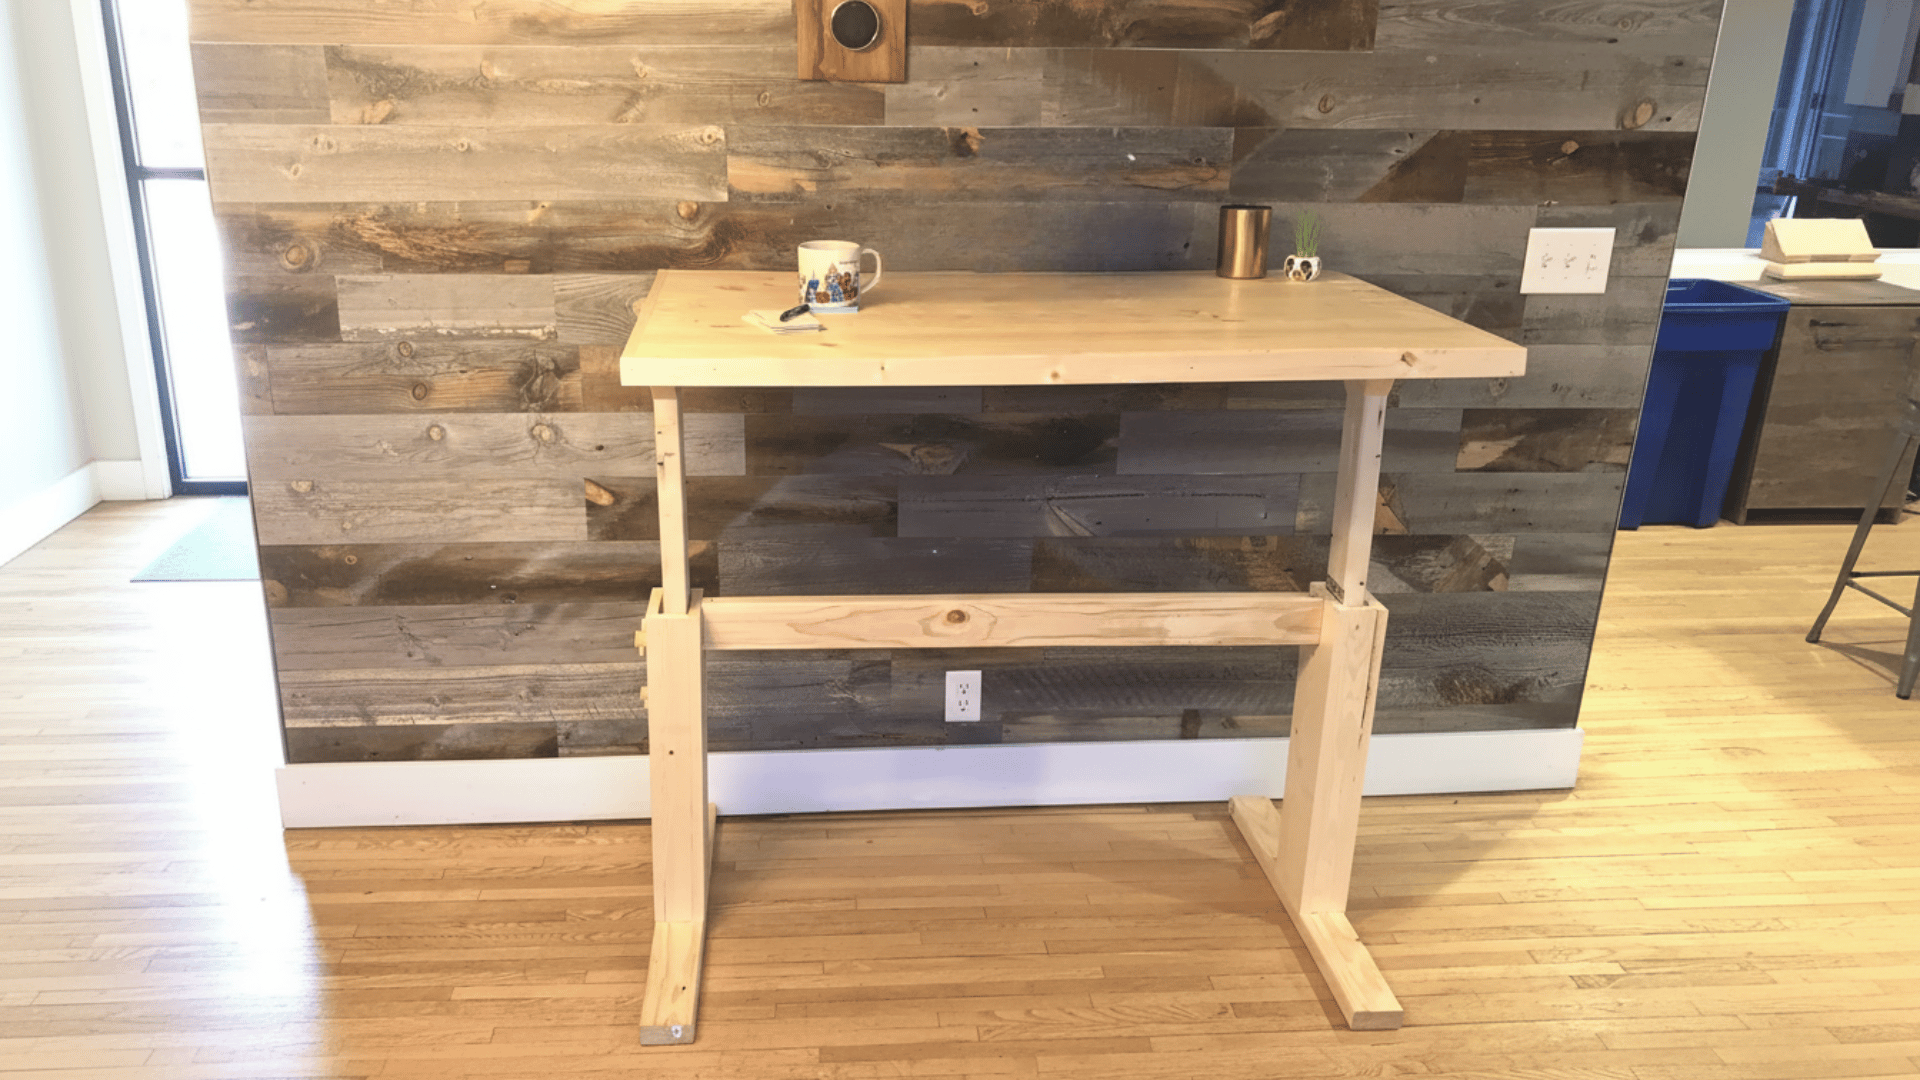
Thinking about improving your workspace for better comfort and focus? Building your own DIY standing desk is a great way to do it.
You can make a desk easily using minimum tools, your body, and your style, without spending a lot of money.
Standing while working helps you move more, feel more awake, and helps you stay focused on the work.
With just a few tools, some materials, you can create a solid and useful desk that works just for you. A little effort can make your daily work or study much more comfortable.
What to Consider Before Building a Standing Desk
Before you grab your tools, it’s important to plan your standing desk carefully. A little preparation ensures the desk is comfortable, functional, and fits your space perfectly.
- Measure your space: Check the area where you’ll place the desk to ensure there’s enough room to move around comfortably.
- Choose the right height: The desk surface should align with your elbows when you stand for proper posture.
- Plan for your needs: Consider what you’ll use the desk for, computer, monitor, or writing, to choose sturdy enough materials.
- Think about cable management: Plan where your cords, outlets, or charging stations will go to keep your setup neat.
- Add storage or shelves: If you need extra space for accessories or supplies, include that in your design plan.
Tools and Materials Required
| Tools | Materials |
|---|---|
| Drill | Wooden board for the desktop |
| Measuring tape | Adjustable legs or metal pipes |
| Saw | Screws and corner brackets |
| Screwdriver | Sandpaper for smoothing |
| Paintbrush | Stain or paint for finishing |
| Level | Wood glue for strong joints |
| Safety glasses | Protective sealant for durability |
Step-by-Step Process of Building a DIY Standing Desk
Learn how to create a standing desk with this simple step-by-step process that helps you from start to finish for a sturdy workspace.
Step 1: Measure and Cut
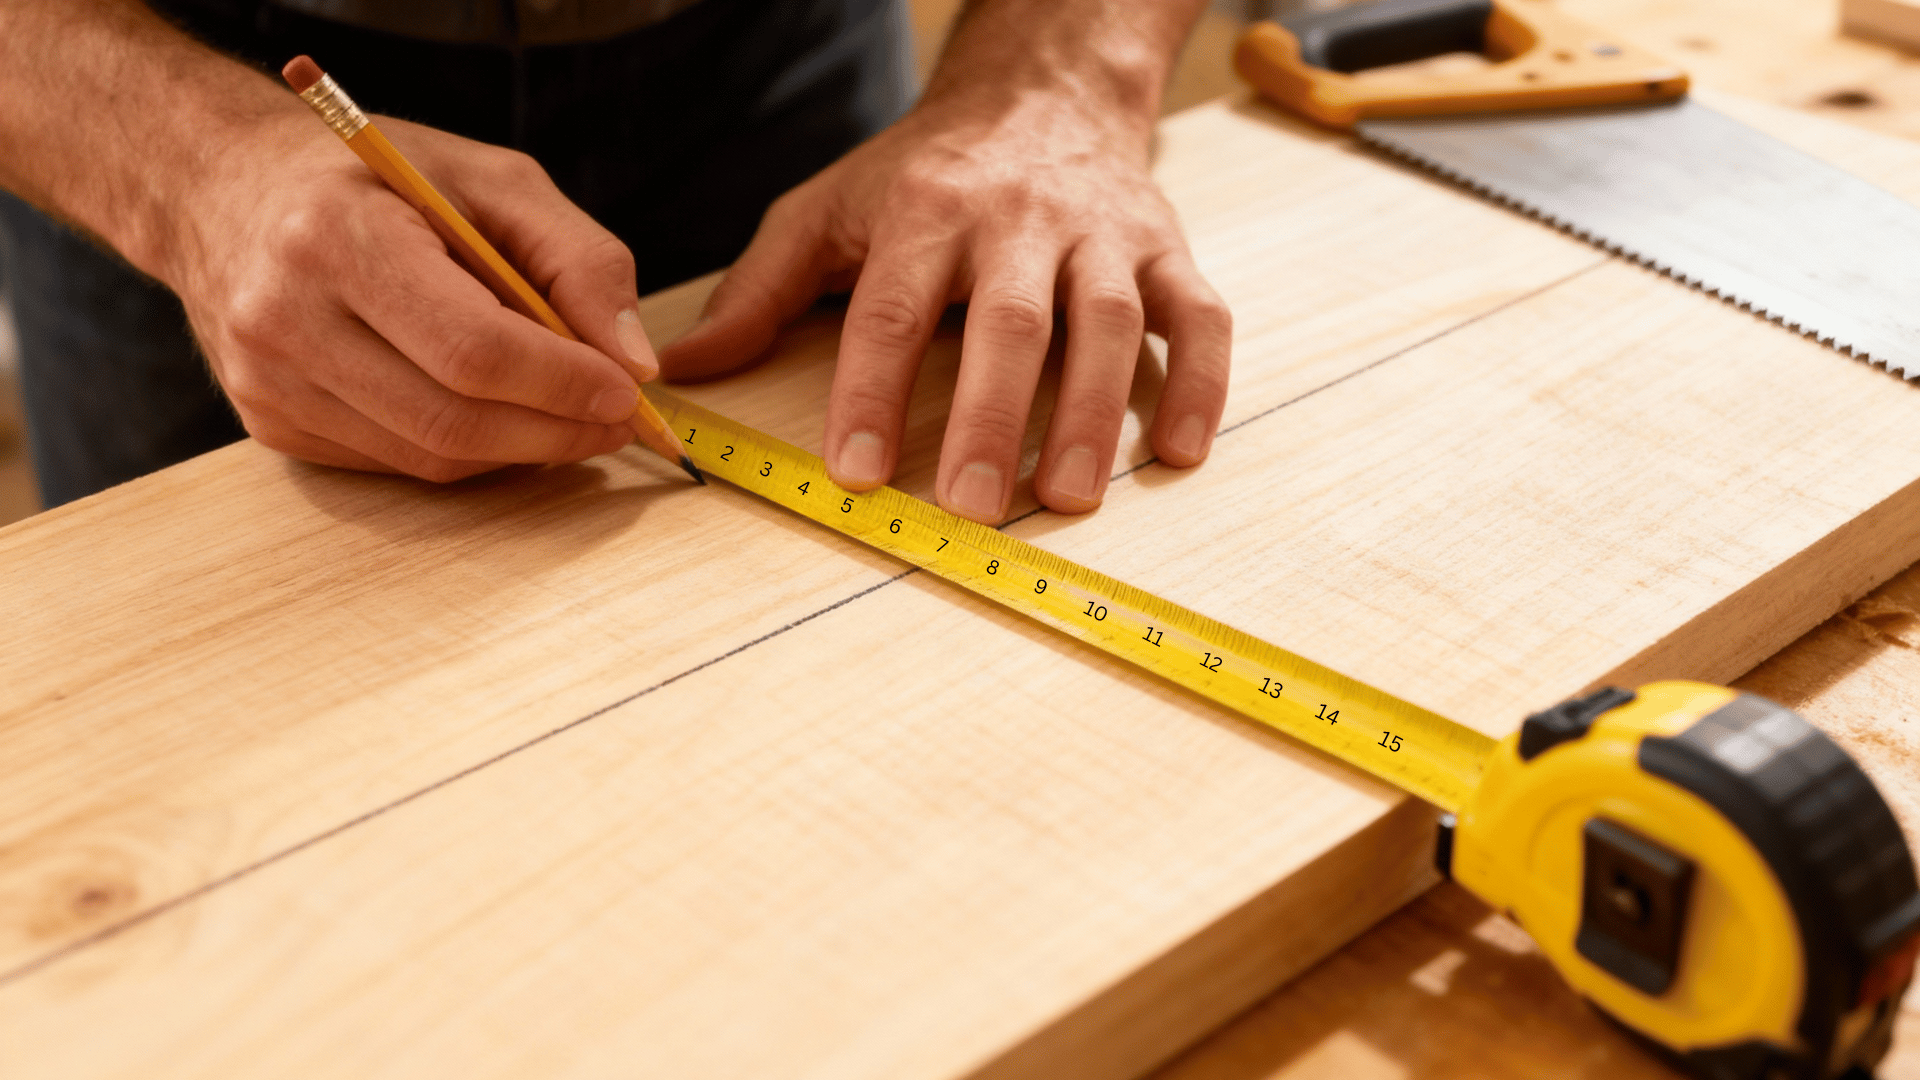
The first and most important part of making a standing desk is measuring your space correctly.
Use a tape measure to mark the length and width of your desktop on the wooden board. A common size is about four feet wide and two feet deep, but you can adjust it to your needs.
Mark straight lines with a pencil and use a saw to cut along them carefully. Smooth cuts will make your desk edges neat and safe.
Step 2: Smooth and Prepare the Surface
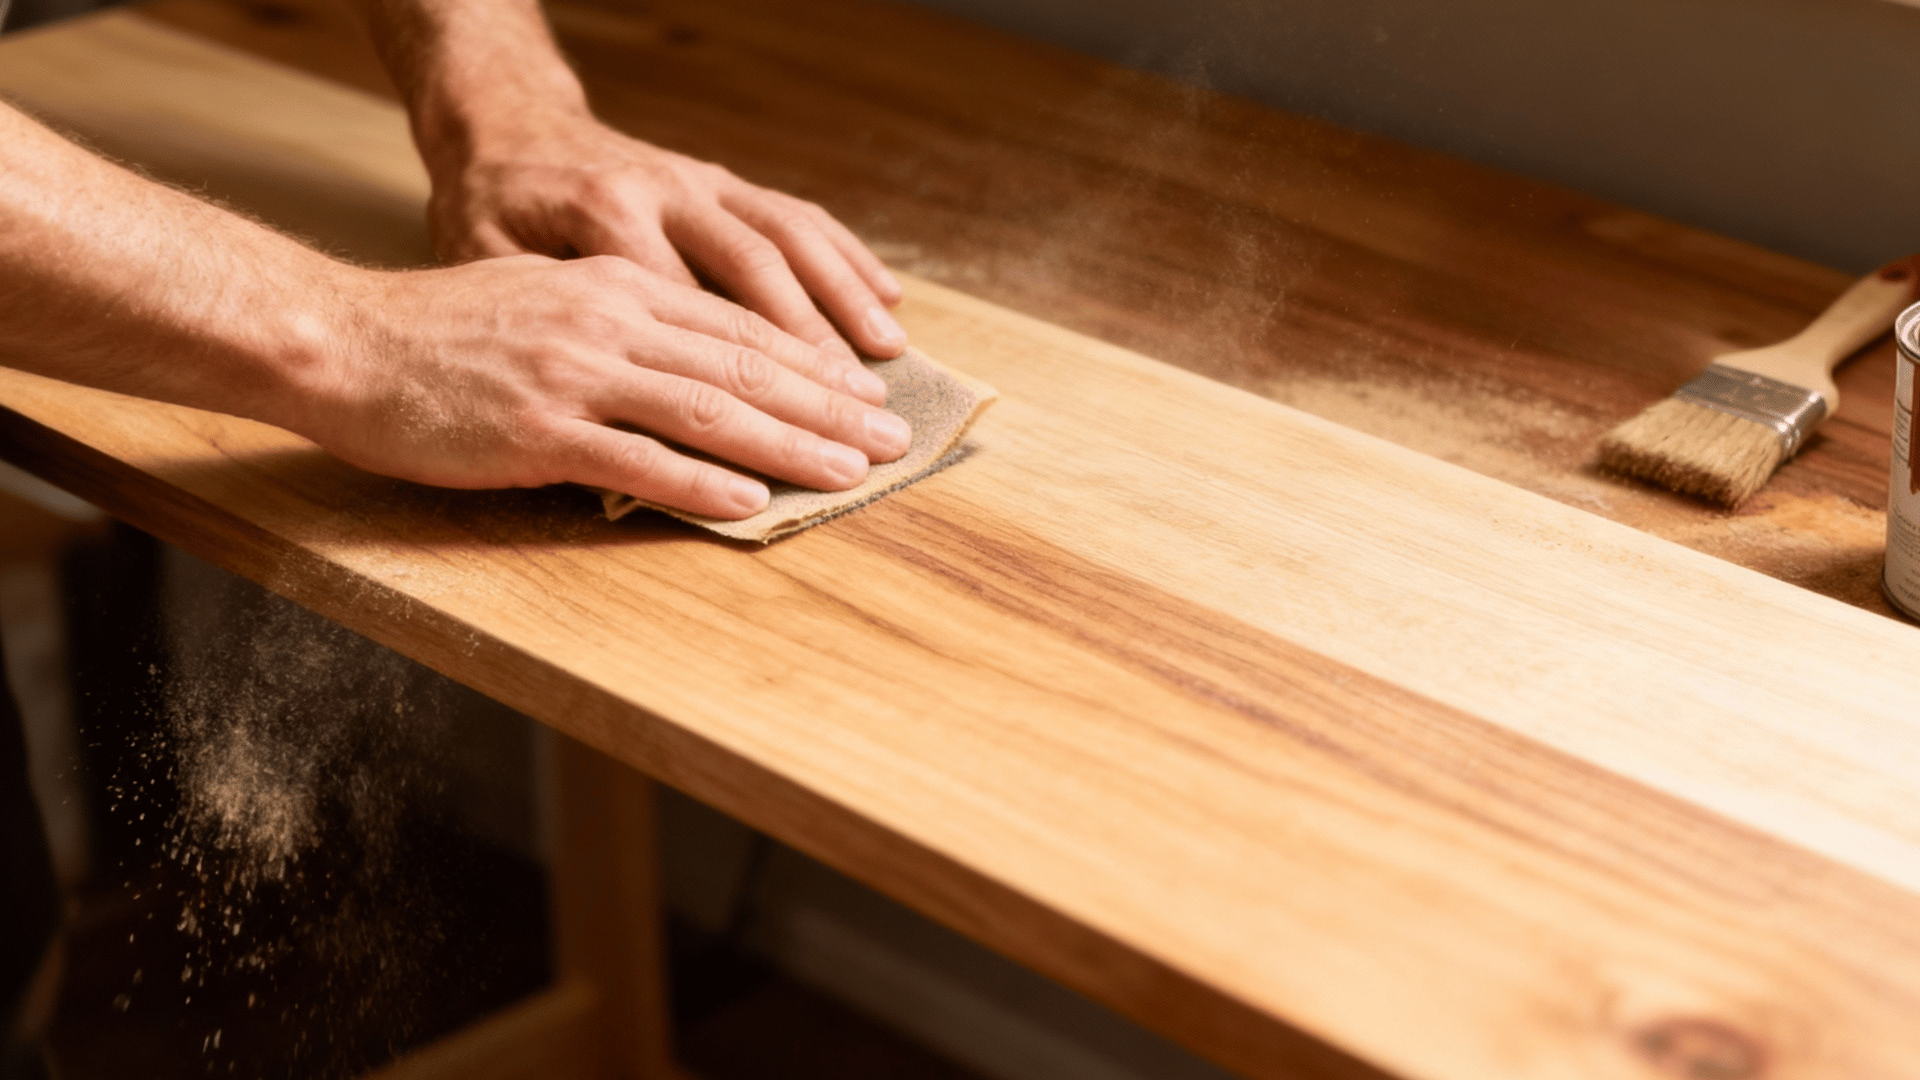
After cutting, sand the top and sides of the board with sandpaper. This step helps the desk feel smooth and prevents splinters.
You can start with coarse sandpaper, then use finer grit for a soft finish. Once the surface feels smooth, wipe away the dust with a dry cloth.
Apply your chosen paint or wood stain to match your room’s look. A light finish makes your space feel open, while darker tones add a classic style.
Step 3: Attach the Legs
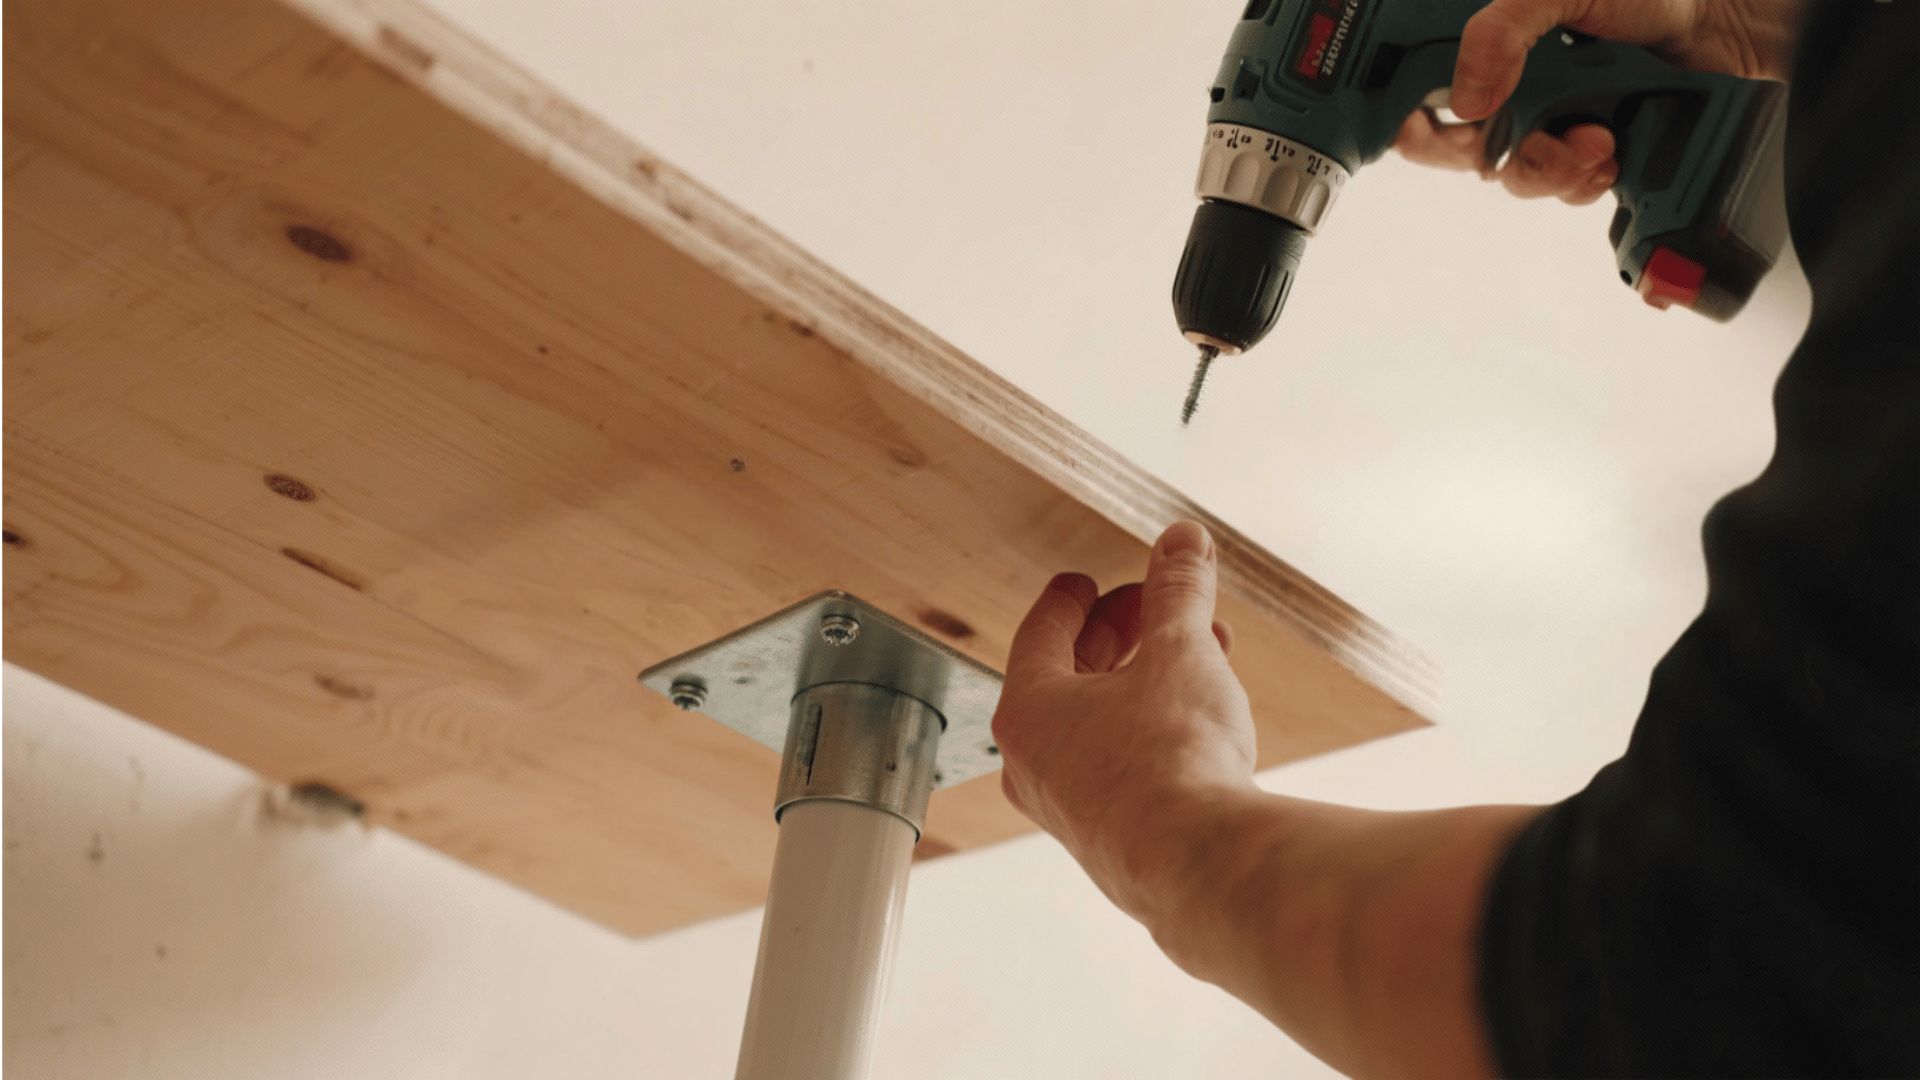
Flip the wooden board upside down and mark where you’ll attach the legs. The legs are what give a desk balance, so place them evenly near the corners.
If you’re using adjustable legs, make sure they’re set to your preferred height before you secure them.
Drill small holes for screws, then attach each leg tightly using brackets. Check each one to ensure it’s level and stable.
Step 4: Secure and Test Stability
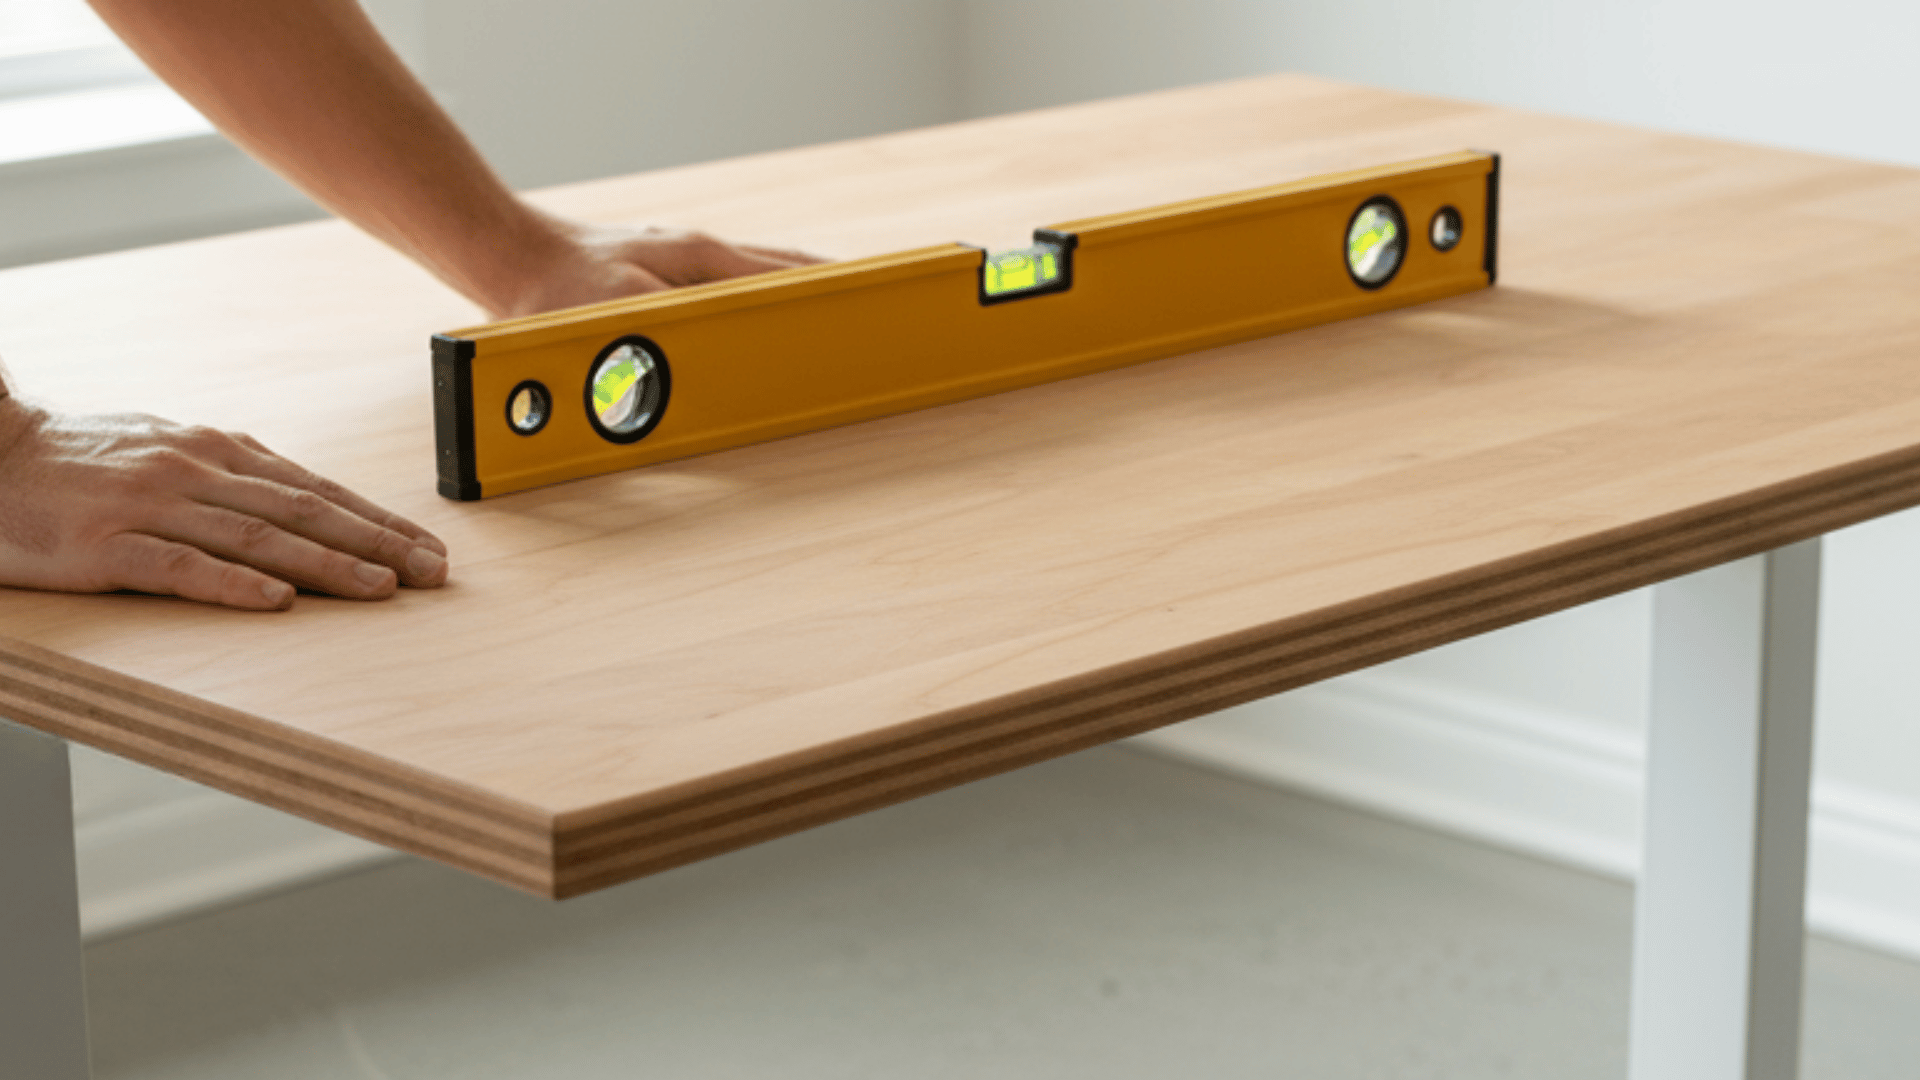
Once the legs are in place, it’s time to test your desk. Carefully turn it upright and press down on different areas of the top.
If you feel movement or shaking, tighten the screws and brackets again. Use a level to make sure the surface is flat. For uneven floors, you can add rubber pads under the legs.
Try setting your laptop or books on top to see if the desk stays firm. This step helps you catch small problems early.
Step 5: Add Finishing Touches

Apply a protective sealant to the surface to keep it safe from scratches and spills. If you use a computer, drill a small hole at the back for cable management.
You can also attach hooks or shelves underneath for storage. Adding simple touches like a desk mat or monitor stand can improve comfort and design.
Personalize your space with plants or a lamp to make it welcoming. These details complete your standing desk, making it look neat and ready for work every day.
Here’s your revised section with each bullet expanded by around seven words for clarity and flow, while keeping the friendly.
Common Mistakes to Avoid When Building a Standing Desk
Building a standing desk can be fun, but a few small errors can cause big issues later. Keep these tips in mind:
- Uneven cuts: Always measure twice before you cut any wood to ensure perfect alignment and prevent wasted material later.
- Loose joints: Use enough screws and brackets for tight, steady connections that won’t weaken or wobble over time.
- Incorrect height: Match desk height with your standing elbow level for proper comfort and posture throughout long working hours.
- Skipping sanding: Rough edges can lead to scratches or wear, making the surface uncomfortable and unsafe for regular use.
- Weak support: Choose strong materials that won’t bend or tilt, ensuring your desk remains stable and long-lasting.
- Poor balance: Always check that your desk doesn’t wobble before use to avoid spills, damage, or discomfort while working.
Can a Standing Desk Help with Back Pain?
A standing desk can help ease and prevent back pain. When you stand, your back stays more aligned, reducing pressure on your lower spine.
Sitting for hours can tighten your muscles, making you feel sore or stiff. By using a standing desk, you keep your body in motion and improve blood flow.
However, standing all day isn’t the goal; alternate between sitting and standing to stay comfortable. Move your feet often and use a soft mat for support.
Over time, standing for part of your day can help you build strength, improve posture, and reduce pain naturally.
A balanced routine using your standing desk supports both comfort and health for years to come.
Conclusion
Building your own DIY standing desk is more than just a home project; it’s an investment in your comfort, health, and creativity.
A well-made standing desk helps you stay active, improves posture, and keeps you focused during long work hours.
It’s a satisfying feeling to use something built with your own hands, knowing it supports your productivity.
Start your build today and make your work time healthier and happier.