If you’ve ever wondered how high to hang curtains, you’re in the right place. Curtains do more than add privacy; they bring warmth, texture, and personality to a room.
The right height can make your space feel taller, brighter, and more balanced, while the wrong placement can throw off the entire look.
Hanging curtains might seem simple, but details like rod height, window size, and ceiling height all matter more than you’d think.
This article will walk you through how high to hang curtains for different ceiling types so you can achieve that polished, designer-quality finish and create a room that feels complete and effortlessly inviting.
How High to Hang Curtains by Ceiling Height
Understanding how high to hang curtains depends on your ceiling height and the visual effect you want to achieve. The right placement can make your windows appear larger, balance room proportions, and add a designer-quality finish.
| Ceiling Height | Rod Placement | Visual Effect |
|---|---|---|
| 8-Foot Ceilings | 4–6 inches above the window frame | Balanced look that elongates walls |
| 9-Foot Ceilings | 8–10 inches above the frame | Enhances vertical space and adds modern openness |
| 10-Foot or Higher | 10–12 inches above the window or just below the crown molding | Creates a grand, classy impression |
| Vaulted or Sloped Ceilings | Parallel to the slope or at the highest even point | Highlights architectural character and symmetry |
Tip: Hanging rods closer to the ceiling always helps draw the eye upward, making ceilings appear higher and rooms more spacious.
Curtain Height Tips for Different Window Shapes
Not all windows are alike, and that’s where rod placement makes all the difference. When you’re dealing with standard, arched, or bay windows, the goal is always the same: balance, proportion, and visual flow.
General Guidelines:
- Near the Ceiling: For low ceilings, mount rods just below the ceiling to make walls appear taller.
- Floor-to-Ceiling Windows: Position rods 1–2 inches below the ceiling for a seamless line.
- Dramatic Effect: Mount rods 8–12 inches above the frame for extra height and visual impact.
Special Window Shapes:
- Bay or Bow Windows: Use a flexible or custom curved rod that follows the window’s shape. Mount slightly above the highest frame for continuity.
- Arched Windows: Place the rod just above the arch to preserve its shape while keeping proportions even.
- Transom Windows: If you want more light, hang rods just above the main frame. For a grand, unified look, mount above both the window and the transom.
Tools and Materials You’ll Need
| Tools | Purpose |
|---|---|
| Measuring Tape | To measure window width and height accurately |
| Pencil & Notepad | For marking and recording measurements |
| Curtain Rod / Track | The hardware from which the curtains hang |
| Curtain Panels | Chosen fabric style (float, kiss, or puddle length) |
| Brackets & Screws | For securing the curtain rod or track |
| Laser Level | To ensure the rod is mounted straight |
| Stud Finder | To locate secure spots in the wall for mounting |
| Drill & Screwdriver | For installing brackets and hardware |
| Ladder or Step Stool | To safely reach higher mounting points |
| Hemming Tape or Sewing Kit | For adjusting the curtain length if needed |
Step-by-Step: How to Hang Curtains at the Right Height
The secret to beautiful curtains isn’t just the fabric; it’s how high you hang them. Here’s a clear, step-by-step guide to help you achieve the perfect height and proportion for your windows.
Step 1: Choose Between Ceiling Mount and Face Mount
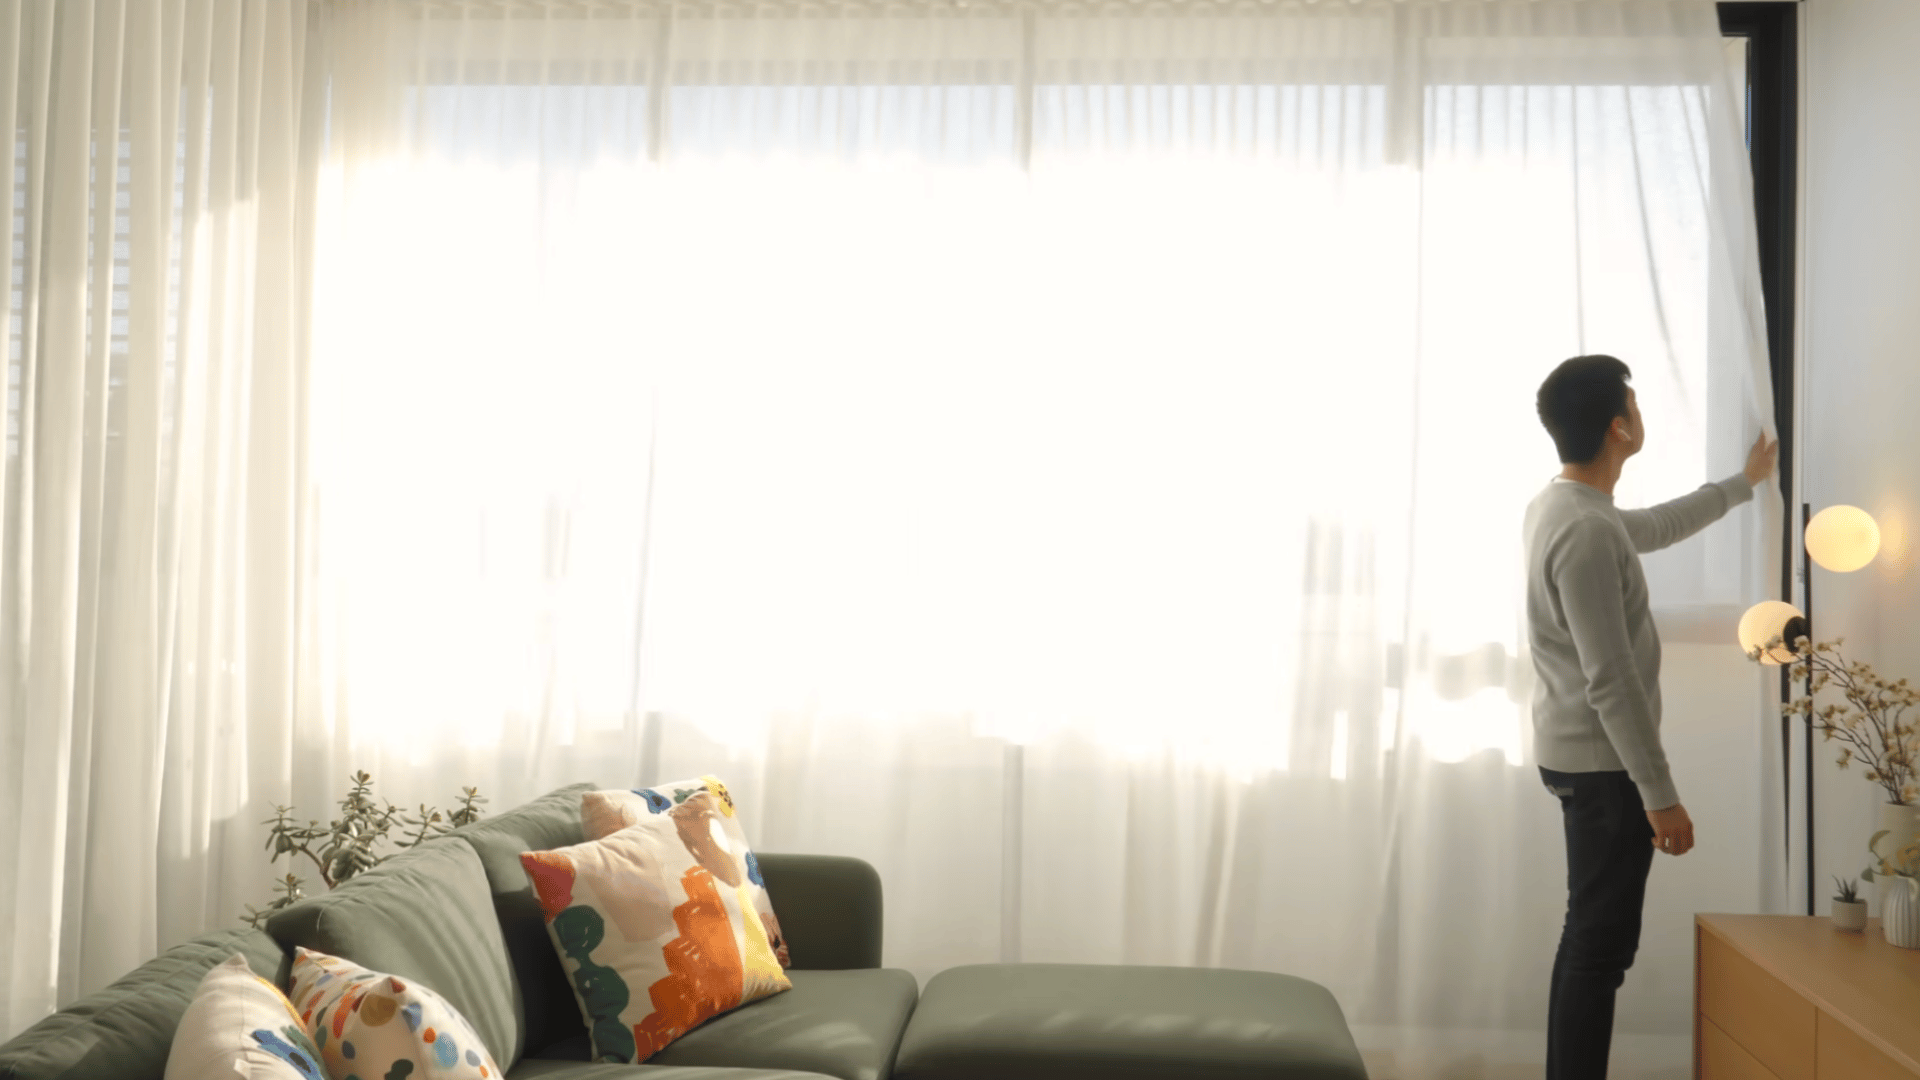
Before you begin, decide whether you’ll mount your curtains on the ceiling or the wall. Ceiling mounts give a clean, modern floor-to-ceiling appearance, ideal for contemporary interiors.
Face mounts, attached to the wall above the window, are versatile for both classic and minimalist styles.
Your choice determines the visual height of the window. Ceiling mounts make ceilings appear taller, while face mounts offer design flexibility.
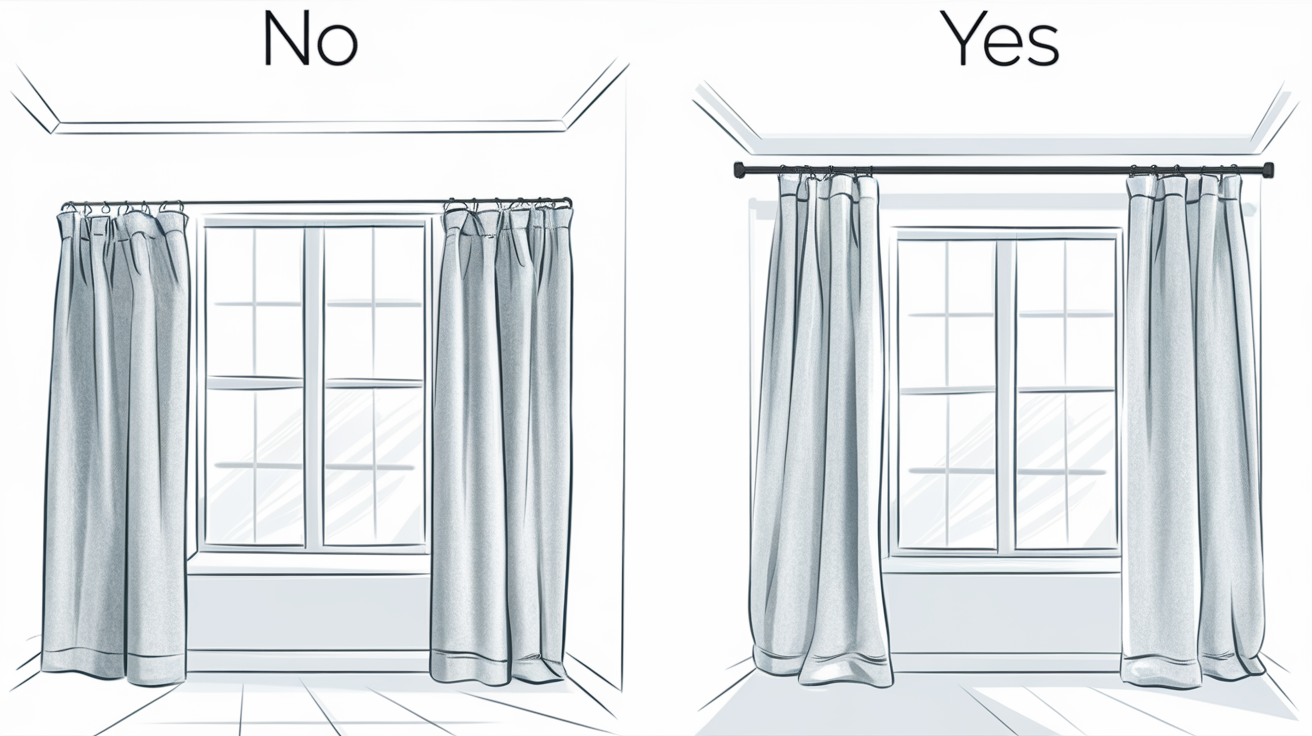
Step 2: Mount the Rod at the Correct Height
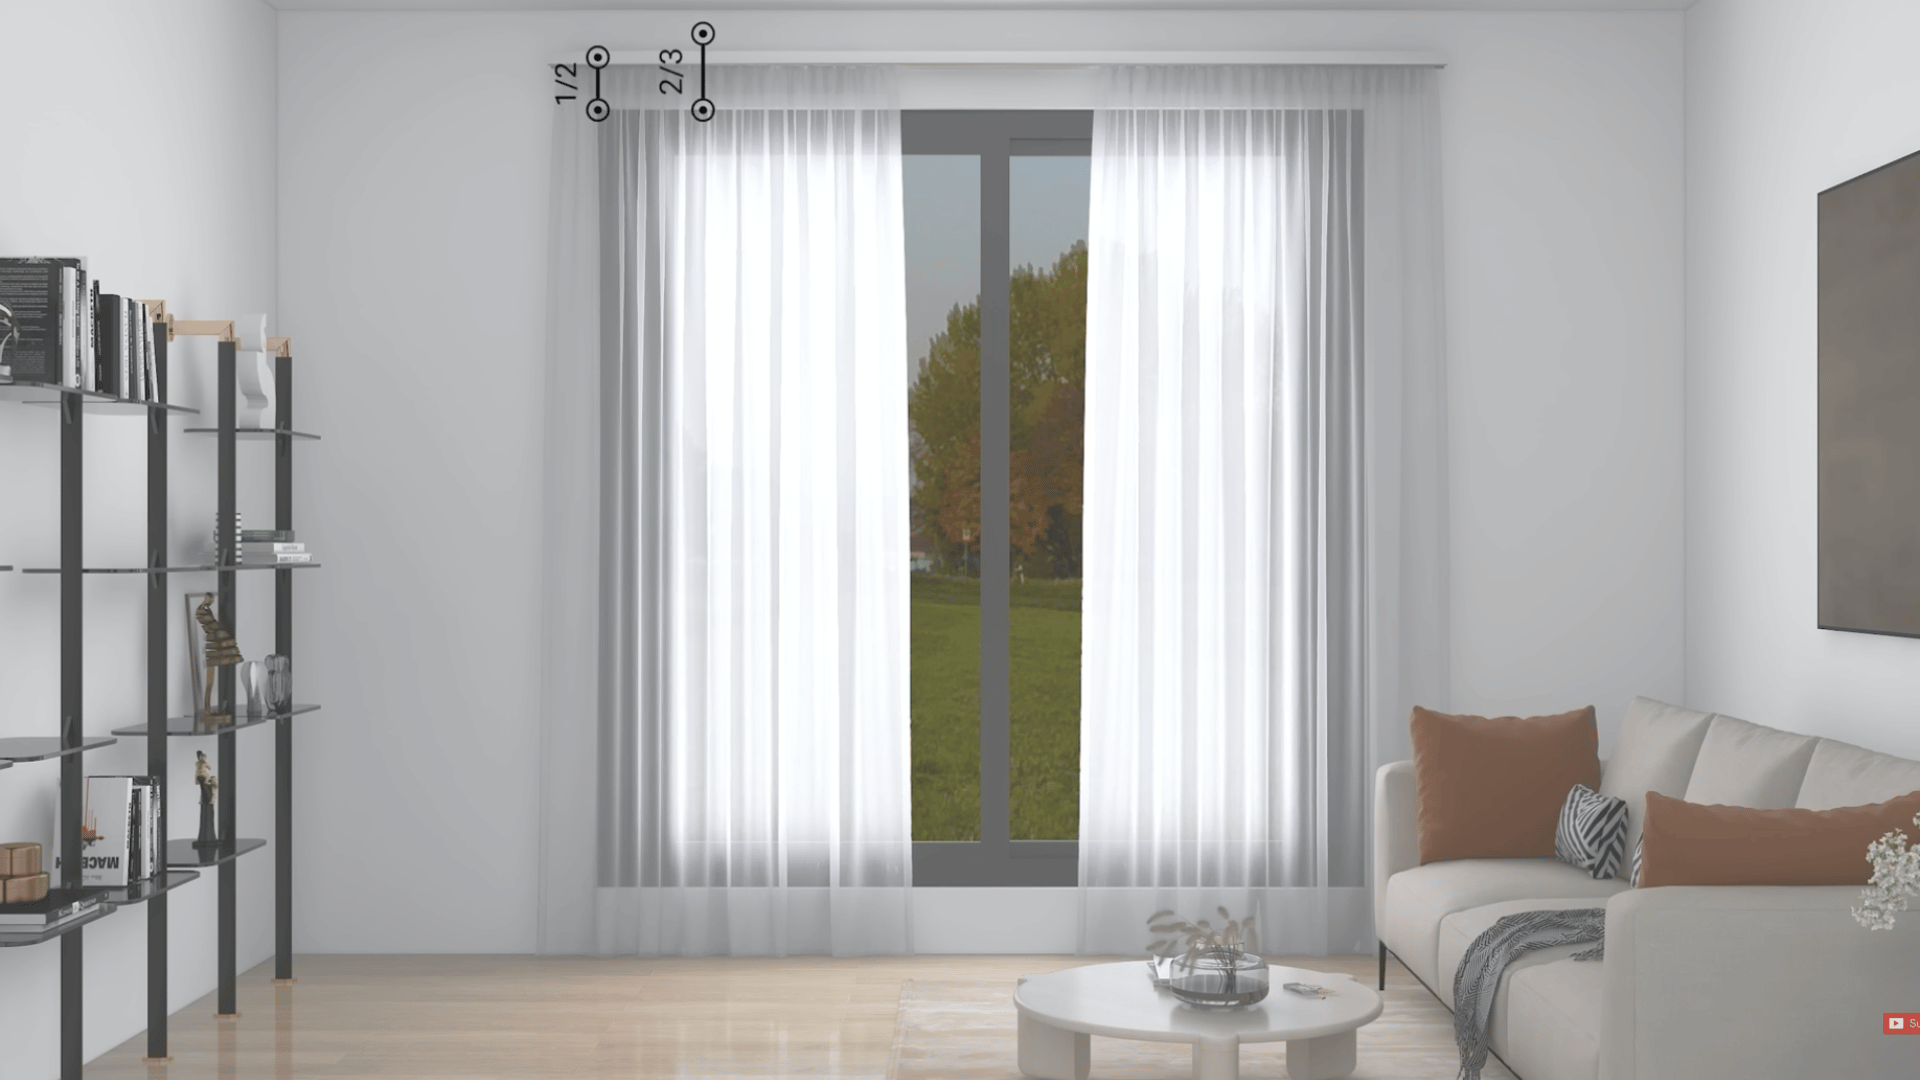
Avoid the common mistake of hanging the curtain rod too low. Mount the rod at least halfway to two-thirds of the distance between the top of the window and the ceiling.
This upward placement draws the eye vertically, making your room feel more spacious and elegant.
For extra drama, position the rod just 1 inch below the crown molding. Hanging it any lower creates a compressed look and makes the ceilings appear shorter.
Step 3: Extend the Curtain Rod Beyond the Window Frame
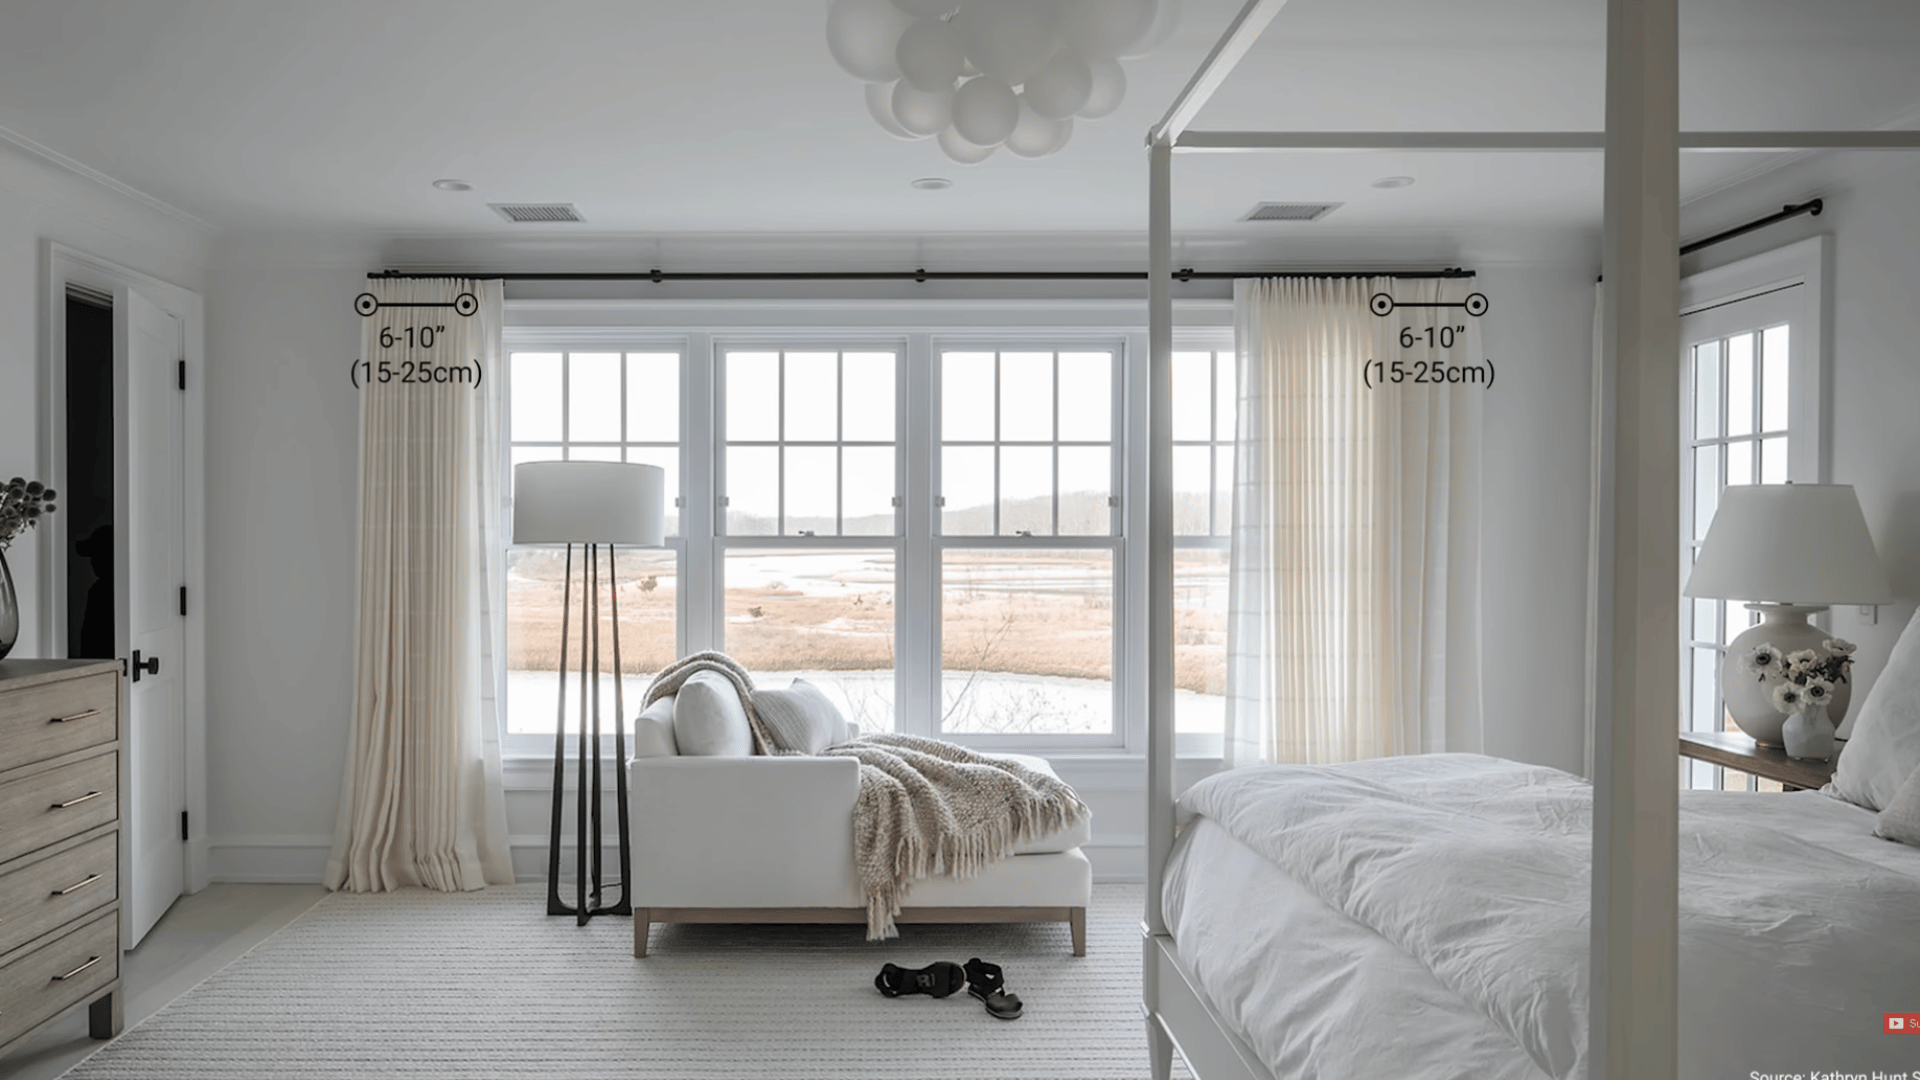
A curtain rod that’s too short makes your window look smaller. To achieve a balanced and light-filled effect, extend your rod 6–10 inches (15–25 cm) beyond each side of the window.
If space allows, multiply your window width by 1.3 to 2 to determine the ideal rod length.
This ensures that when curtains are open, they frame the window rather than covering it, maximizing natural light and visual width.
Step 4: Select the Perfect Curtain Drop
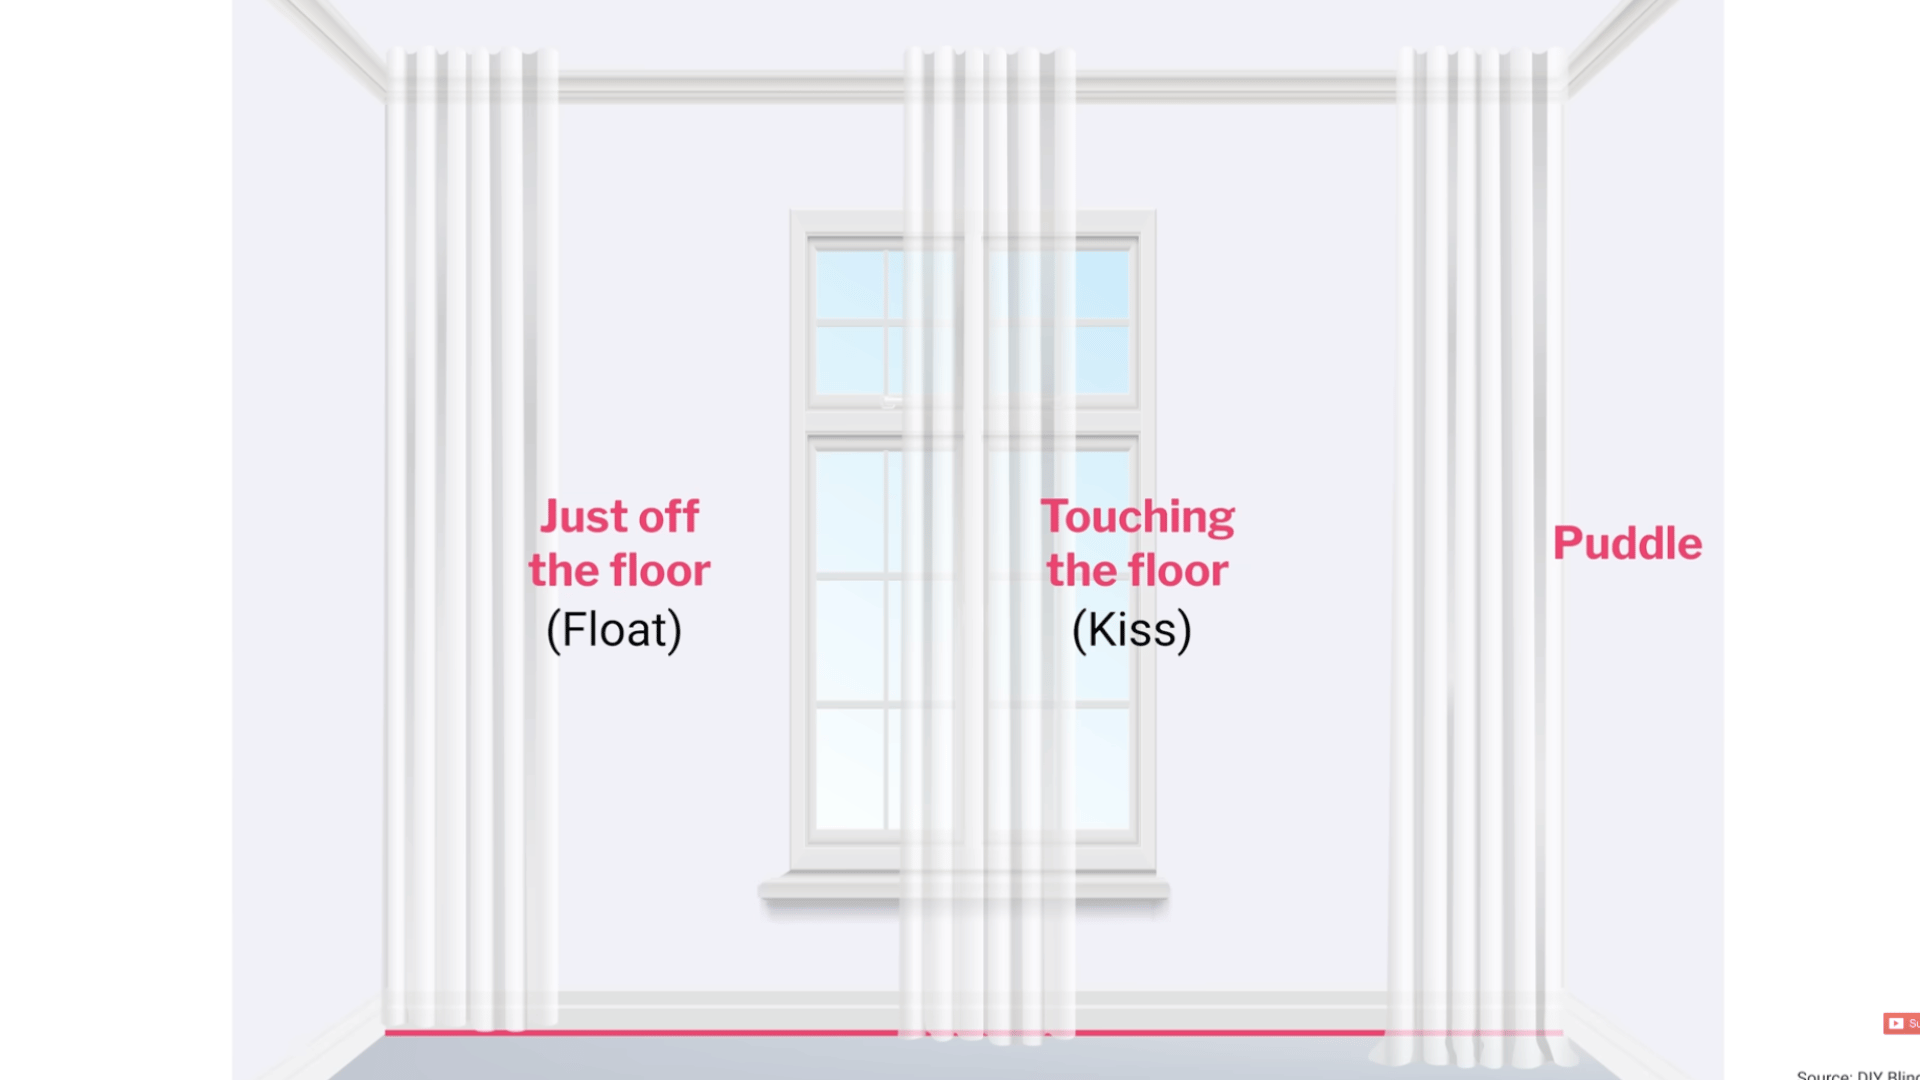
The drop is the length from the rod to the curtain’s bottom hem.
There are three main styles:
- Float: Ends about an inch above the floor; easy to maintain and modern.
- Kiss: Barely touches the floor; elegant but requires precise measurement.
- Puddle: Fabric pools 2–4 inches on the floor; luxurious but high-maintenance.
Always measure from your rod to the floor before buying curtains. If unsure, choose a longer curtain; it’s easier to hem than to add fabric later.
Step 5: Ensure Proper Curtain Width and Fullness

Curtains that look flat or stretched are a sign they’re too narrow. The ideal curtain width is 1.5 to 2.5 times the window width.
For example, a 2-meter-wide window needs 3–5 meters of fabric for rich folds.
If you’re using ready-made panels, buy two per side or have them stitched together for fullness. The extra volume gives your curtains a luxurious, wave-like flow even when closed.
Step 6: Level and Secure the Curtain Rod
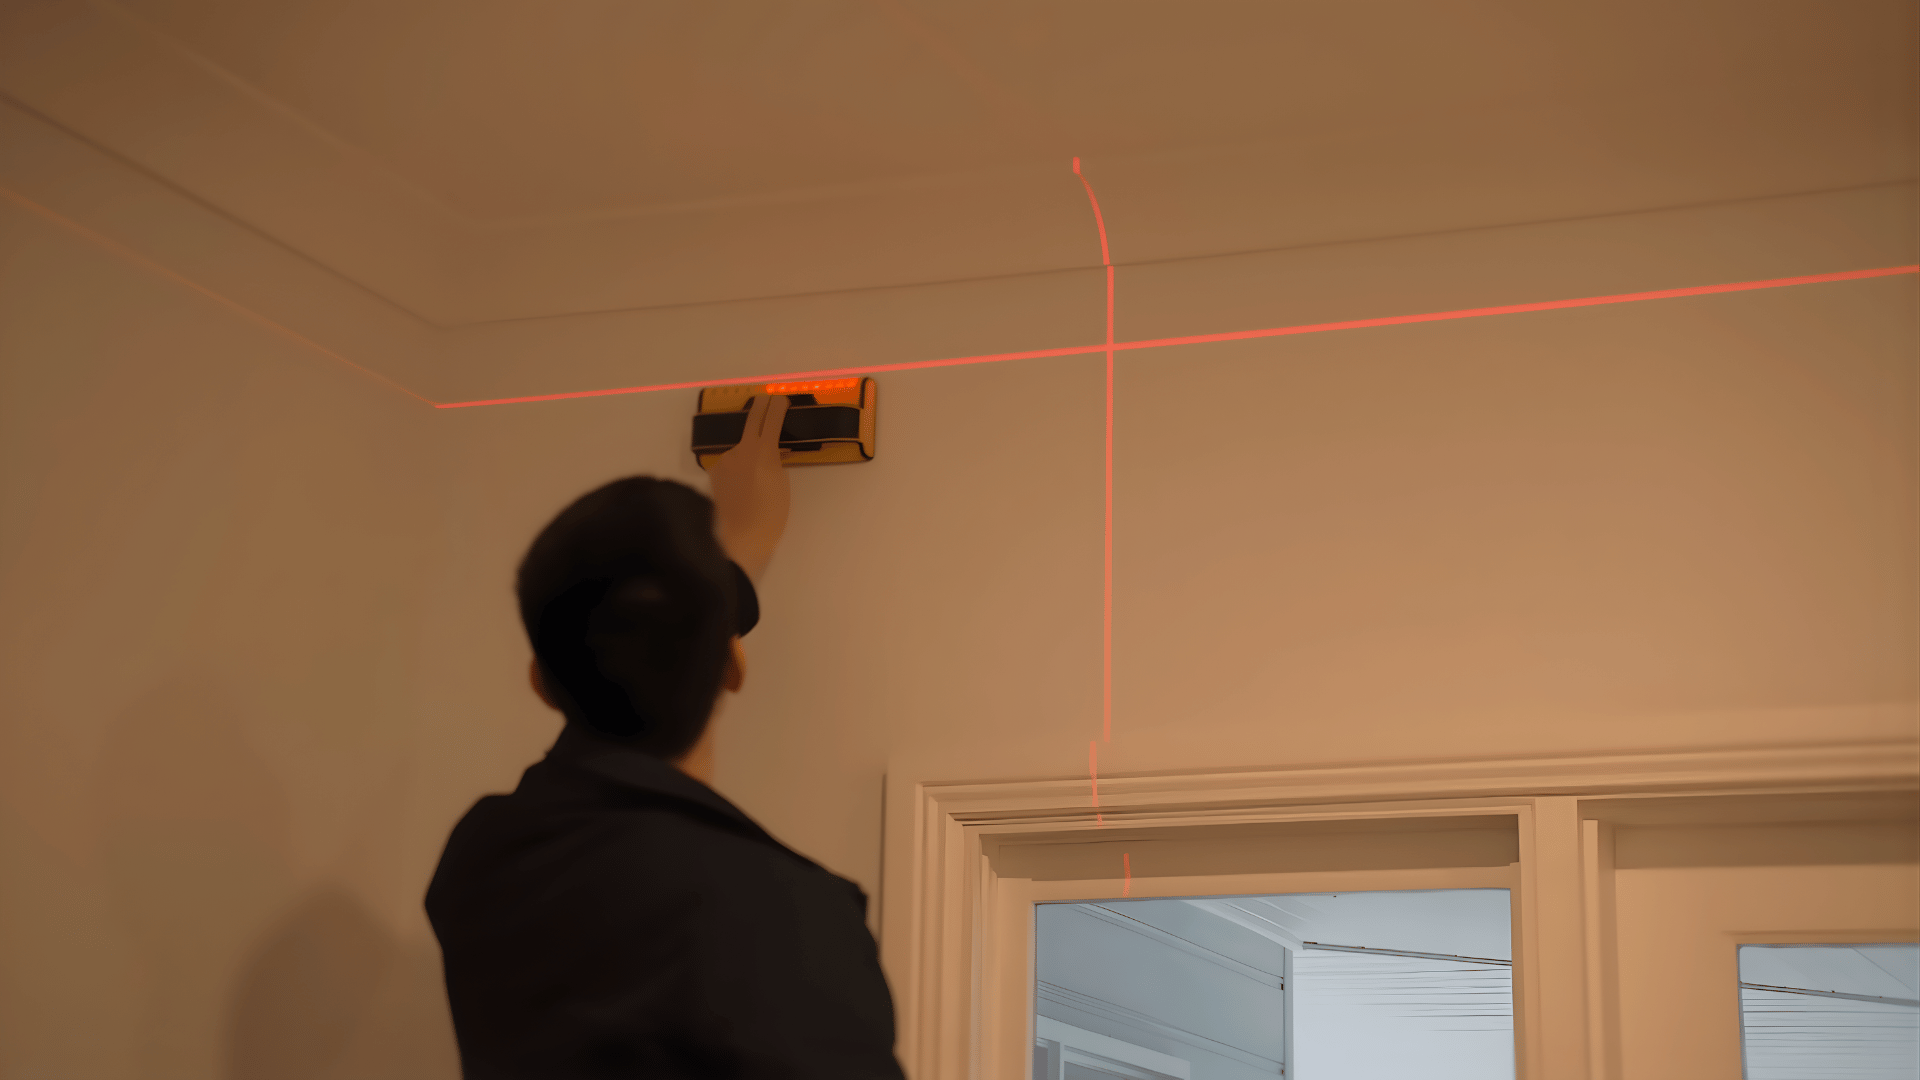
The trickiest part is getting your curtain rod perfectly level. Use a laser level to align both sides evenly, especially for rods longer than 2 meters.
Always anchor your brackets into wall studs for stability. Use a stud finder to locate them. This prevents sagging or damage over time.
Mounting your brackets into studs gives a more secure hold than drywall anchors, ensuring your curtains stay level and sturdy for years.
For a more detailed review, watch out the video given below:
Curtain Hanging Dos and Don’ts You Should Know
| Dos | Don’ts |
|---|---|
| Hang rods closer to the ceiling to make rooms feel taller. | Don’t hang rods directly on the window frame. |
| Extend rods 8–12 inches beyond each side for balance. | Don’t make the rods the same width as the window. |
| Ensure the curtains touch or puddle slightly on the floor. | Don’t let curtains stop short of the floor. |
| Use a level to confirm even placement. | Don’t eyeball your measurements. |
| Use sturdy brackets that support a certain weight. | Don’t use weak or unstable hardware. |
Style Tips for Different Spaces
Choosing the right curtain height depends on your room’s purpose and design style. Here’s how to adapt for different spaces:
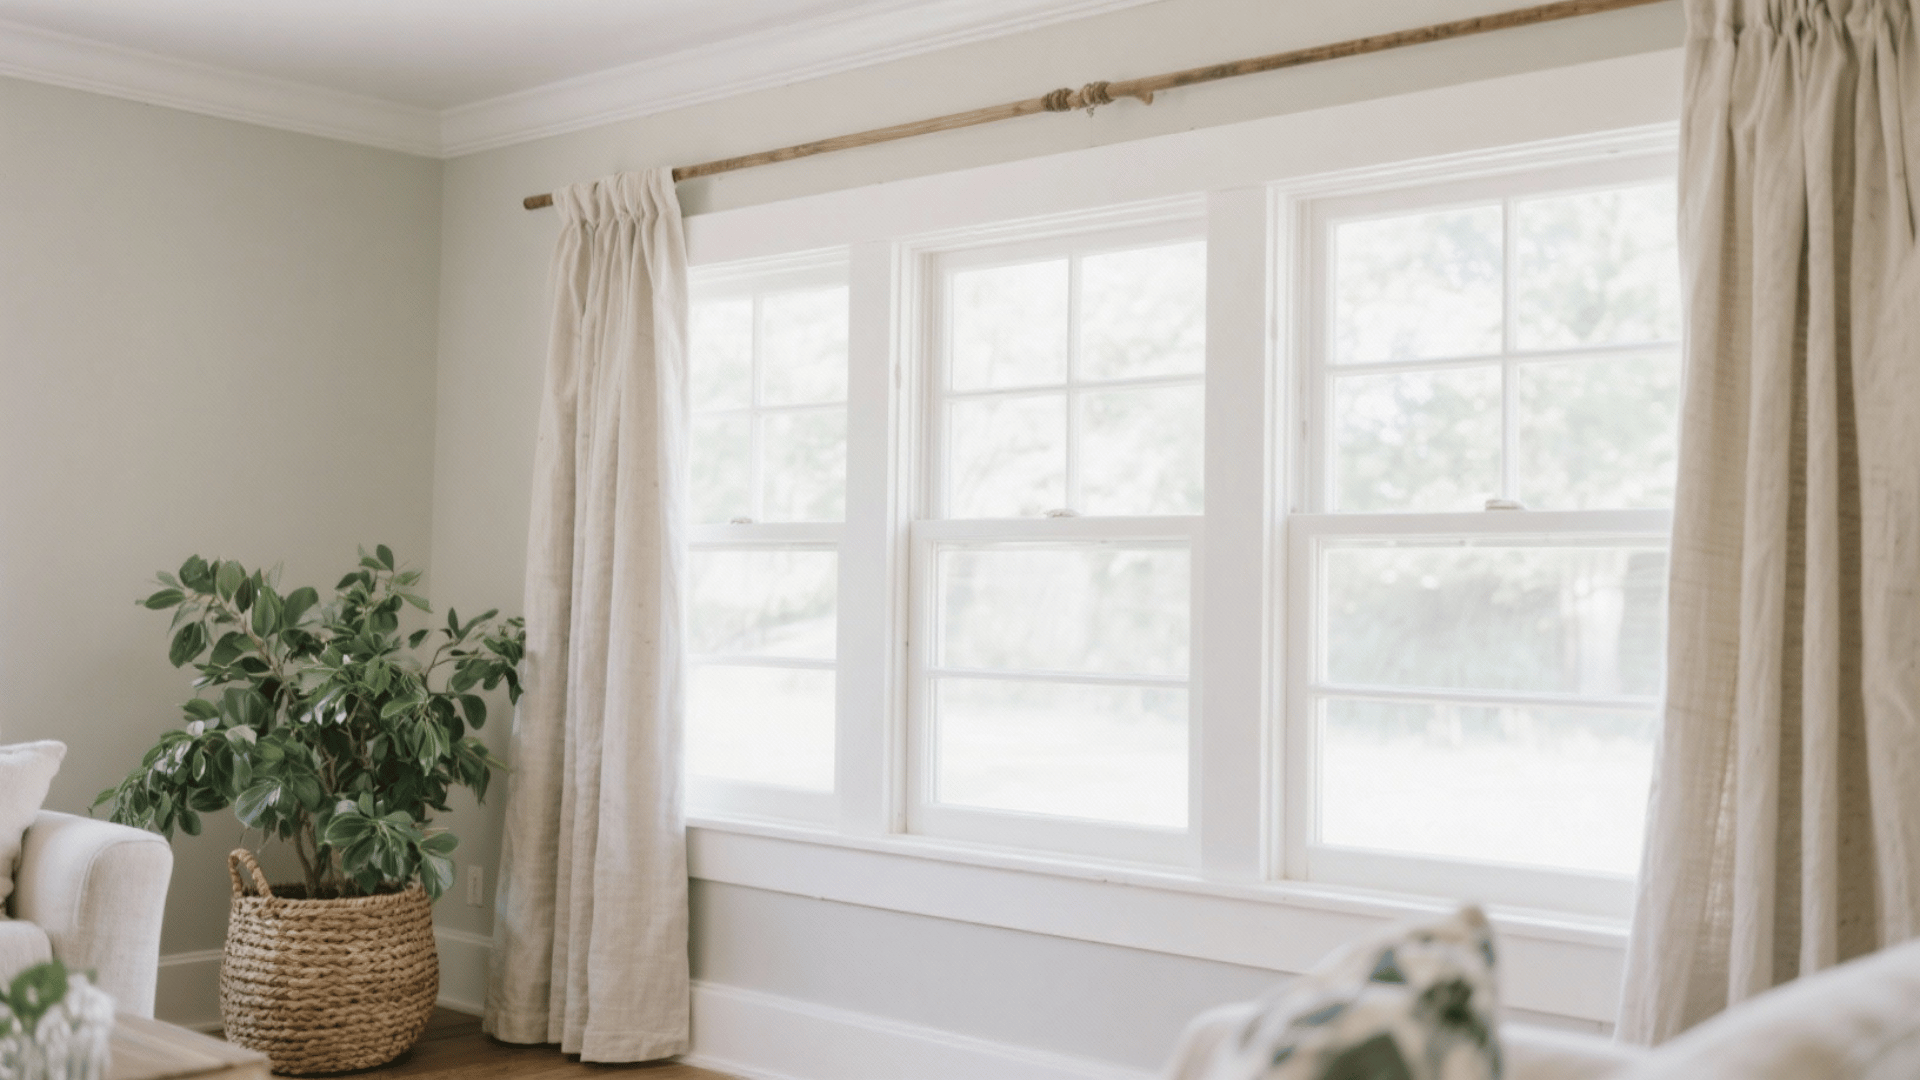
- Living Room: Hang curtains close to the ceiling for a grand, open feel. Use full-length panels that slightly “kiss” the floor to create elegance and flow.
- Bedroom: Opt for floor-length curtains for a cozy, restful vibe. Mount rods a few inches above the frame for warmth and privacy without overwhelming the space.
- Dining Room: Go higher and wider for a formal look. Choose fabrics like linen or velvet that drape gracefully for a refined, balanced effect.
- Small Spaces or Apartments: Mount rods just below the ceiling to make the room appear taller. Use light fabrics to maximize brightness and airiness.
- Kitchen or Bathroom: Keep curtains shorter (sill or apron length) for practicality, but mount rods slightly higher to maintain proportion and style consistency.
Conclusion
Getting the curtain height right isn’t just a design choice; it’s what turns a basic window into a standout feature.
When curtains are hung at the correct level, they expand your space visually, balance proportions, and instantly elevate your décor.
The key is simple: measure carefully, mount thoughtfully, and choose placement that complements your ceiling height.
With a few accurate measurements and mindful details, your curtains will frame the room beautifully and create that seamless, designer finish.
Now you’re ready to hang your curtains with confidence and enjoy the polished transformation they bring to your living space.