I’d like to give a big WELCOME to Michele from Sew Sweet Vintage!!!
~~~~~~~~~~~~~~~~~~~~~~~~~~~~~~~~~~~~~~~~~~~~~~~~~~~~~~~~~~~~~~~~~~~~~~~~~~~~~~~~~~~~~~~~~~~~~~~~~~~~~~~~~~~~~~~~~~~~~~~~~~~~~~~~~~~~~~~~~~~~~~~~~~~~~~~~~~~~~~~~~~~

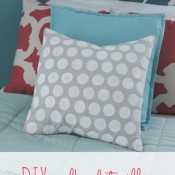
Scrappy Bows
are easy and inexpensive to make, using up cycycled and recycled
jersey knits and cotton fabric.
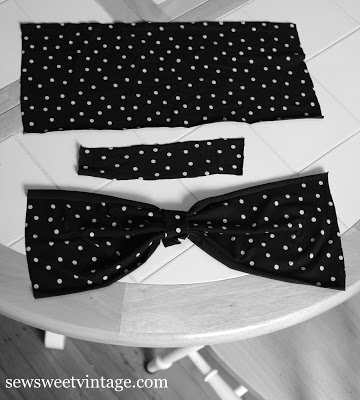
super short tutorial on how to make a 12 inch pillow bow:
coordinating jersey knit shirts to cut apart. I recently picked a
black and b&w polkadot knit, both women’s size large, from the
Goodwill, for my bow project.
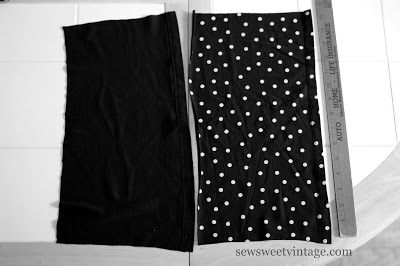
by 15 inch piece from each top for the front and back of your bow.
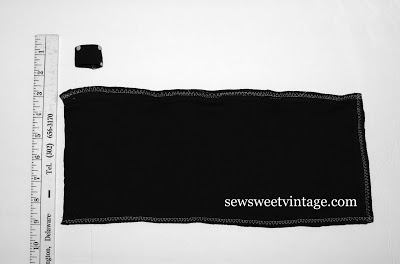
the right sides of each piece together, facing each other, and
machine stitch three sides with a finishing stitch. Leave the fourth
side unstitched, so you can turn your bow right side out and finish
the edges. I used white thread in my bobbin, so you could see my
stitching. I would normally match it to my fabric.
by 4 inch piece of fabric for the center loop of your bow.
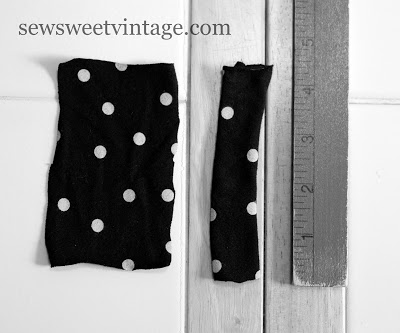
5. Next, fold in half length wise, good side facing in, and machine stitch edge with a straight stitch. Then turn right side out as shown on right side of photo above.
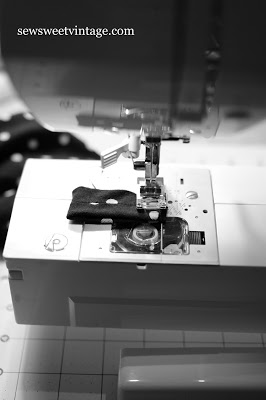
loop in half, with seam facing out, and machine stitch edge of loop
with finishing stitch (as shown in above photo).
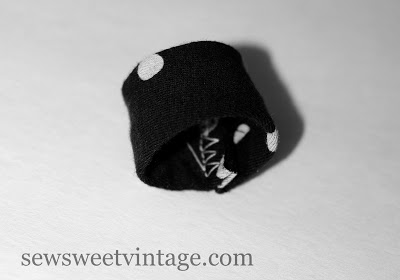
right side out again. This is the center of your bow (shown below).
bow edges
right side out, tuck in unfinished edge of bow and machine stitch
bow’s edge with a straight stitch, to close end of bow.
stitch other end of bow’s edge as well.
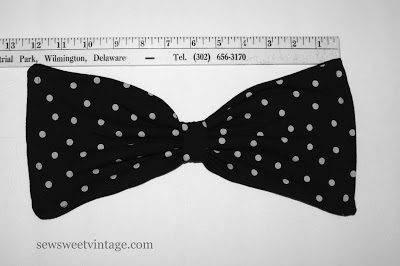
center loop onto bow. Your finished bow should measure 12 inches.
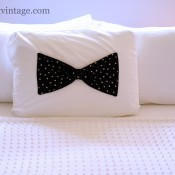
post inspires your to save those fabric scraps, and to add a bow tie
to a favorite tank top, dress or pillow for a fun vintage look!
and many blessings for you and your family in your new home:)
~~~~~~~~~~~~~~~~~~~~~~~~~~~~~~~~~~~~~~~~~~~~~~~~~~~~~~~~~~~~~~~~~~~~~~~~~~~~~~~~~~~~~~~~~~~~~~~~~~~~~~~~~~~~~~~~~~~~~~~~~~~~~~~~~~~~~~~~~~~~~~~~~~~~~~~~~~~~~~~~~~
Thank you so much Michele for being our guest today!!! If you want to see more from Sew Sweet Vintage, hope on over and check out her blog!!!
I hope you all have a wonderful weekend!!!


If you extend the ends of the bow so that it forms a loop, you can get a double “bow” effect as well.
Form everything as shown above, cutting the bow at twice the length. Take a section of your pillow fabric (twice the width and equal to the height of your pillow) fold it in half (right sides in) lengthwise so that it is now the same width as your pillow. Sew 2 1/2 sides leaving just enough space to turn it right side out. Sew up the rest of the hole. Slip the tutorial bow over the new piece like you would with the center of the bow itself. Sew the new section to the top and bottom of your pillow following the pillow seams. The contrasting bow will cinch in the middle of the new section which will hold the bow in place and make it look like a bow on a bow. Adds extra texture, you could add a contrasting pattern or colour and really make it custom.
You could also use different fabrics (jersey is so stretchy that although forgiving it can be a pain) to get different textural effects. Imagine rough burlap topped with satin then given a felted wool bow? Zebra pillow, leopard over-fabric and a floral bow would be a wild statement piece.
I just started following your blog recently & love your posts. I nominated you for The Sunshine Blog Award I received from a fellow blogger. You can check it out here::
http://amandachazz.blogspot.com/2013/08/the-sunshine-award.html